> ## Documentation Index
> Fetch the complete documentation index at: https://docs.knowlix.ai/llms.txt
> Use this file to discover all available pages before exploring further.
# AI Marketing
> Plan, execute, and analyze email marketing campaigns with audience management and performance tracking
Knowlix AI Marketing gives you a complete email marketing platform to plan campaigns, build audiences, design professional emails, and measure results — all integrated with your business data.
## Campaign Dashboard
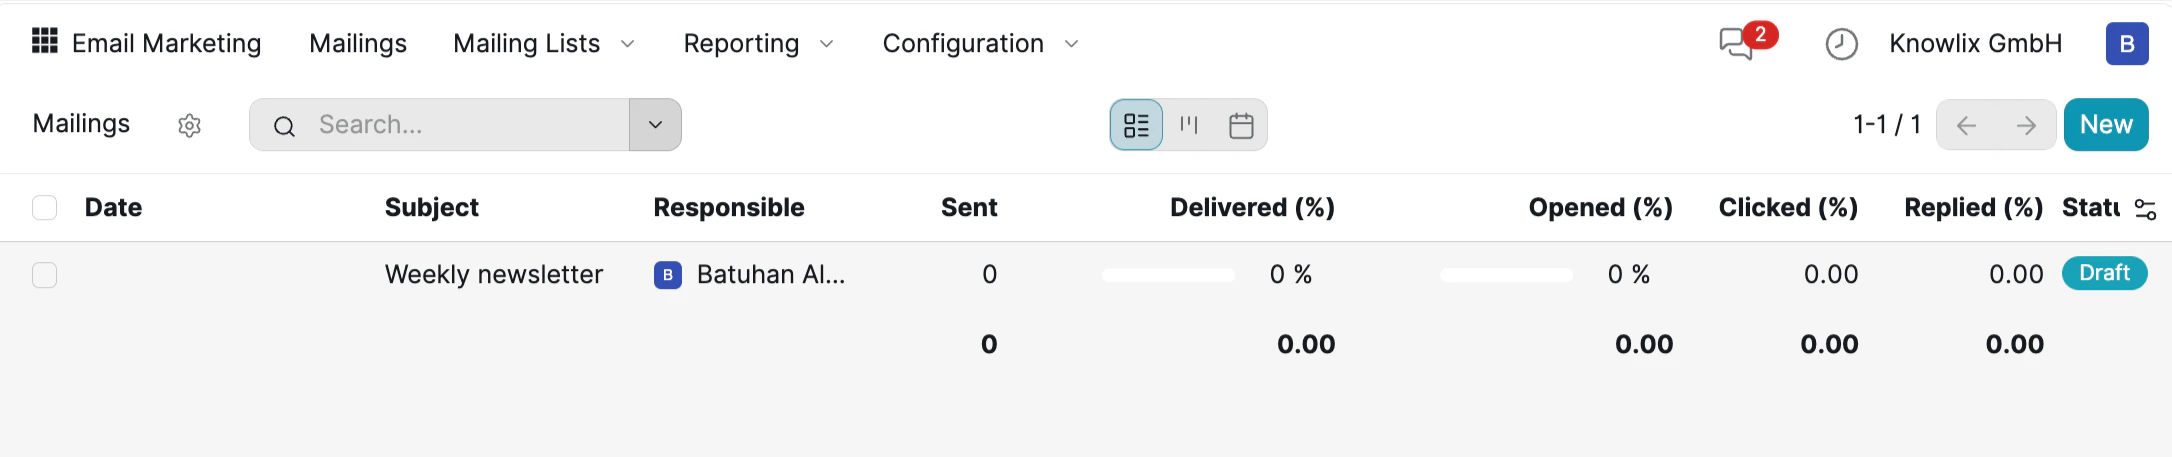 The **Mailings** dashboard is your command center for all email campaigns. Each row shows a campaign with its Subject, Responsible person, Sent count, Delivered %, Opened %, Clicked %, Replied %, and Status (**Draft**, **In Queue**, **Sending**, or **Sent**).
Click any campaign to open the editor, or click **New** to create a fresh one.
## Building Your Audience
Before sending campaigns, set up your mailing lists to define who receives your emails.
The **Mailings** dashboard is your command center for all email campaigns. Each row shows a campaign with its Subject, Responsible person, Sent count, Delivered %, Opened %, Clicked %, Replied %, and Status (**Draft**, **In Queue**, **Sending**, or **Sent**).
Click any campaign to open the editor, or click **New** to create a fresh one.
## Building Your Audience
Before sending campaigns, set up your mailing lists to define who receives your emails.
 Navigate to **Mailing Lists** to manage your subscriber lists. Each list tracks:
* **Total Contacts**: Number of subscribers.
* **Mailings**: Campaigns sent to this list.
* **Bounce / Opt-Out / Blacklist %**: Delivery health metrics to monitor list quality.
Click **Import Contacts** to upload subscribers from a CSV or Excel file. Click **Send Mailing** to create a campaign targeting this list directly.
## Creating a Campaign
Click **Mailings** → **New** to start a new campaign. Choose from a library of pre-built templates.
Navigate to **Mailing Lists** to manage your subscriber lists. Each list tracks:
* **Total Contacts**: Number of subscribers.
* **Mailings**: Campaigns sent to this list.
* **Bounce / Opt-Out / Blacklist %**: Delivery health metrics to monitor list quality.
Click **Import Contacts** to upload subscribers from a CSV or Excel file. Click **Send Mailing** to create a campaign targeting this list directly.
## Creating a Campaign
Click **Mailings** → **New** to start a new campaign. Choose from a library of pre-built templates.
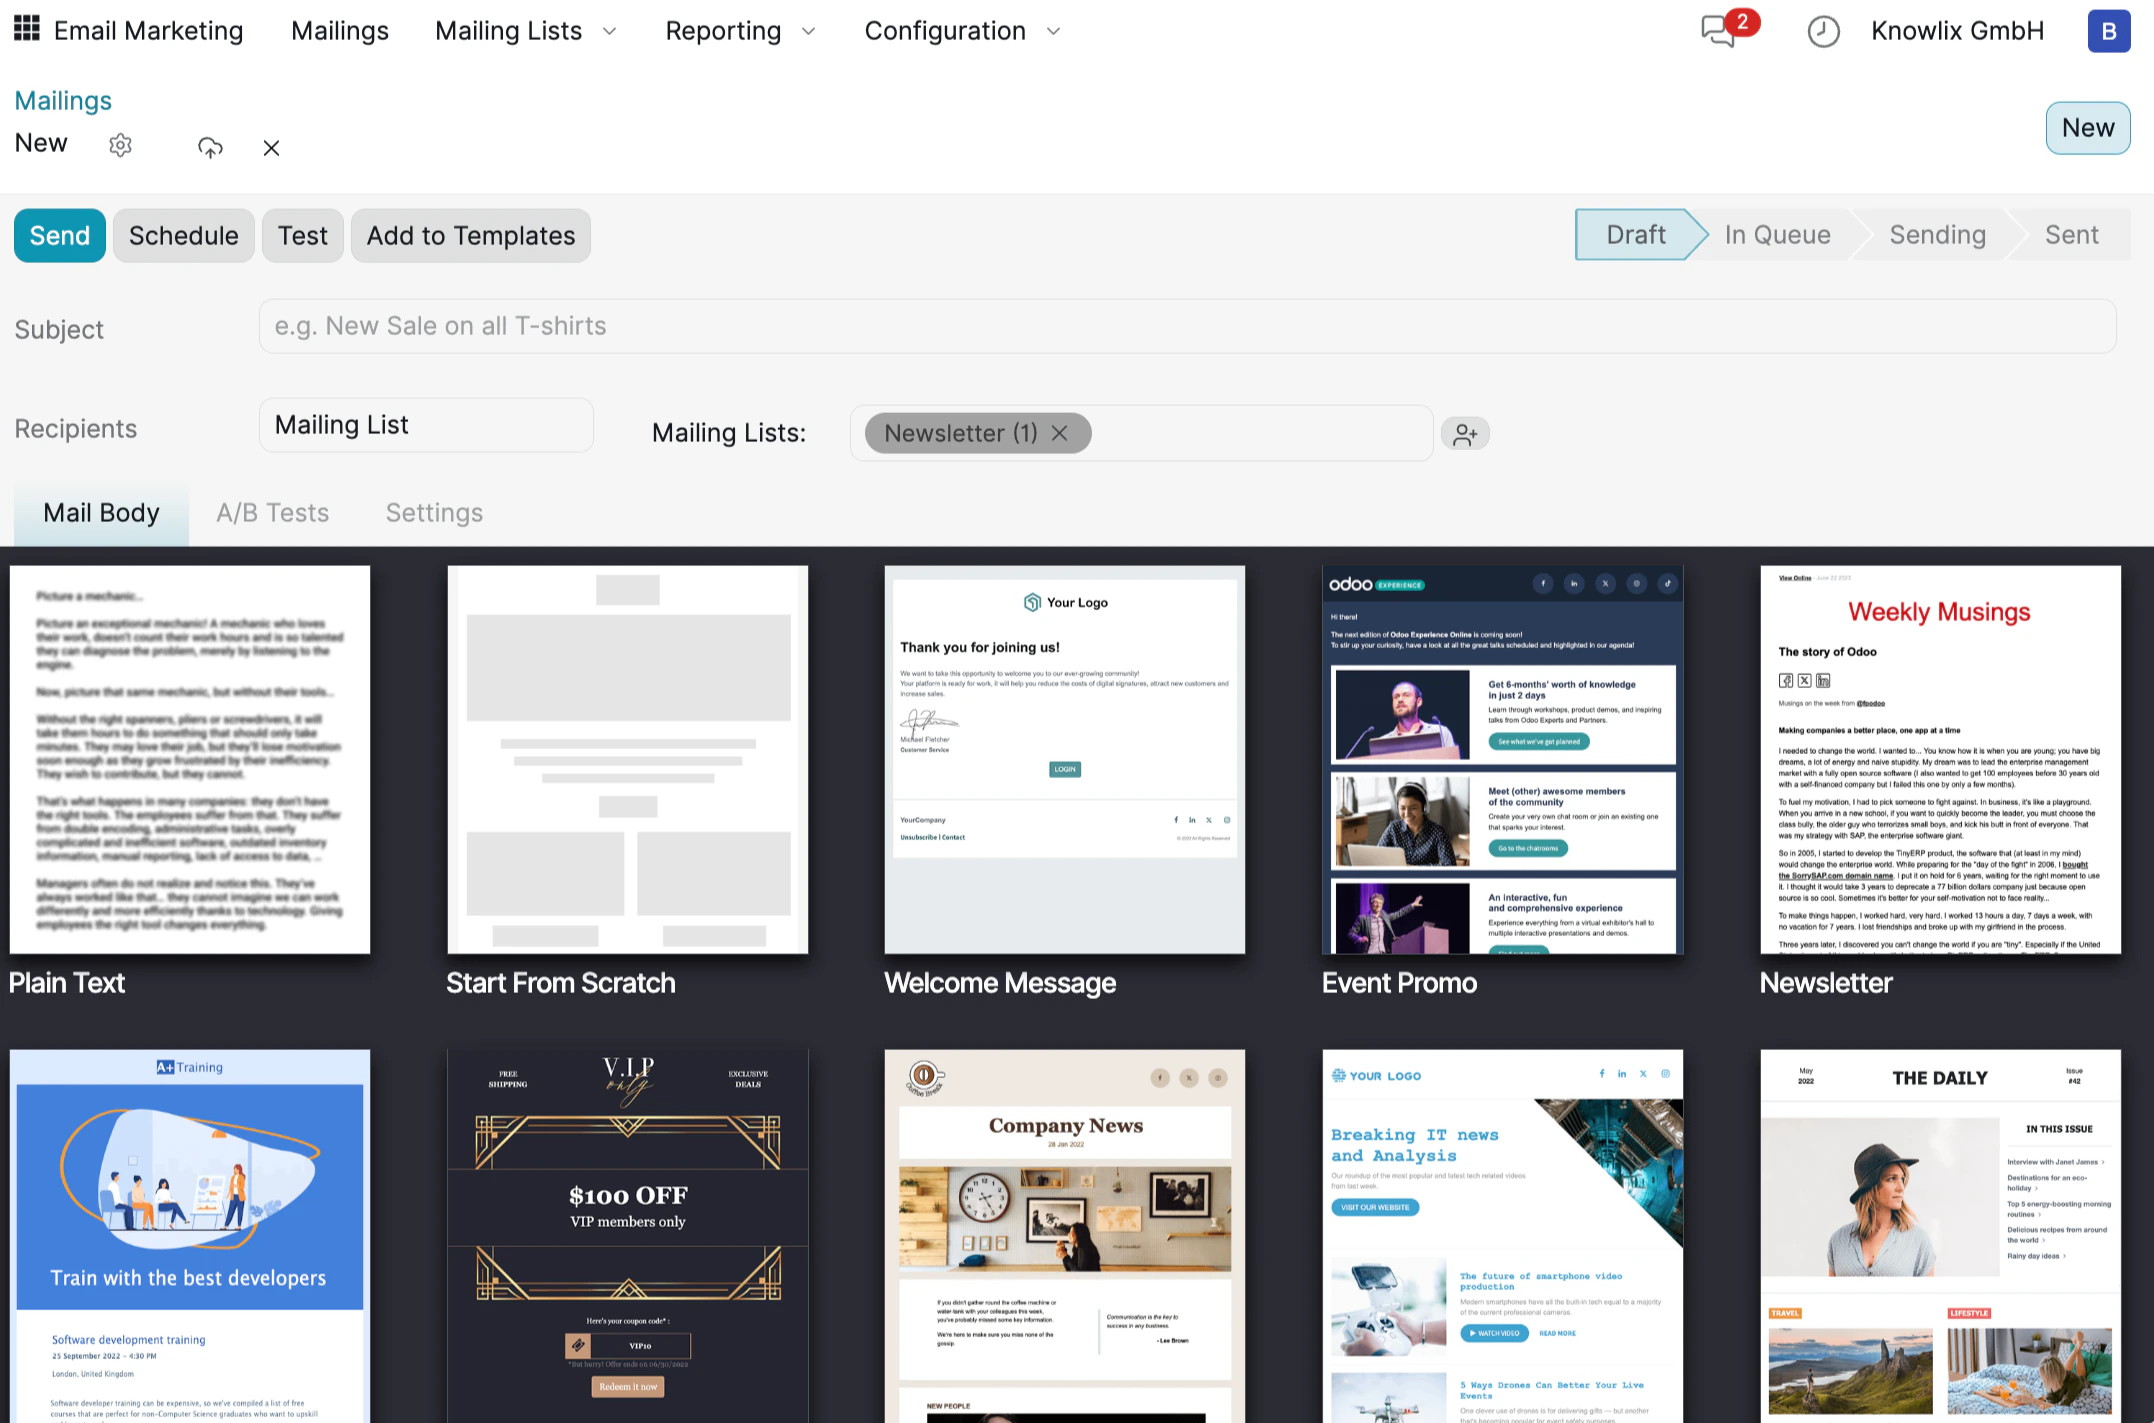 Select a template that fits your goal — **Plain Text** for simple announcements, **Welcome Message** for onboarding, **Event Promo** for events, **Newsletter** for regular updates, or **Start From Scratch** for full creative control.
Set your campaign details at the top:
* **Subject**: The subject line recipients will see in their inbox.
* **Recipients**: Choose a **Mailing List** (e.g., Newsletter) as your target audience.
* **A/B Tests**: Create content variants to test which version performs best.
* **Settings**: Configure tracking and delivery options.
## Designing Your Email
Select a template that fits your goal — **Plain Text** for simple announcements, **Welcome Message** for onboarding, **Event Promo** for events, **Newsletter** for regular updates, or **Start From Scratch** for full creative control.
Set your campaign details at the top:
* **Subject**: The subject line recipients will see in their inbox.
* **Recipients**: Choose a **Mailing List** (e.g., Newsletter) as your target audience.
* **A/B Tests**: Create content variants to test which version performs best.
* **Settings**: Configure tracking and delivery options.
## Designing Your Email
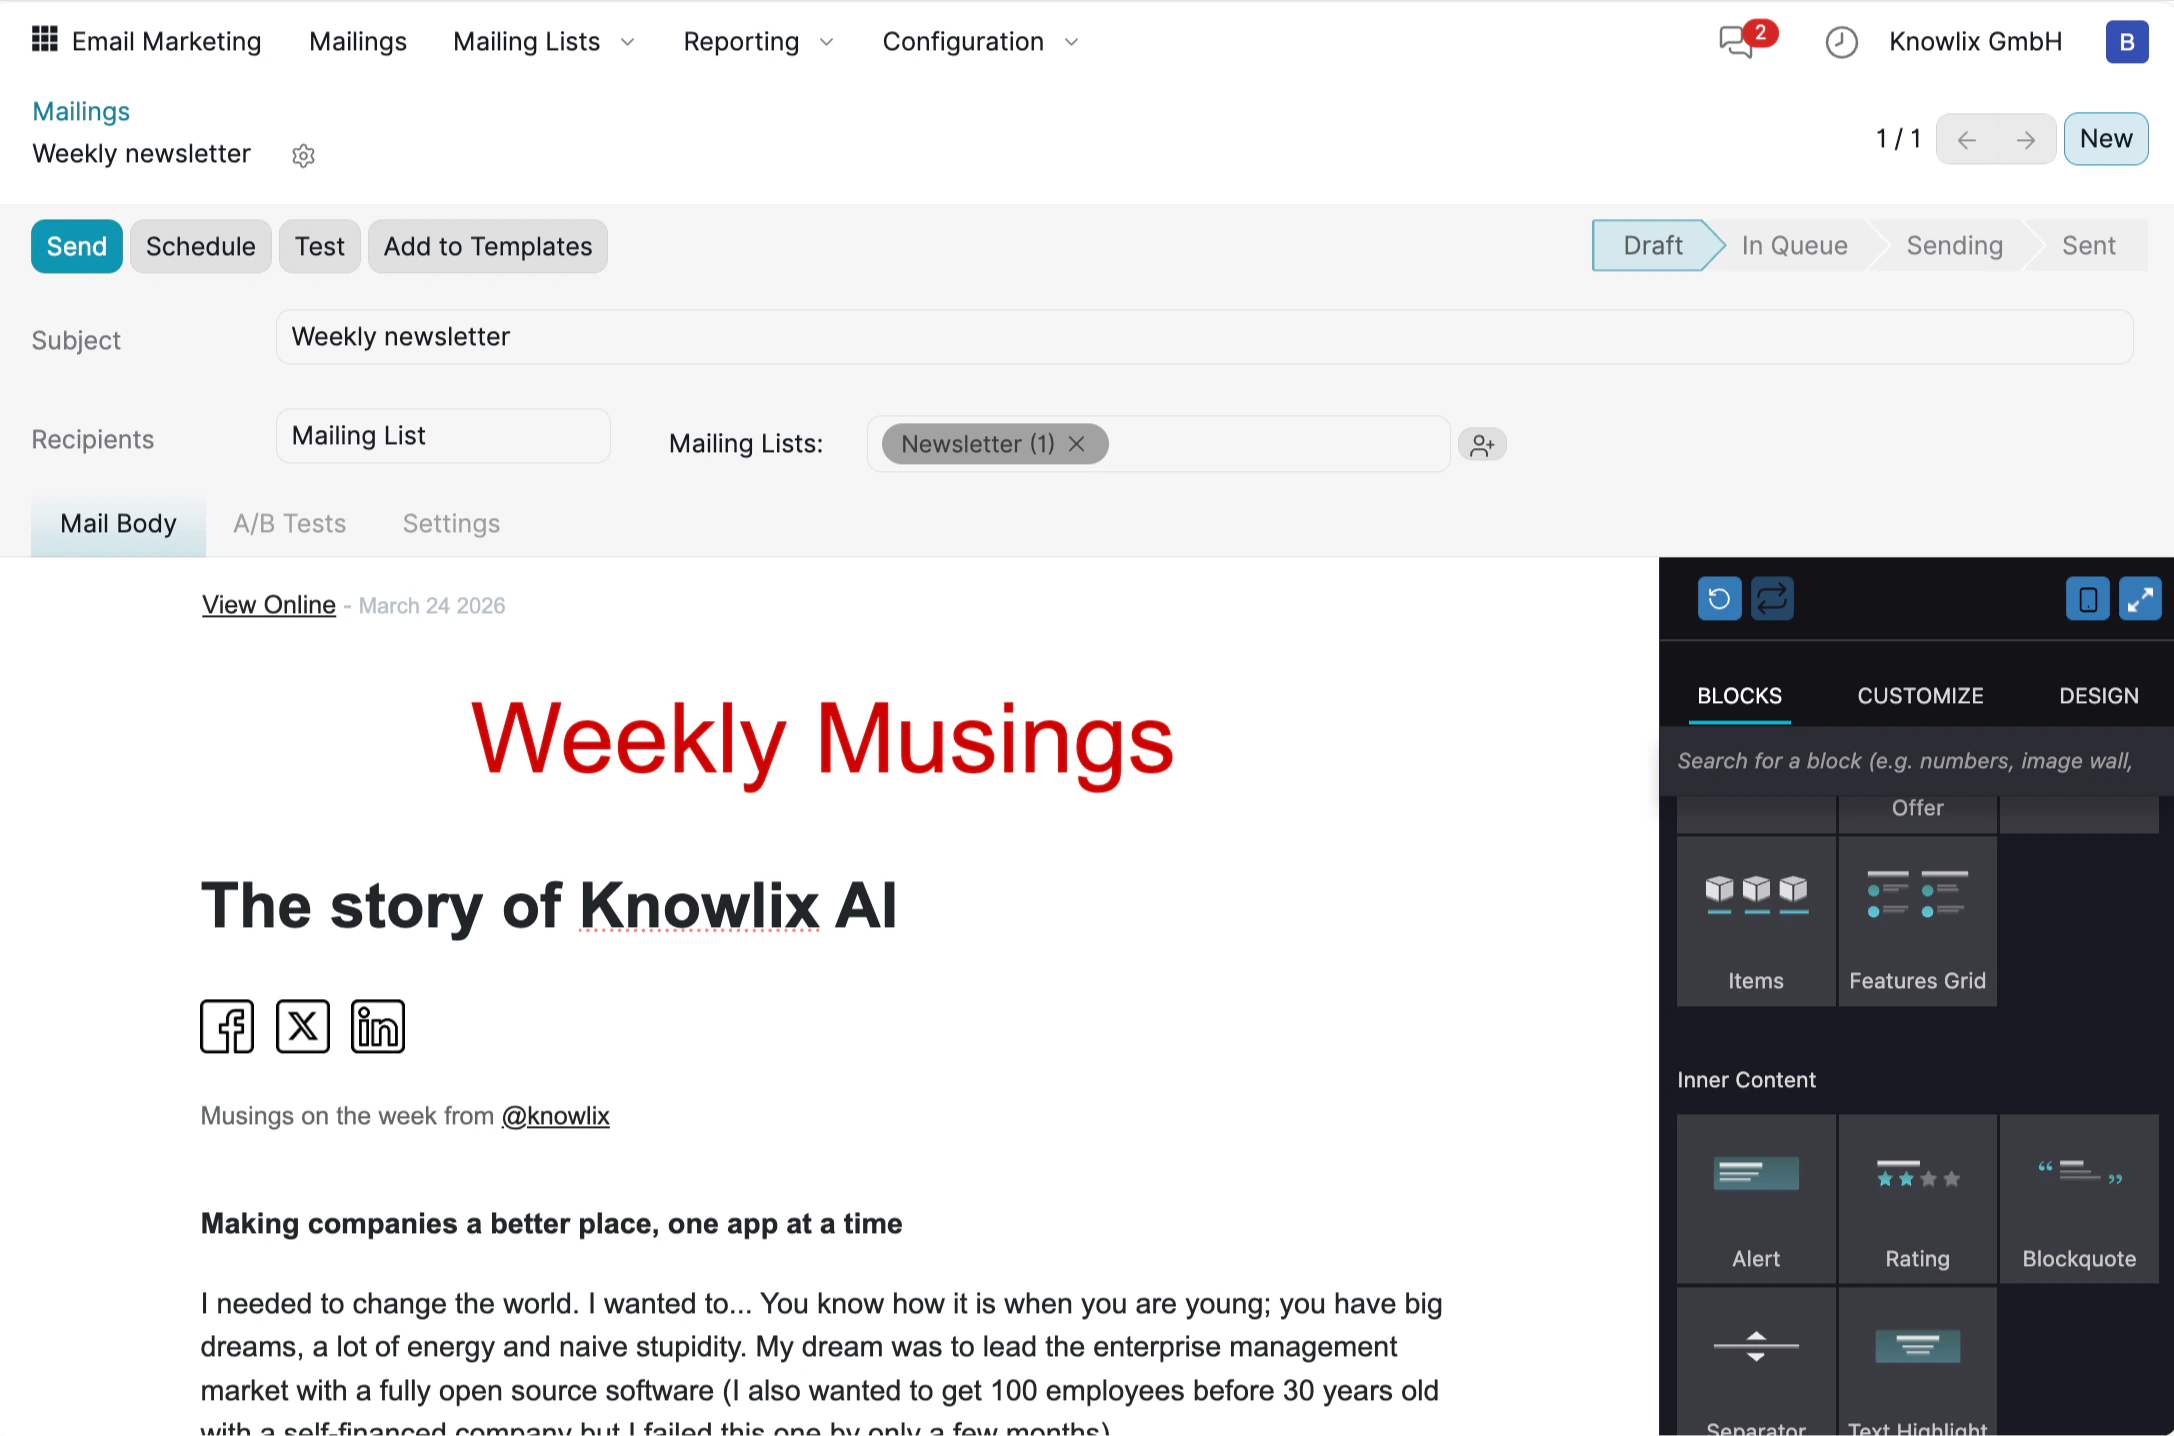 The drag-and-drop editor lets you visually design your email. The left side shows a live preview, and the right panel provides three editing modes:
* **BLOCKS**: Drag pre-built elements into your layout — headers, text blocks, images, offers, feature grids, comparisons, and more.
* **CUSTOMIZE**: Click any element to edit its content, layout, background, and text formatting. Use the **AI** button to generate or rewrite copy instantly.
* **DESIGN**: Set global styles for your entire email — body width, background colors, heading sizes, font families, button styles, and link formatting.
## Testing Your Campaign
Before sending to your full audience, verify your email by sending a test.
The drag-and-drop editor lets you visually design your email. The left side shows a live preview, and the right panel provides three editing modes:
* **BLOCKS**: Drag pre-built elements into your layout — headers, text blocks, images, offers, feature grids, comparisons, and more.
* **CUSTOMIZE**: Click any element to edit its content, layout, background, and text formatting. Use the **AI** button to generate or rewrite copy instantly.
* **DESIGN**: Set global styles for your entire email — body width, background colors, heading sizes, font families, button styles, and link formatting.
## Testing Your Campaign
Before sending to your full audience, verify your email by sending a test.
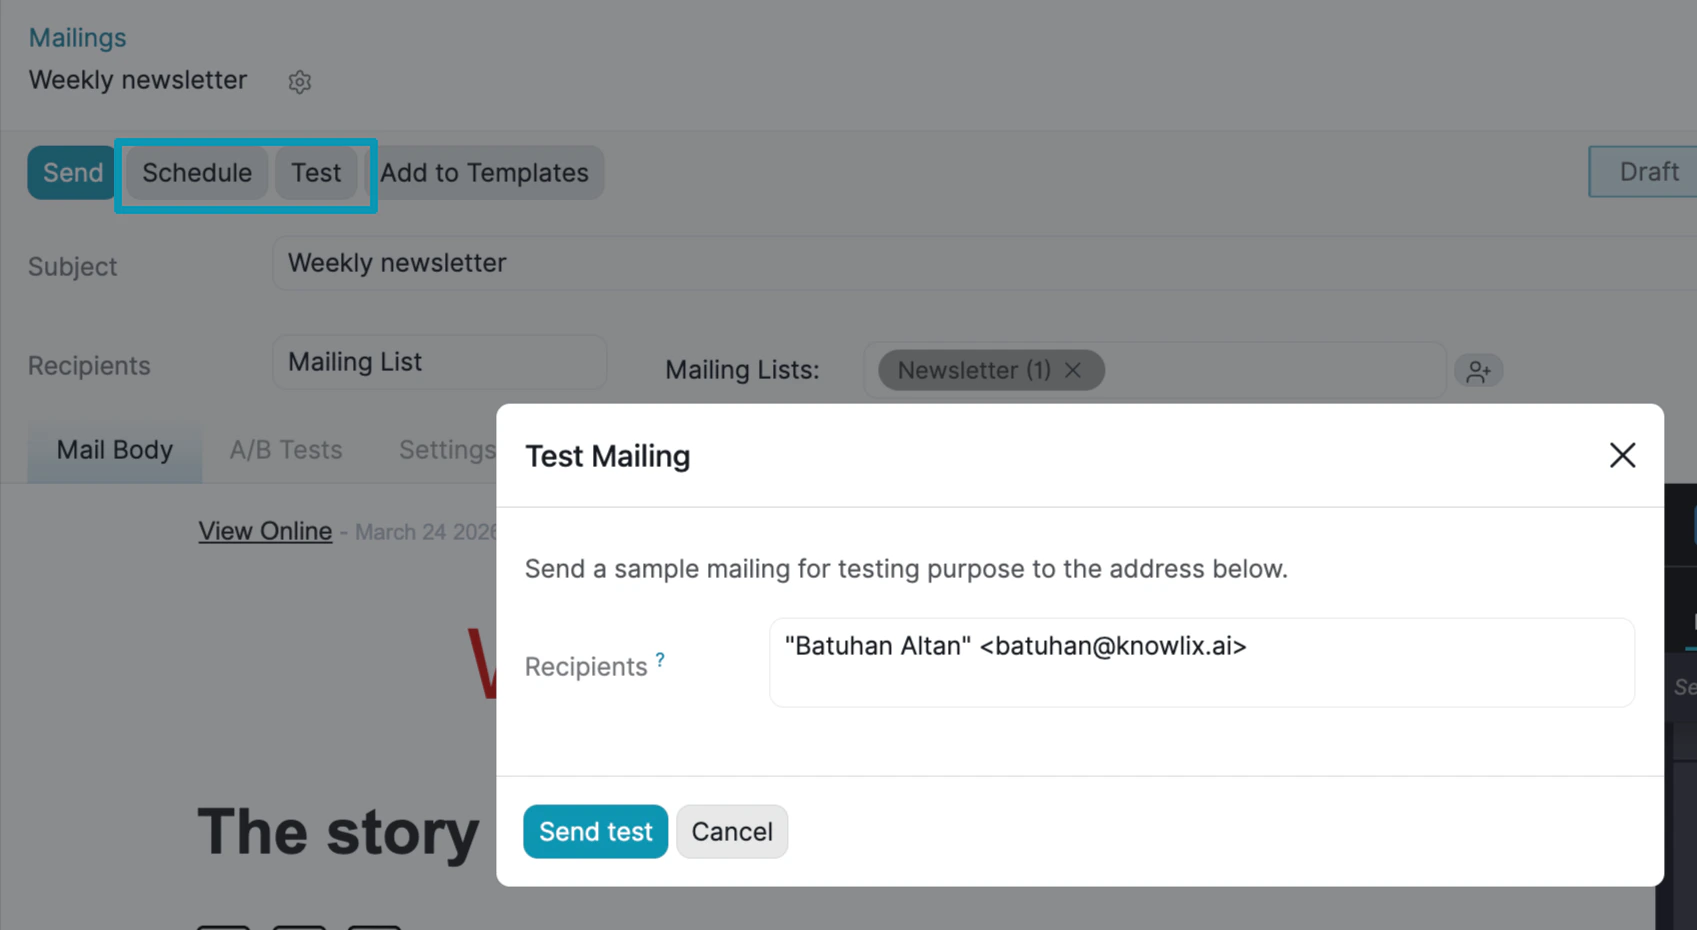 Click the **Test** button to open the Test Mailing dialog. Enter a recipient address and click **Send test** to receive a preview in your inbox. Use **Schedule** to set a future delivery date, or click **Send** when you are ready to dispatch to the full list.
## Campaign Analytics
Click the **Test** button to open the Test Mailing dialog. Enter a recipient address and click **Send test** to receive a preview in your inbox. Use **Schedule** to set a future delivery date, or click **Send** when you are ready to dispatch to the full list.
## Campaign Analytics
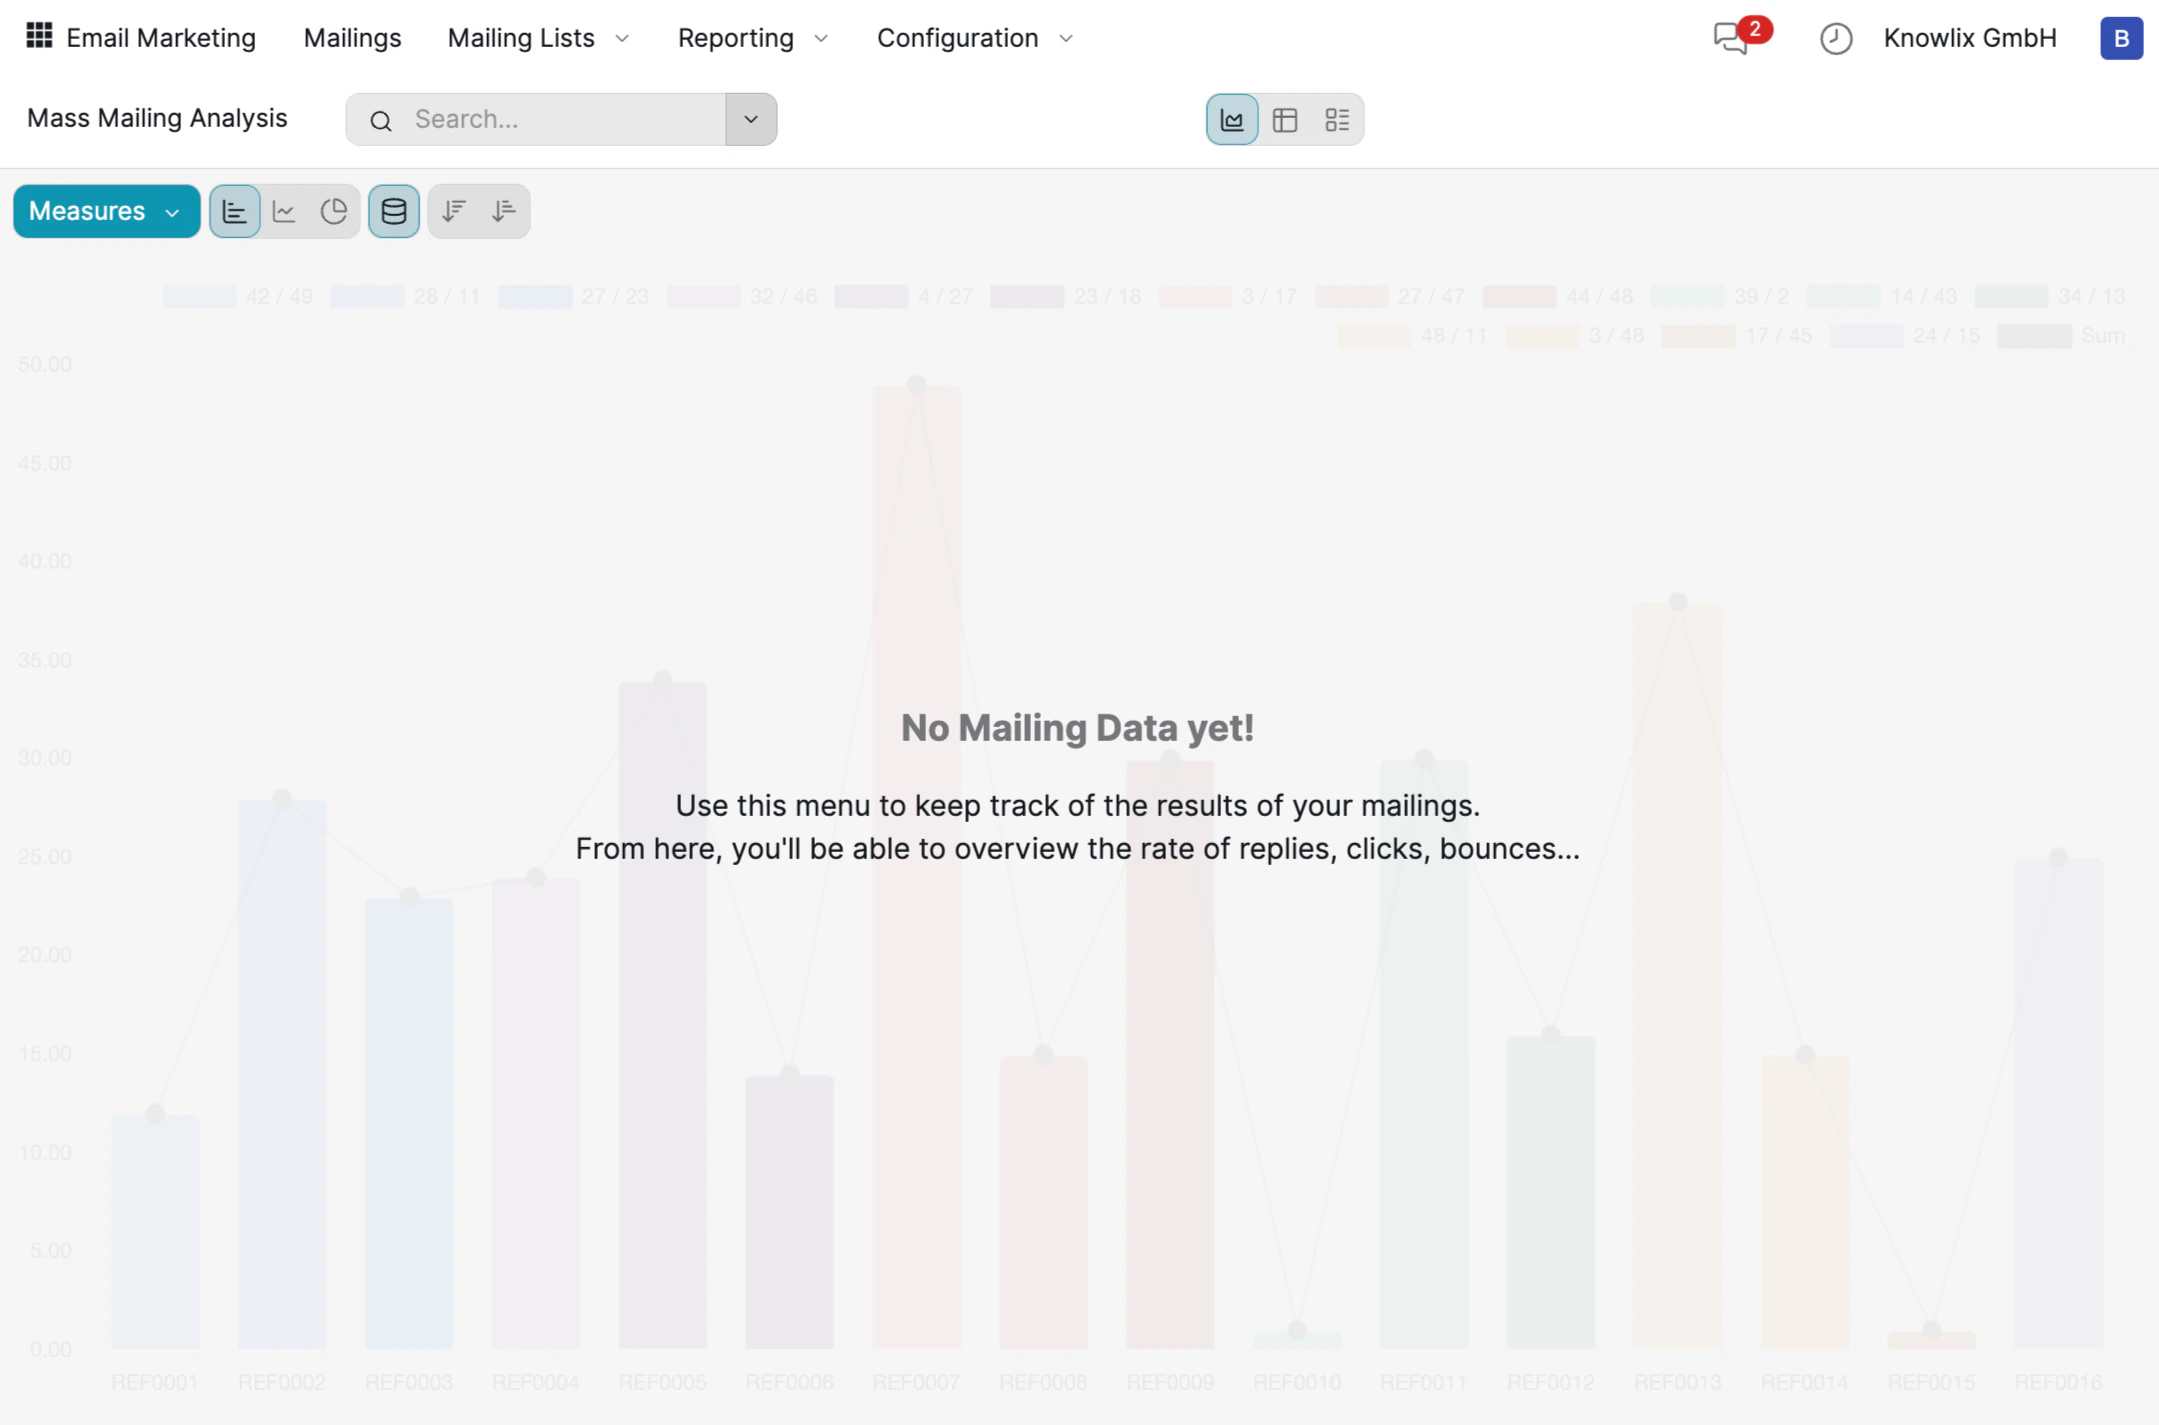 Navigate to **Reporting** → **Mass Mailing Analysis** to track the performance of all your campaigns. The dashboard provides:
* **Bar Charts**: Visual comparison of performance across all mailings (REF0001, REF0002, etc.).
* **Key Metrics**: Replies, clicks, and bounces for each campaign.
* **Measures Dropdown**: Switch between different metrics to focus on what matters.
* **Chart Types**: Toggle between bar, line, pie, and pivot table views.
Use these insights to identify your best-performing campaigns and optimize future sends.
***
## More Information
Bulk email campaigns and automation
SMS campaigns and message management
Social media management and scheduling
Automated marketing workflows and triggers
AI assistant tips for the Marketing module
Navigate to **Reporting** → **Mass Mailing Analysis** to track the performance of all your campaigns. The dashboard provides:
* **Bar Charts**: Visual comparison of performance across all mailings (REF0001, REF0002, etc.).
* **Key Metrics**: Replies, clicks, and bounces for each campaign.
* **Measures Dropdown**: Switch between different metrics to focus on what matters.
* **Chart Types**: Toggle between bar, line, pie, and pivot table views.
Use these insights to identify your best-performing campaigns and optimize future sends.
***
## More Information
Bulk email campaigns and automation
SMS campaigns and message management
Social media management and scheduling
Automated marketing workflows and triggers
AI assistant tips for the Marketing module