> ## Documentation Index
> Fetch the complete documentation index at: https://docs.knowlix.ai/llms.txt
> Use this file to discover all available pages before exploring further.
# AI Email
> Design and send professional email campaigns with a drag-and-drop editor, mailing lists, and built-in analytics
Knowlix AI Email lets you create professional email campaigns from scratch using a visual drag-and-drop editor. Manage your mailing lists, design newsletters, test before sending, and track performance — all from one interface.
## Creating a New Mailing
Navigate to **Email Marketing** → **Mailings** and click **New** to start a new email campaign. You are presented with a library of pre-designed templates to choose from.
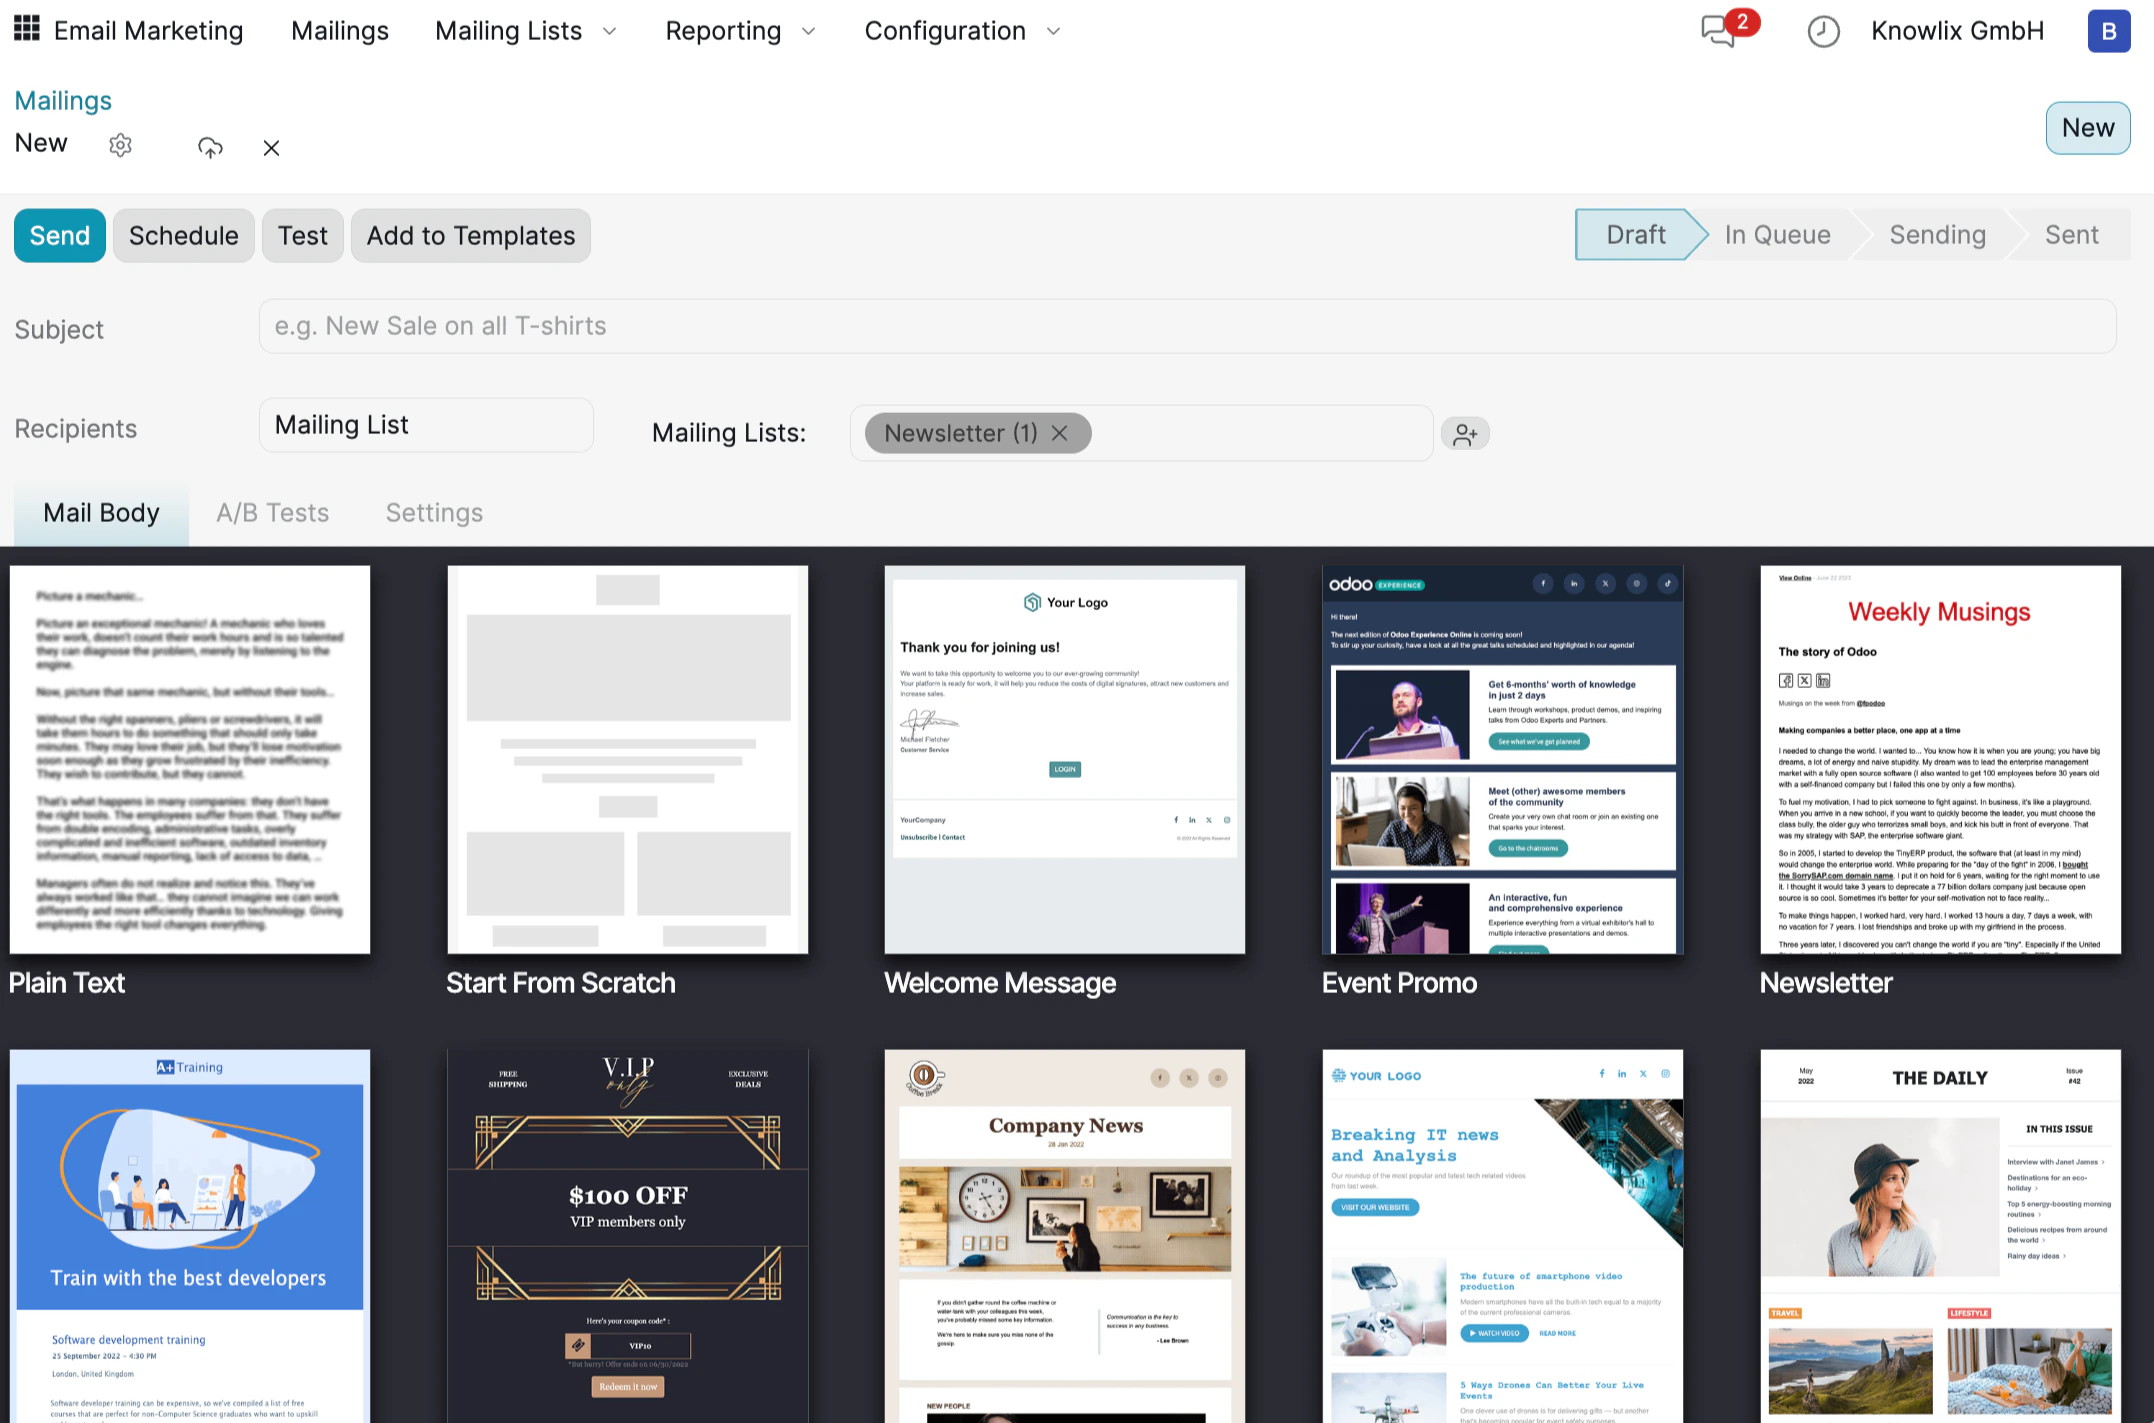 Choose from templates like **Plain Text**, **Start From Scratch**, **Welcome Message**, **Event Promo**, **Newsletter**, and more. Each template provides a ready-made layout that you can fully customize. Click any template to load it into the editor.
At the top, fill in the campaign details:
* **Subject**: The email subject line your recipients will see.
* **Recipients**: Select **Mailing List** and choose which list to send to (e.g., "Newsletter").
* **Tabs**: Switch between **Mail Body** (content), **A/B Tests** (variants), and **Settings** (tracking options).
## Designing Your Email
Once you select a template, the drag-and-drop editor opens with your email content on the left and the editing panel on the right.
Choose from templates like **Plain Text**, **Start From Scratch**, **Welcome Message**, **Event Promo**, **Newsletter**, and more. Each template provides a ready-made layout that you can fully customize. Click any template to load it into the editor.
At the top, fill in the campaign details:
* **Subject**: The email subject line your recipients will see.
* **Recipients**: Select **Mailing List** and choose which list to send to (e.g., "Newsletter").
* **Tabs**: Switch between **Mail Body** (content), **A/B Tests** (variants), and **Settings** (tracking options).
## Designing Your Email
Once you select a template, the drag-and-drop editor opens with your email content on the left and the editing panel on the right.
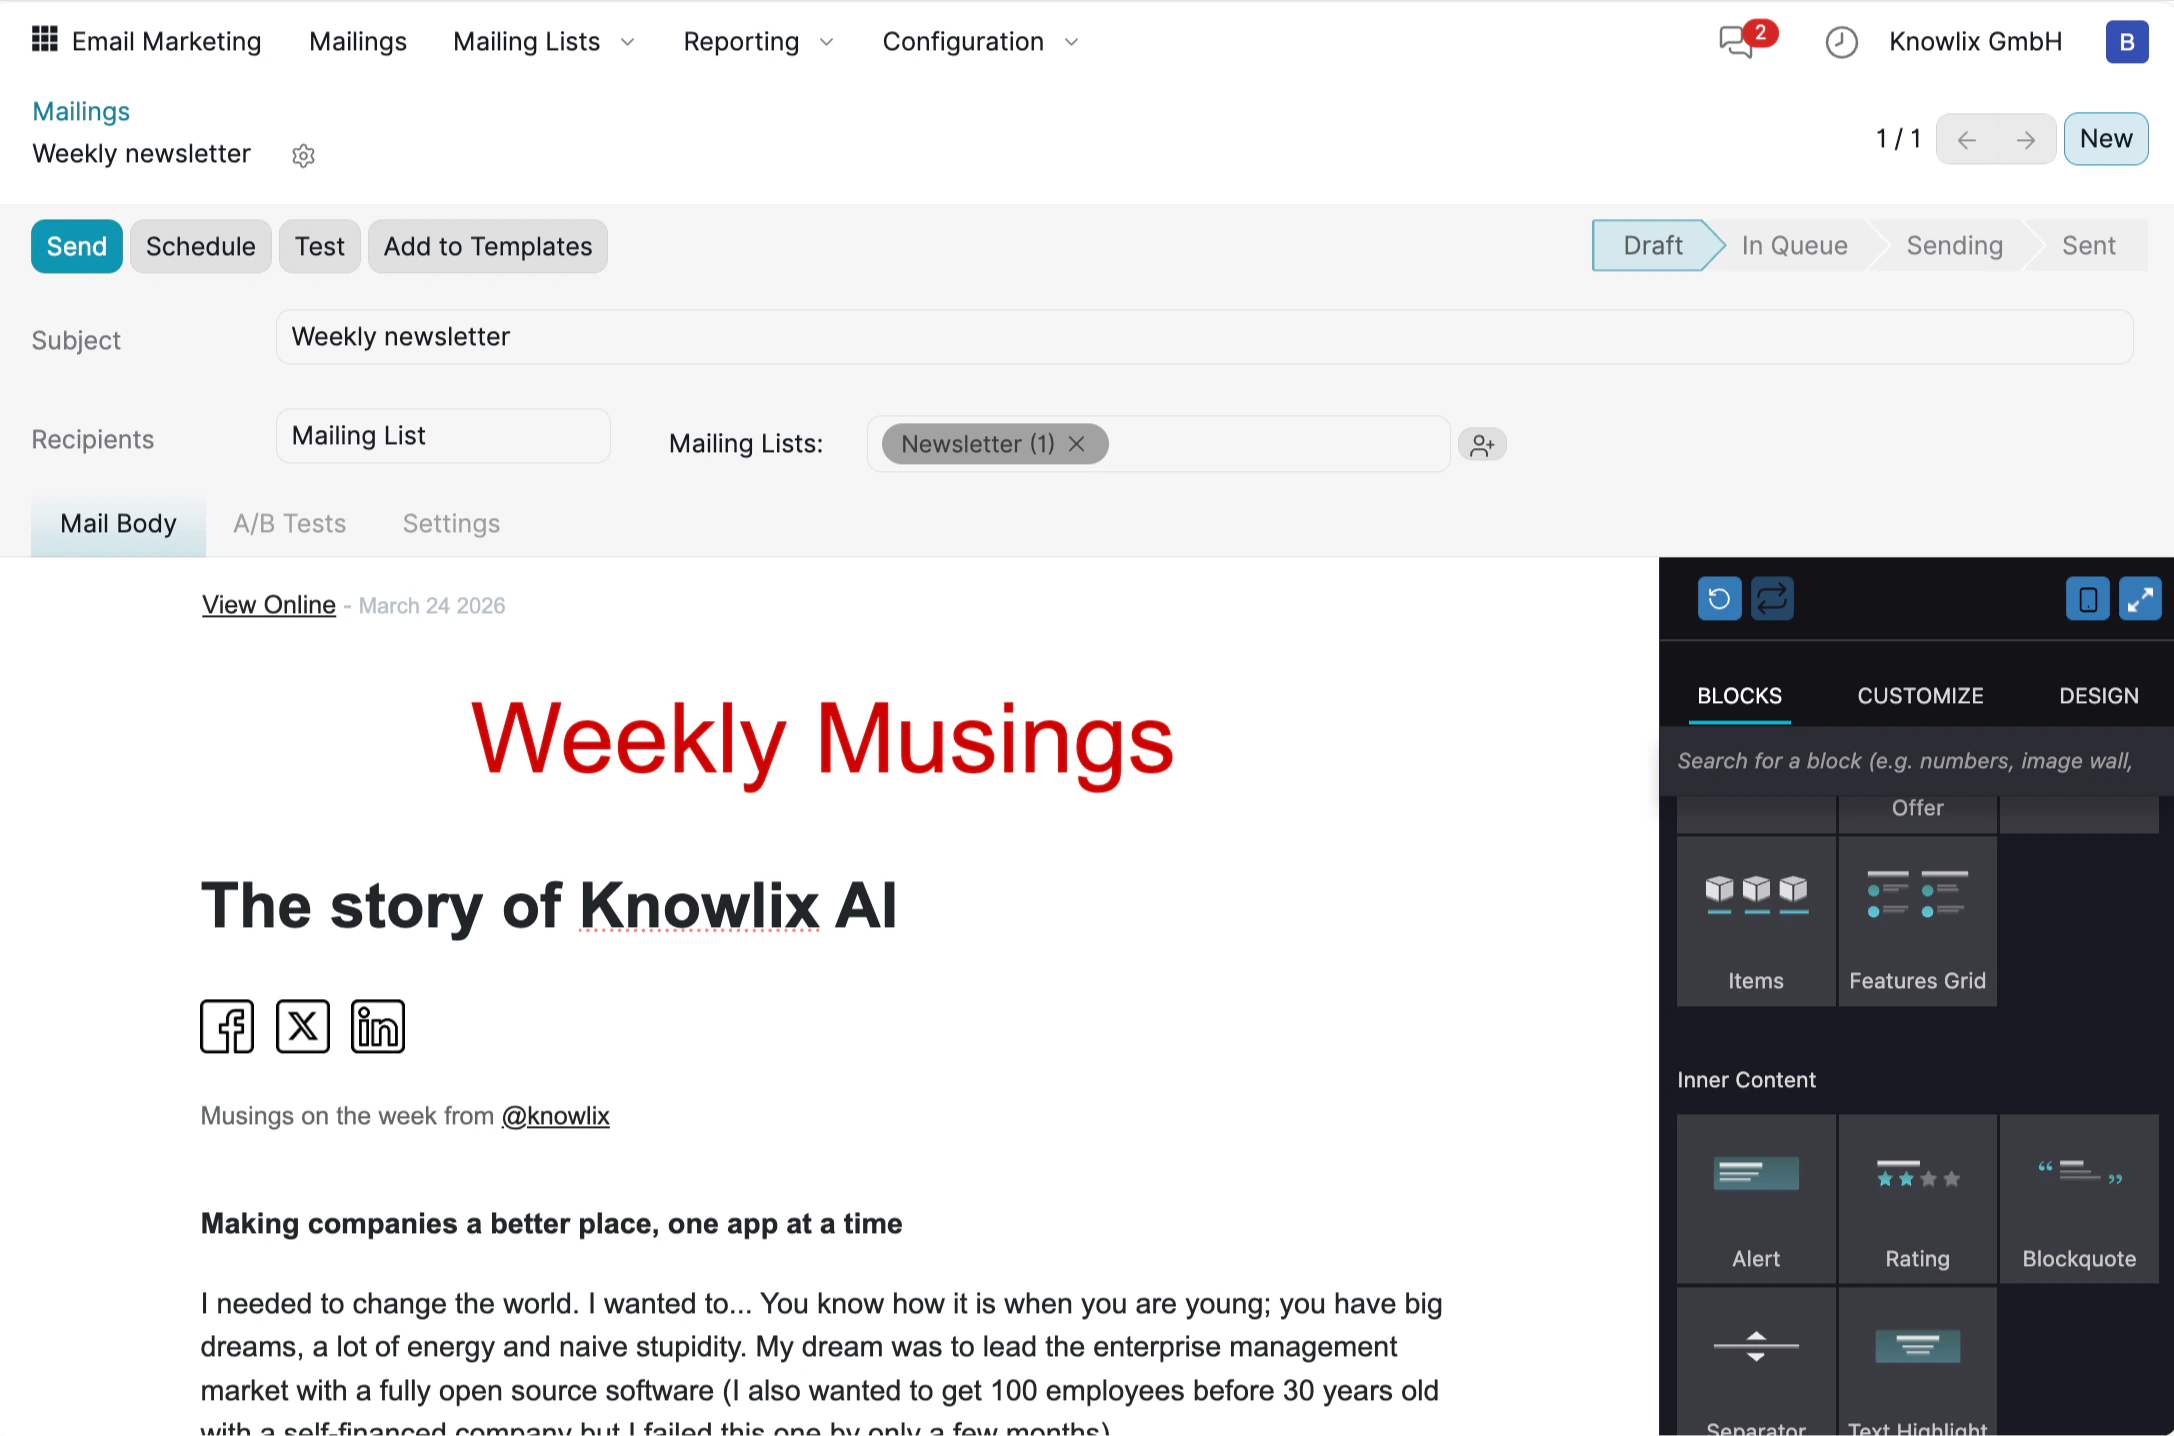 The editor displays a live preview of your email. Click any element to select and edit it. The right panel has three tabs:
### Blocks
The editor displays a live preview of your email. Click any element to select and edit it. The right panel has three tabs:
### Blocks
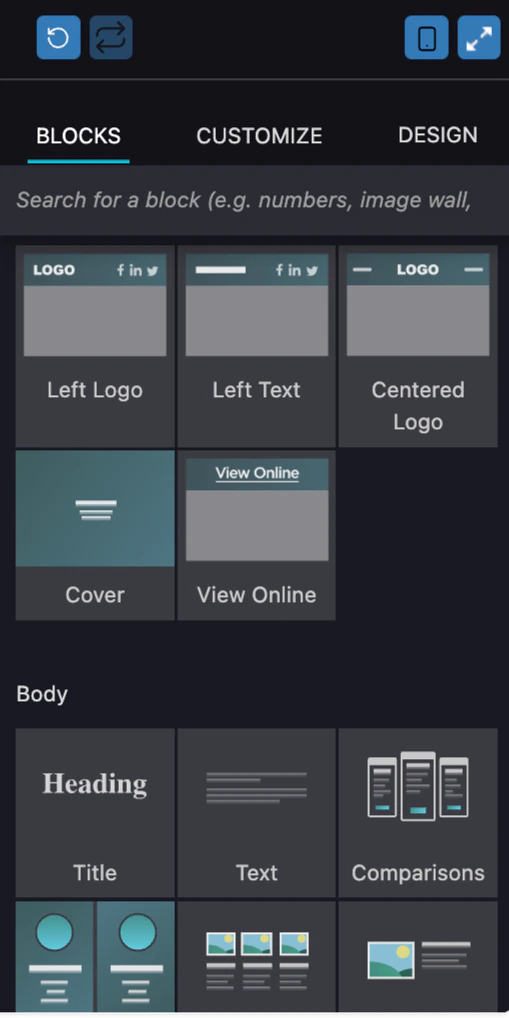
The **BLOCKS** tab provides drag-and-drop content elements organized into categories:
* **Header**: Left Logo, Left Text, Centered Logo, Cover, View Online.
* **Body**: Title, Text, Comparisons, and more.
* **Content**: Offer, Items, Features Grid, Alert, Rating, Blockquote.
Drag any block from the panel and drop it into your email layout to add new sections.
### Customize
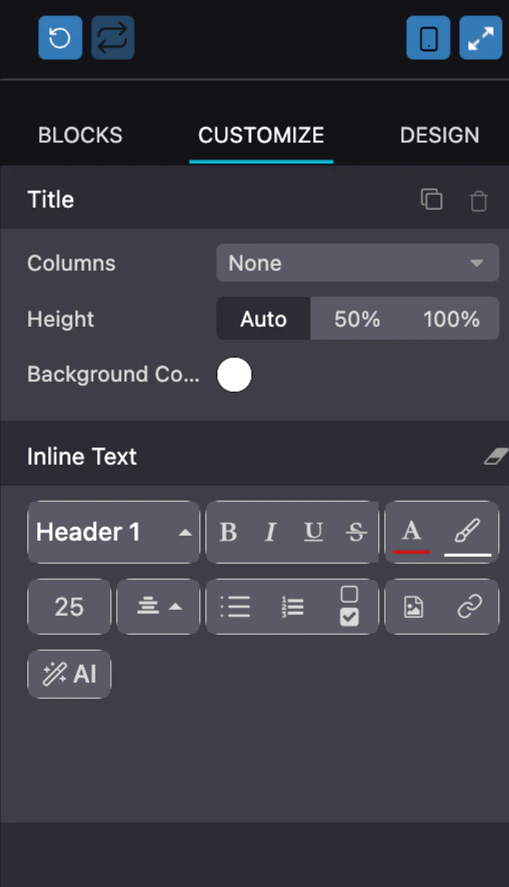
The **CUSTOMIZE** tab appears when you click on a specific block. It lets you edit the selected element's properties:
* **Layout**: Set Columns and Height (Auto, 50%, 100%).
* **Background Color**: Choose a background for the block.
* **Inline Text**: Format text with heading levels (Header 1–3), bold, italic, underline, strikethrough, font color, alignment, lists, checkboxes, images, and links.
* **AI**: Click the **AI** button to generate or rewrite content using AI assistance.
### Design
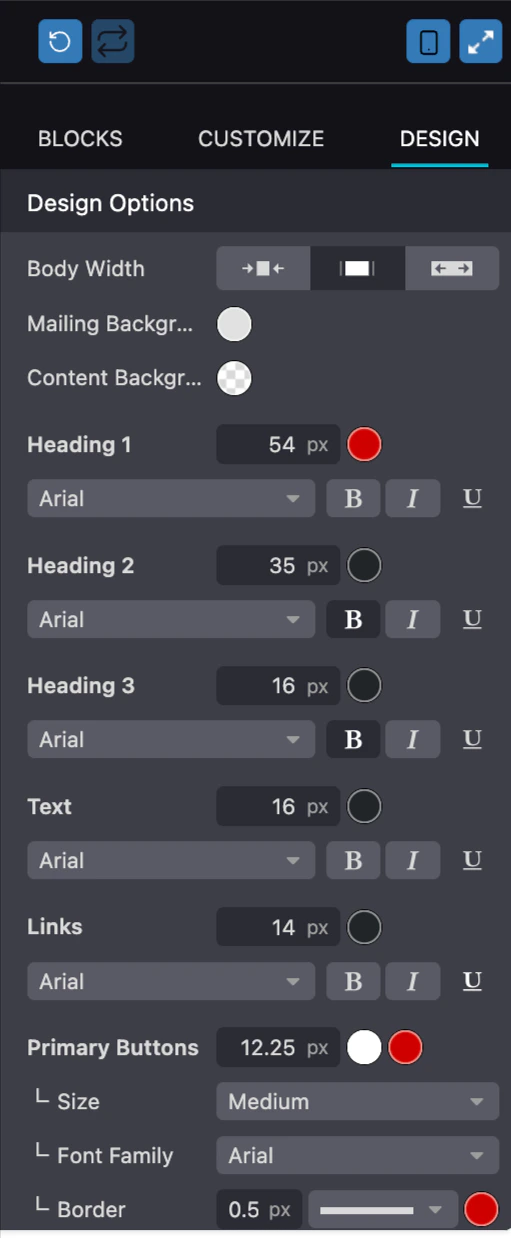
The **DESIGN** tab controls the global appearance of your entire email:
* **Body Width**: Choose between compact, medium, or full-width layouts.
* **Colors**: Set Mailing Background and Content Background colors.
* **Typography**: Configure font family, size, color, and style (Bold, Italic, Underline) for Heading 1, Heading 2, Heading 3, Text, and Links independently.
* **Primary Buttons**: Adjust button size, font family, and border settings.
## Managing Mailing Lists
 Navigate to **Mailing Lists** in the top menu to manage your subscriber lists. Each list displays:
* **Total Contacts**: The number of subscribers in the list.
* **Mailings**: How many campaigns have been sent to this list.
* **Bounce %**: Percentage of emails that failed to deliver.
* **Opt-Out %**: Percentage of subscribers who unsubscribed.
* **Blacklist %**: Percentage of blocked addresses.
Use the **Import Contacts** button to add subscribers from a file, or click **Send Mailing** to create a new campaign targeting this list.
## Testing Before Sending
Before sending to your full audience, you can send a test email to verify everything looks correct.
Navigate to **Mailing Lists** in the top menu to manage your subscriber lists. Each list displays:
* **Total Contacts**: The number of subscribers in the list.
* **Mailings**: How many campaigns have been sent to this list.
* **Bounce %**: Percentage of emails that failed to deliver.
* **Opt-Out %**: Percentage of subscribers who unsubscribed.
* **Blacklist %**: Percentage of blocked addresses.
Use the **Import Contacts** button to add subscribers from a file, or click **Send Mailing** to create a new campaign targeting this list.
## Testing Before Sending
Before sending to your full audience, you can send a test email to verify everything looks correct.
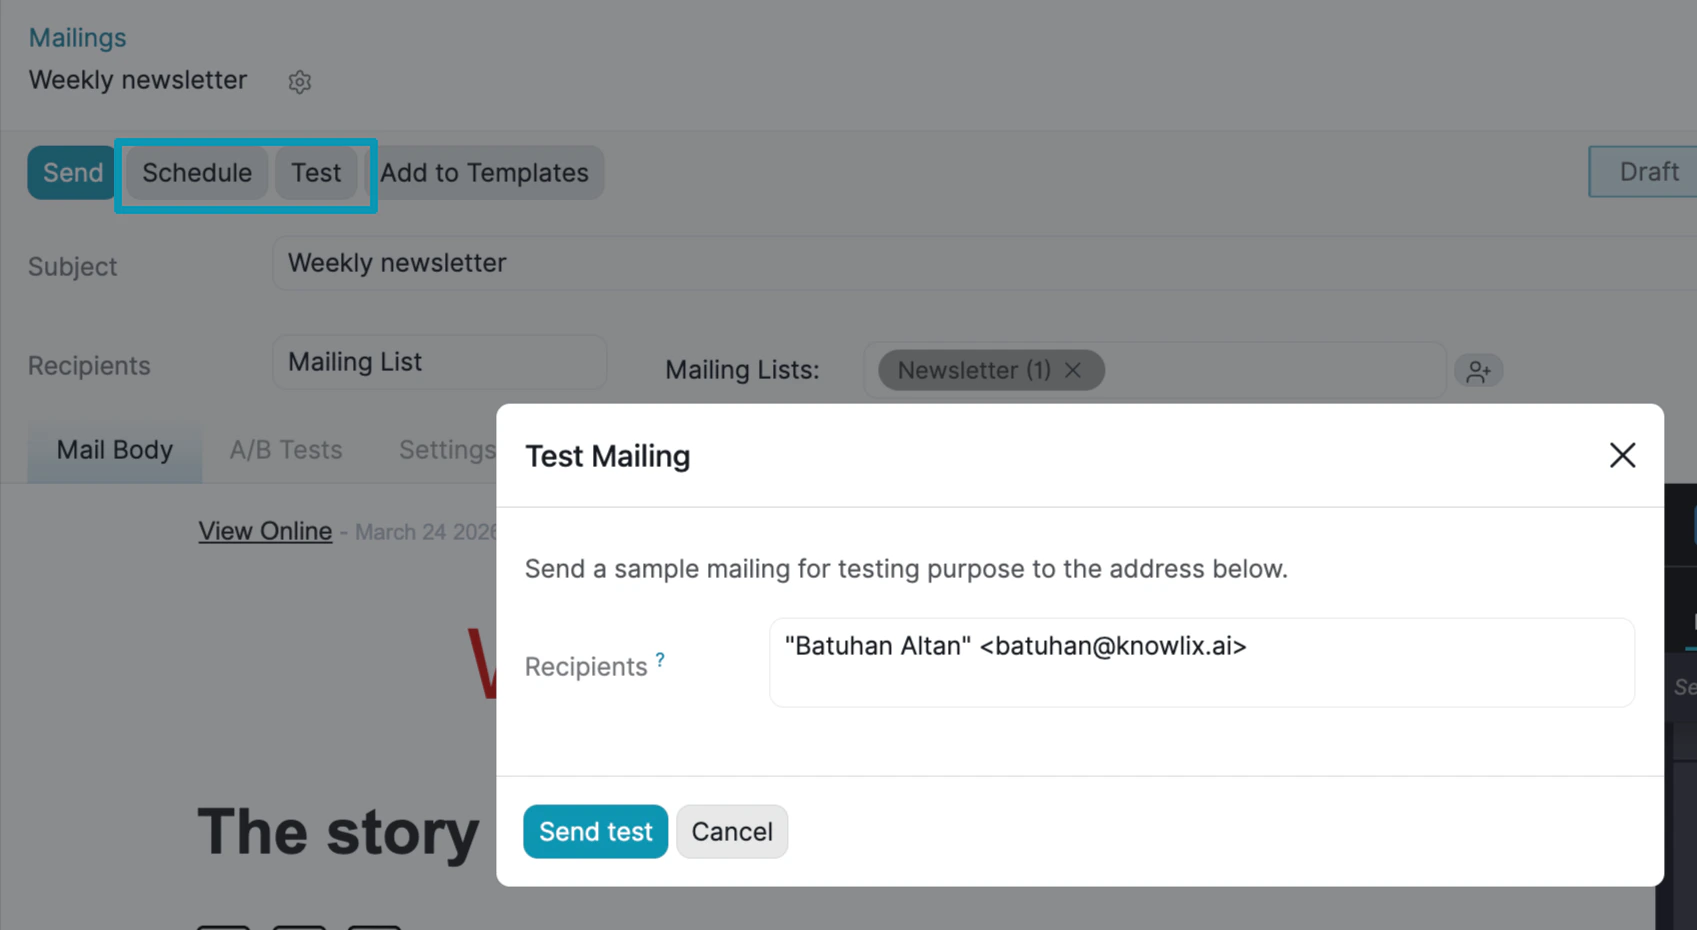 Click the **Test** button at the top of the editor. A dialog appears where you enter a recipient address to send a sample mailing. Click **Send test** to dispatch the test email, or use **Schedule** to set a future send date.
## Campaign Overview
Click the **Test** button at the top of the editor. A dialog appears where you enter a recipient address to send a sample mailing. Click **Send test** to dispatch the test email, or use **Schedule** to set a future send date.
## Campaign Overview
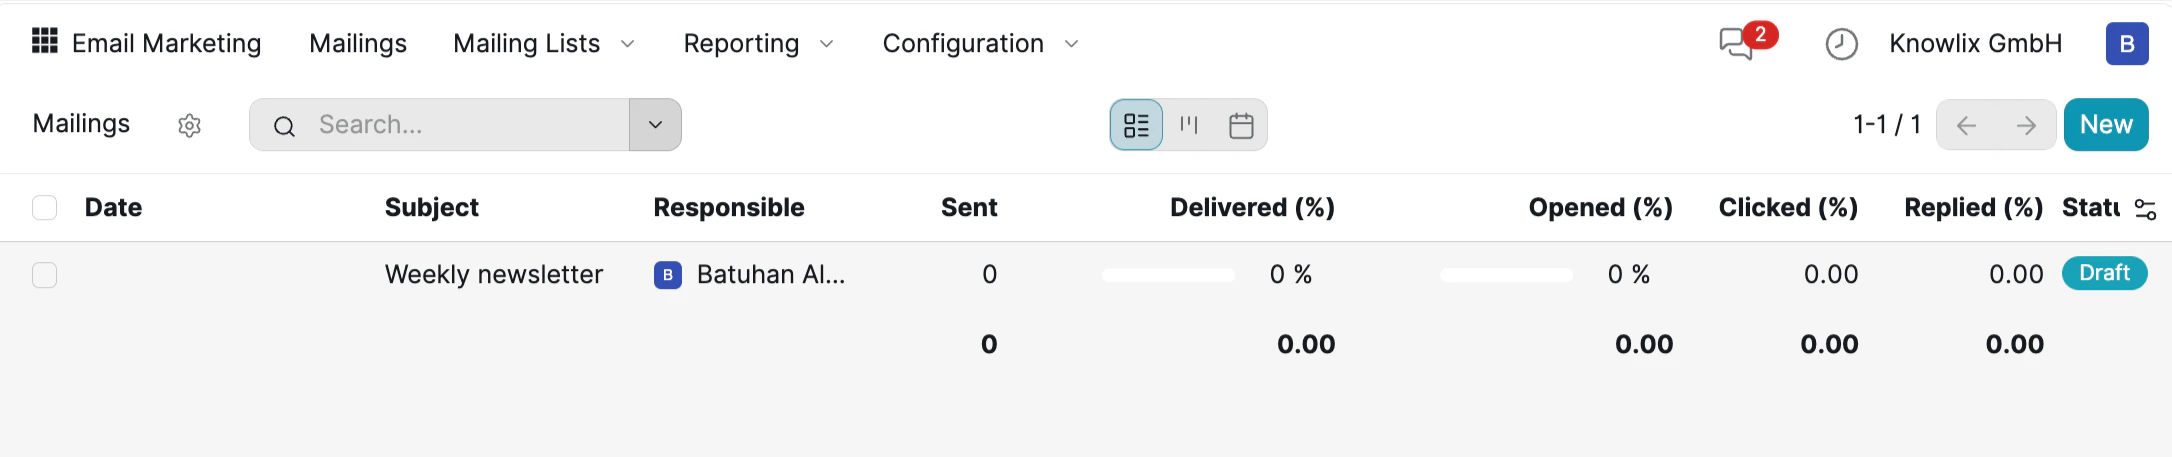 The **Mailings** dashboard lists all your email campaigns with key metrics: Date, Subject, Responsible, Sent count, Delivered %, Opened %, Clicked %, Replied %, and Status. Each campaign shows its current state — **Draft**, **In Queue**, **Sending**, or **Sent** — so you can track progress at a glance.
## Reporting & Analytics
The **Mailings** dashboard lists all your email campaigns with key metrics: Date, Subject, Responsible, Sent count, Delivered %, Opened %, Clicked %, Replied %, and Status. Each campaign shows its current state — **Draft**, **In Queue**, **Sending**, or **Sent** — so you can track progress at a glance.
## Reporting & Analytics
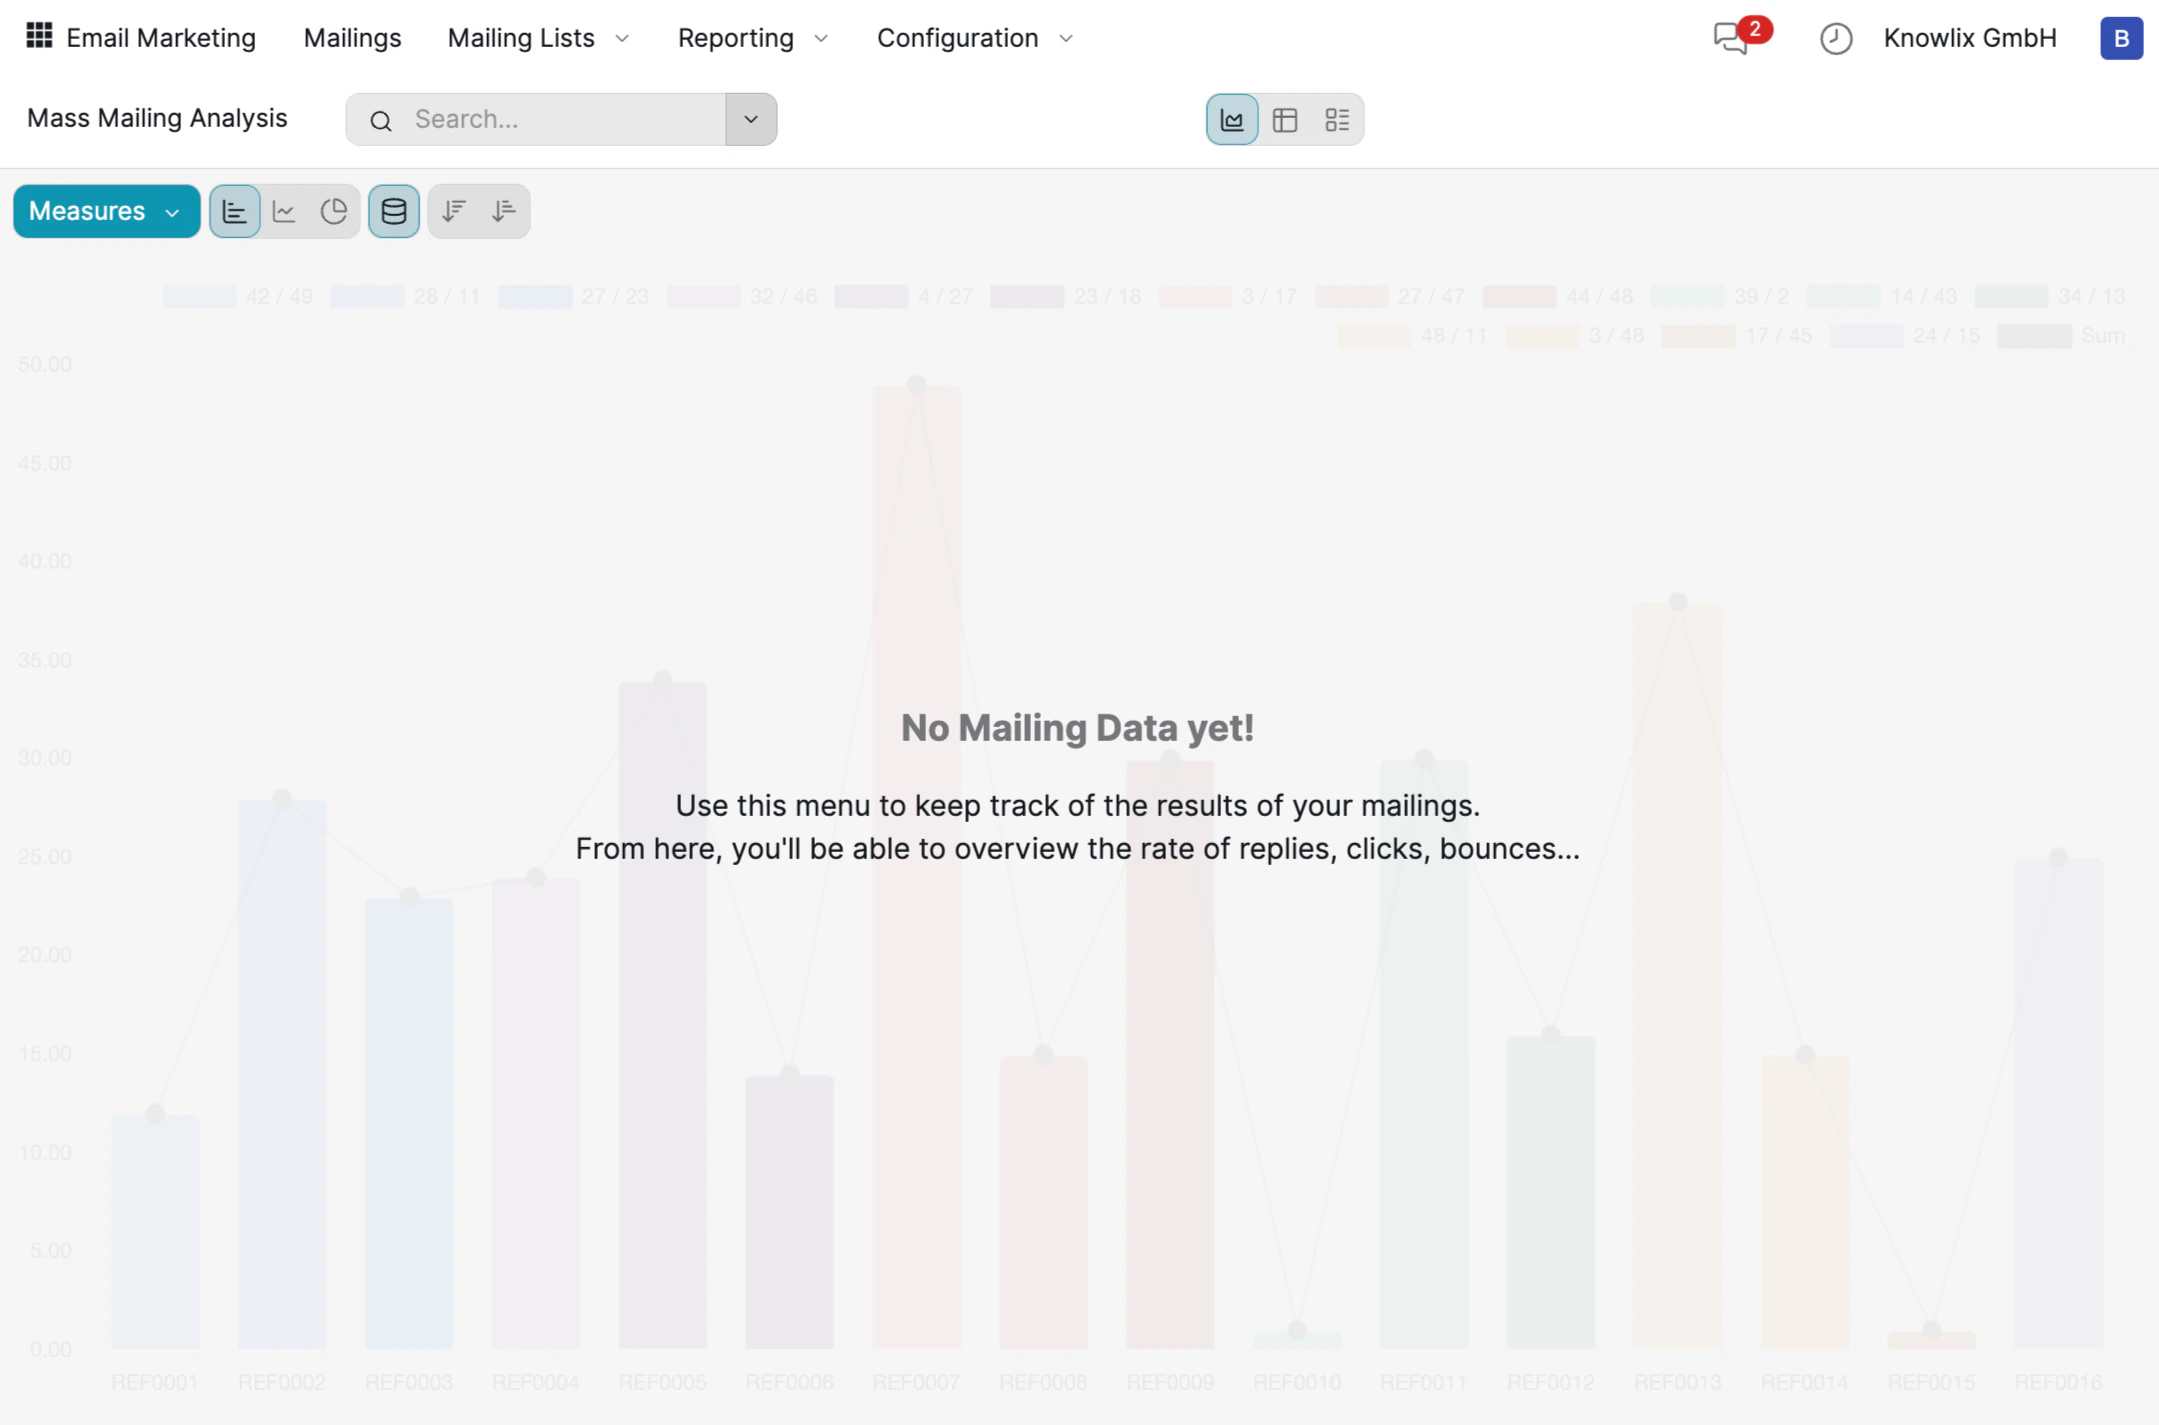 Navigate to **Reporting** to access the **Mass Mailing Analysis** dashboard. This view provides a visual breakdown of your campaign performance with bar charts showing results across all mailings. Track the rate of replies, clicks, and bounces to identify what works best and optimize future campaigns.
Use the **Measures** dropdown and chart type toggles to switch between different visualization modes and metrics.
***
## More Information
Electronic signatures and document approval
Rich text editor for content formatting and HTML editing
AI assistant tips for the Productivity module
Navigate to **Reporting** to access the **Mass Mailing Analysis** dashboard. This view provides a visual breakdown of your campaign performance with bar charts showing results across all mailings. Track the rate of replies, clicks, and bounces to identify what works best and optimize future campaigns.
Use the **Measures** dropdown and chart type toggles to switch between different visualization modes and metrics.
***
## More Information
Electronic signatures and document approval
Rich text editor for content formatting and HTML editing
AI assistant tips for the Productivity module