> ## Documentation Index
> Fetch the complete documentation index at: https://docs.knowlix.ai/llms.txt
> Use this file to discover all available pages before exploring further.
# AI Phone
> Set up AI-powered phone agents with Twilio integration for automated business calls
Knowlix AI Phone lets you create intelligent phone agents that handle business calls automatically. Connect your Twilio phone number, configure an AI agent, and start receiving calls — all from a single interface.
## Setting Up a Phone Number
To start using AI Phone, you first need to connect a phone number via Twilio.
### Step 1: Navigate to Phone Numbers
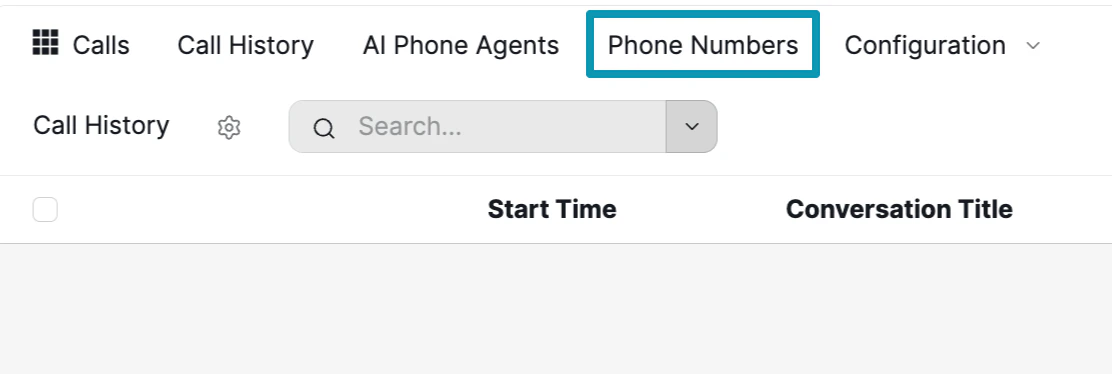 Click **Phone Numbers** in the top navigation bar to access the phone number management section.
### Step 2: Configure Your Twilio Number
Click **New** to add a new phone number. Fill in the configuration form:
Click **Phone Numbers** in the top navigation bar to access the phone number management section.
### Step 2: Configure Your Twilio Number
Click **New** to add a new phone number. Fill in the configuration form:
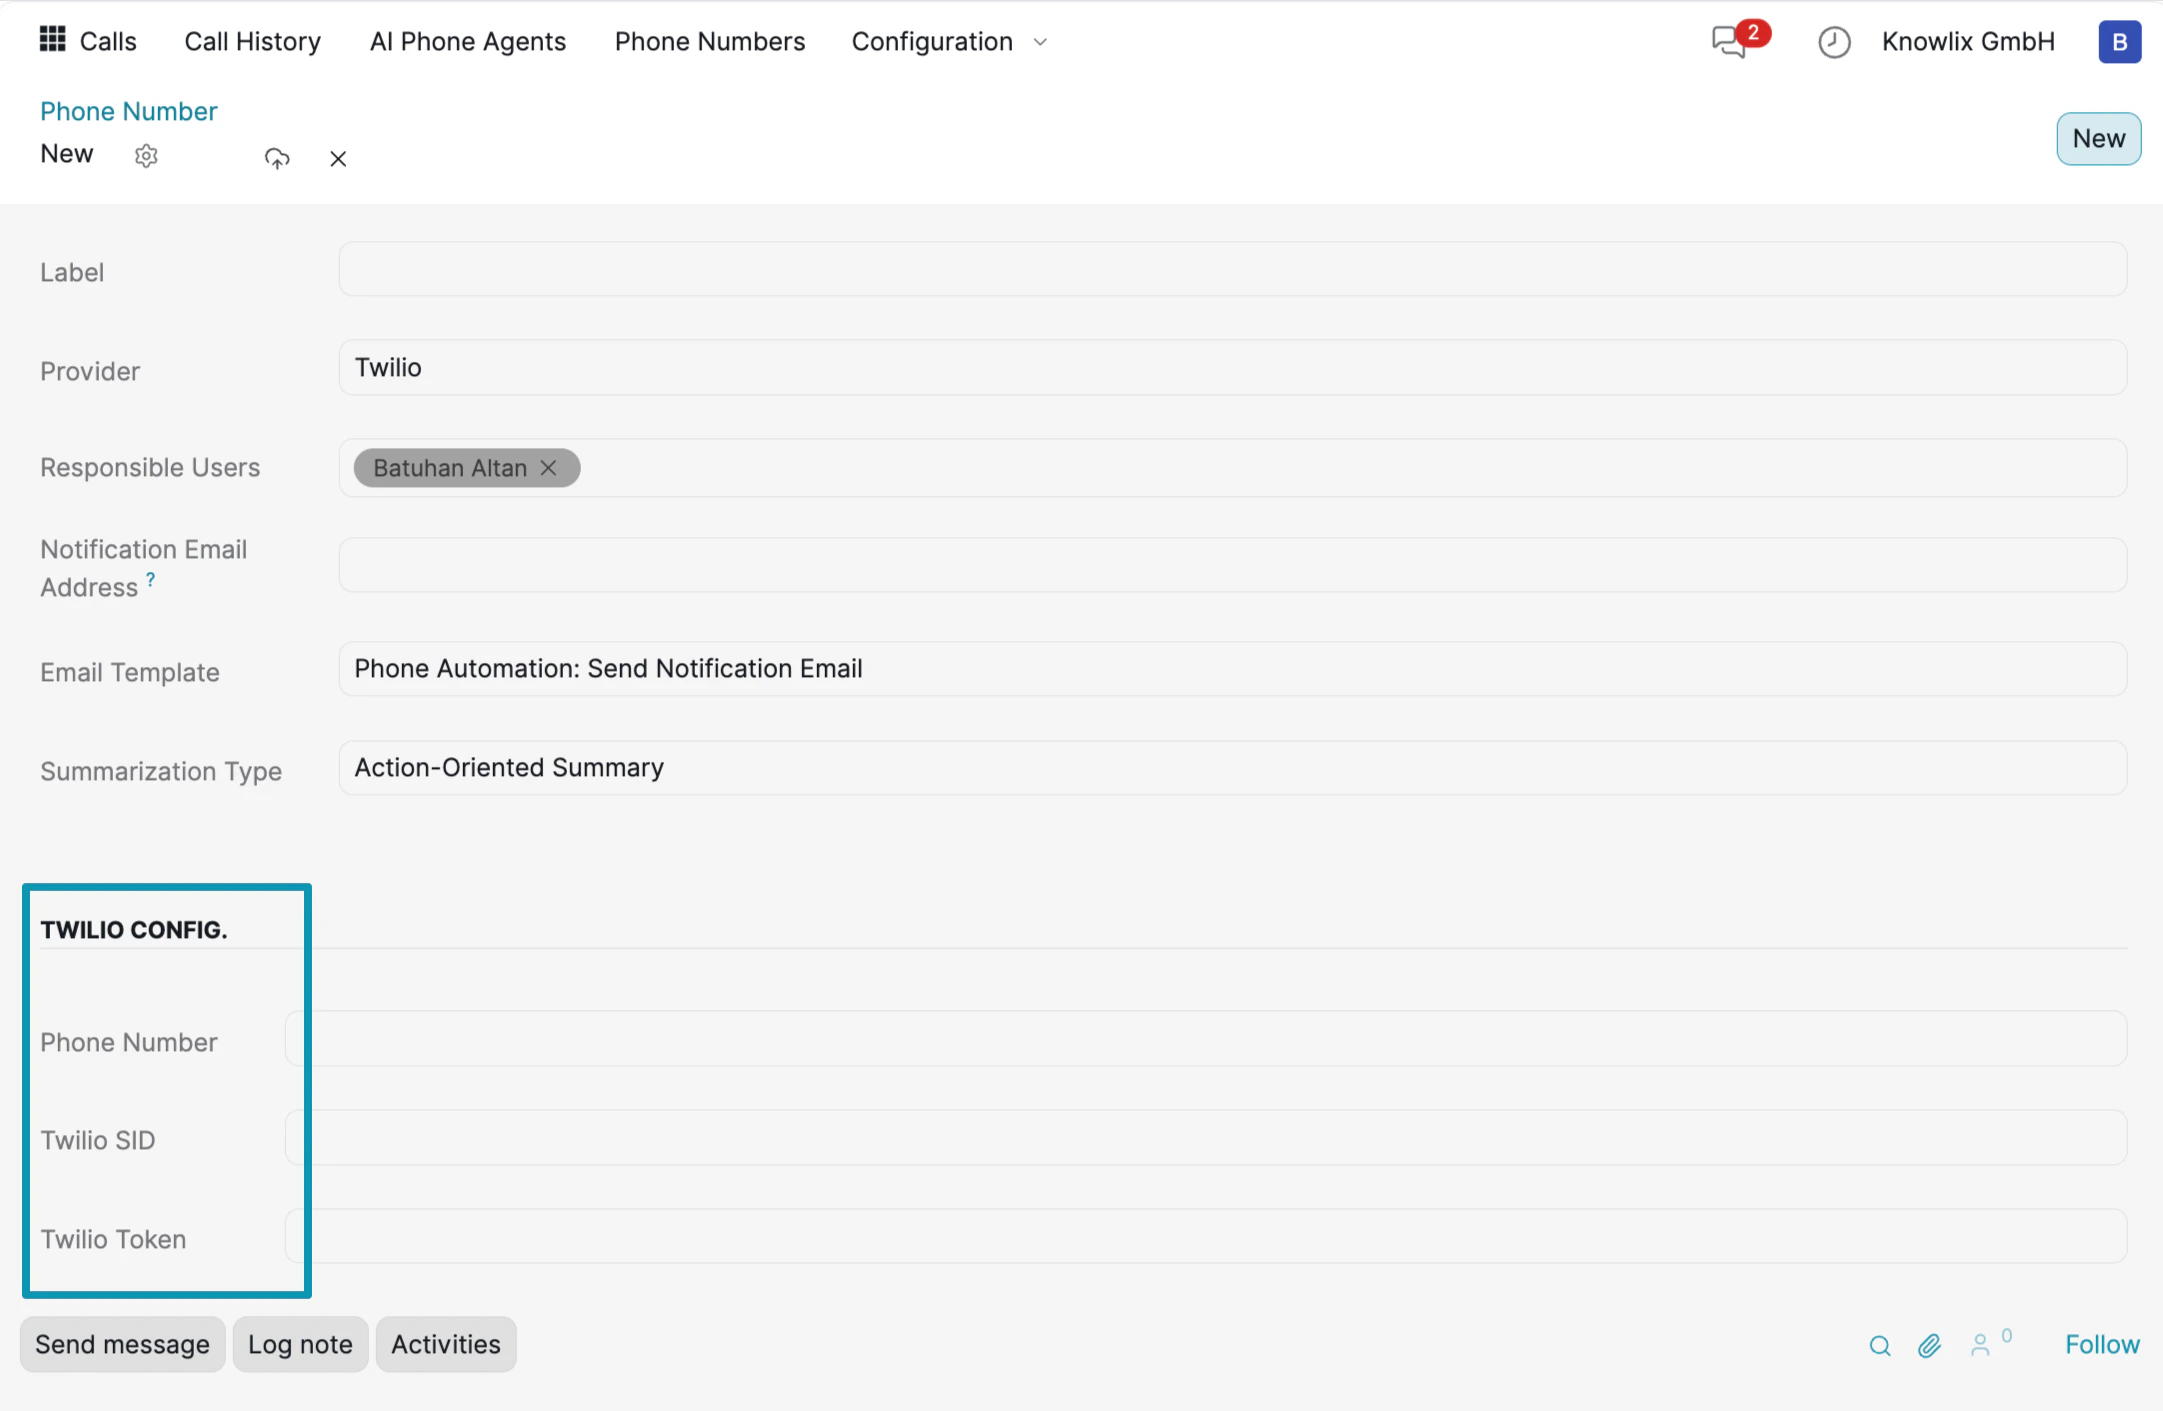 * **Label**: A friendly name for your phone number (e.g., "Batu").
* **Provider**: Select **Twilio** as the telephony provider.
* **Responsible Users**: Assign team members who will manage this number.
* **Notification Email Address**: Set an email to receive call notifications.
* **Email Template**: Choose a template for automated email notifications (e.g., "Phone Automation: Send Notification Email").
* **Summarization Type**: Select how call summaries are generated (e.g., "Action-Oriented Summary").
Under the **TWILIO CONFIG** section at the bottom, enter your Twilio credentials:
* **Phone Number**: Your Twilio phone number.
* **Twilio SID**: Your account SID from the Twilio console.
* **Twilio Token**: Your auth token from the Twilio console.
You can find your Twilio SID and Auth Token in your [Twilio console](https://help.twilio.com/articles/223136027-Auth-Tokens-and-How-to-Change-Them).
### Step 3: Verify Your Number
* **Label**: A friendly name for your phone number (e.g., "Batu").
* **Provider**: Select **Twilio** as the telephony provider.
* **Responsible Users**: Assign team members who will manage this number.
* **Notification Email Address**: Set an email to receive call notifications.
* **Email Template**: Choose a template for automated email notifications (e.g., "Phone Automation: Send Notification Email").
* **Summarization Type**: Select how call summaries are generated (e.g., "Action-Oriented Summary").
Under the **TWILIO CONFIG** section at the bottom, enter your Twilio credentials:
* **Phone Number**: Your Twilio phone number.
* **Twilio SID**: Your account SID from the Twilio console.
* **Twilio Token**: Your auth token from the Twilio console.
You can find your Twilio SID and Auth Token in your [Twilio console](https://help.twilio.com/articles/223136027-Auth-Tokens-and-How-to-Change-Them).
### Step 3: Verify Your Number
 Once saved, your phone number appears in the Phone Number list with its **Label**, **Phone Number**, and **Provider** (Twilio). You can click any row to edit the configuration or add additional numbers by clicking **New**.
## Creating an AI Phone Agent
With your phone number configured, you can now create an AI agent that answers calls automatically.
Navigate to **AI Phone Agents** in the top menu and click **New**.
Once saved, your phone number appears in the Phone Number list with its **Label**, **Phone Number**, and **Provider** (Twilio). You can click any row to edit the configuration or add additional numbers by clicking **New**.
## Creating an AI Phone Agent
With your phone number configured, you can now create an AI agent that answers calls automatically.
Navigate to **AI Phone Agents** in the top menu and click **New**.
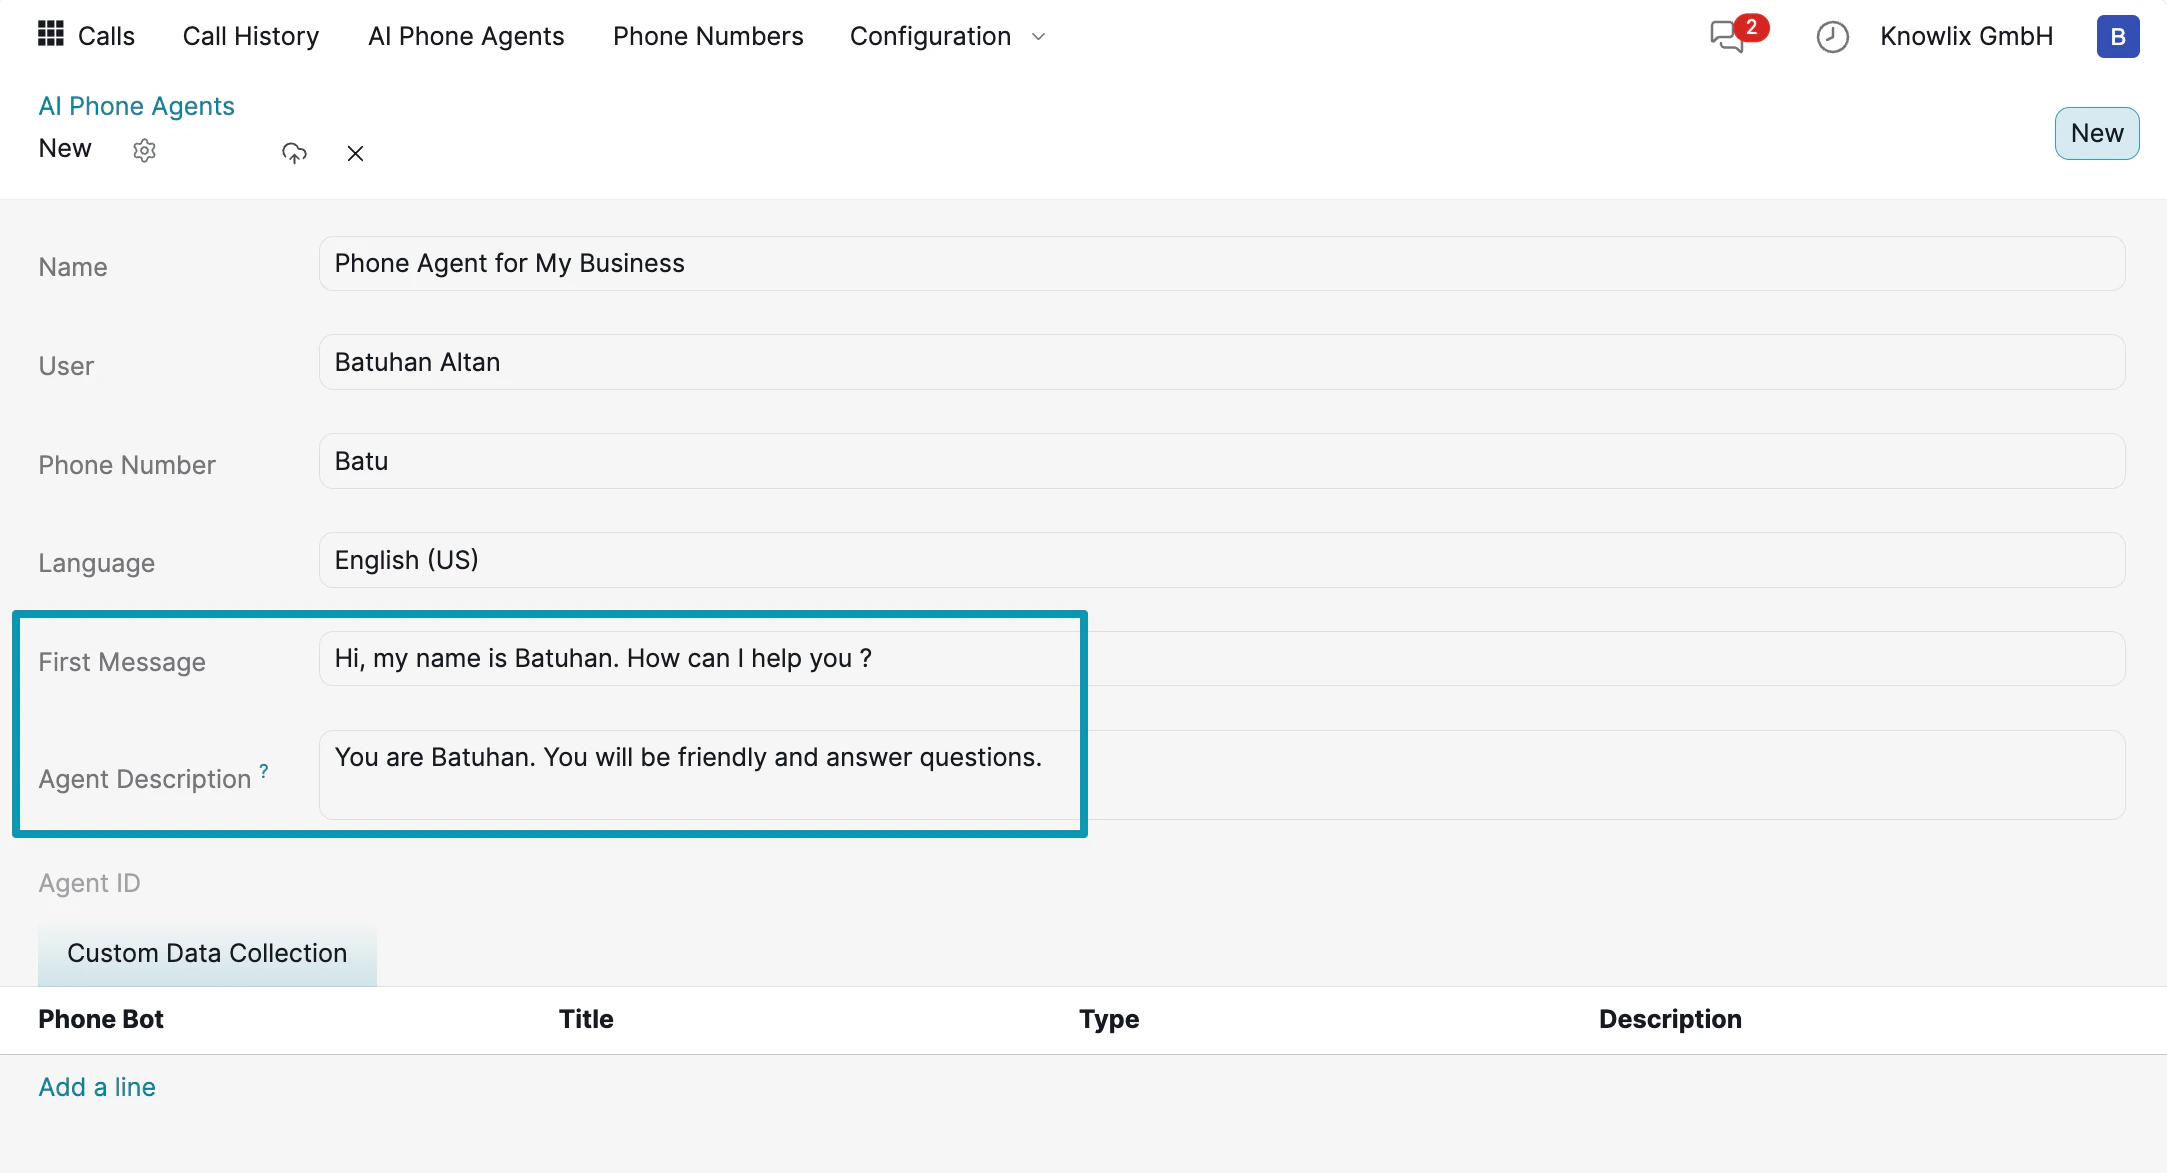 Fill in the agent details:
* **Name**: Give your agent a descriptive name (e.g., "Phone Agent for My Business").
* **User**: The user account the agent operates under.
* **Phone Number**: Select the Twilio number you configured in the previous step.
* **Language**: Choose the agent's language (e.g., English US).
* **First Message**: The greeting your agent says when answering a call (e.g., *"Hi, my name is Batuhan. How can I help you?"*).
* **Agent Description**: Instructions that define the agent's personality and behavior (e.g., *"You are Batuhan. You will be friendly and answer questions."*).
Under **Custom Data Collection**, you can configure the agent to collect specific information from callers by adding data fields with a Title, Type, and Description.
## Managing Your Agents
Fill in the agent details:
* **Name**: Give your agent a descriptive name (e.g., "Phone Agent for My Business").
* **User**: The user account the agent operates under.
* **Phone Number**: Select the Twilio number you configured in the previous step.
* **Language**: Choose the agent's language (e.g., English US).
* **First Message**: The greeting your agent says when answering a call (e.g., *"Hi, my name is Batuhan. How can I help you?"*).
* **Agent Description**: Instructions that define the agent's personality and behavior (e.g., *"You are Batuhan. You will be friendly and answer questions."*).
Under **Custom Data Collection**, you can configure the agent to collect specific information from callers by adding data fields with a Title, Type, and Description.
## Managing Your Agents
 The **AI Phone Agents** list view displays all your configured agents with their Name, Phone Number, Language, First Message, and Agent ID. Click any agent to edit its configuration, or click **New** to create additional agents.
You can also access **Call History** from the top navigation to review past calls, including Start Time and Conversation Title for each call.
## Call Transcript & Summary
After each call, Knowlix automatically generates a transcript and summary. Click any call in the **Call History** to view the full details.
The **AI Phone Agents** list view displays all your configured agents with their Name, Phone Number, Language, First Message, and Agent ID. Click any agent to edit its configuration, or click **New** to create additional agents.
You can also access **Call History** from the top navigation to review past calls, including Start Time and Conversation Title for each call.
## Call Transcript & Summary
After each call, Knowlix automatically generates a transcript and summary. Click any call in the **Call History** to view the full details.
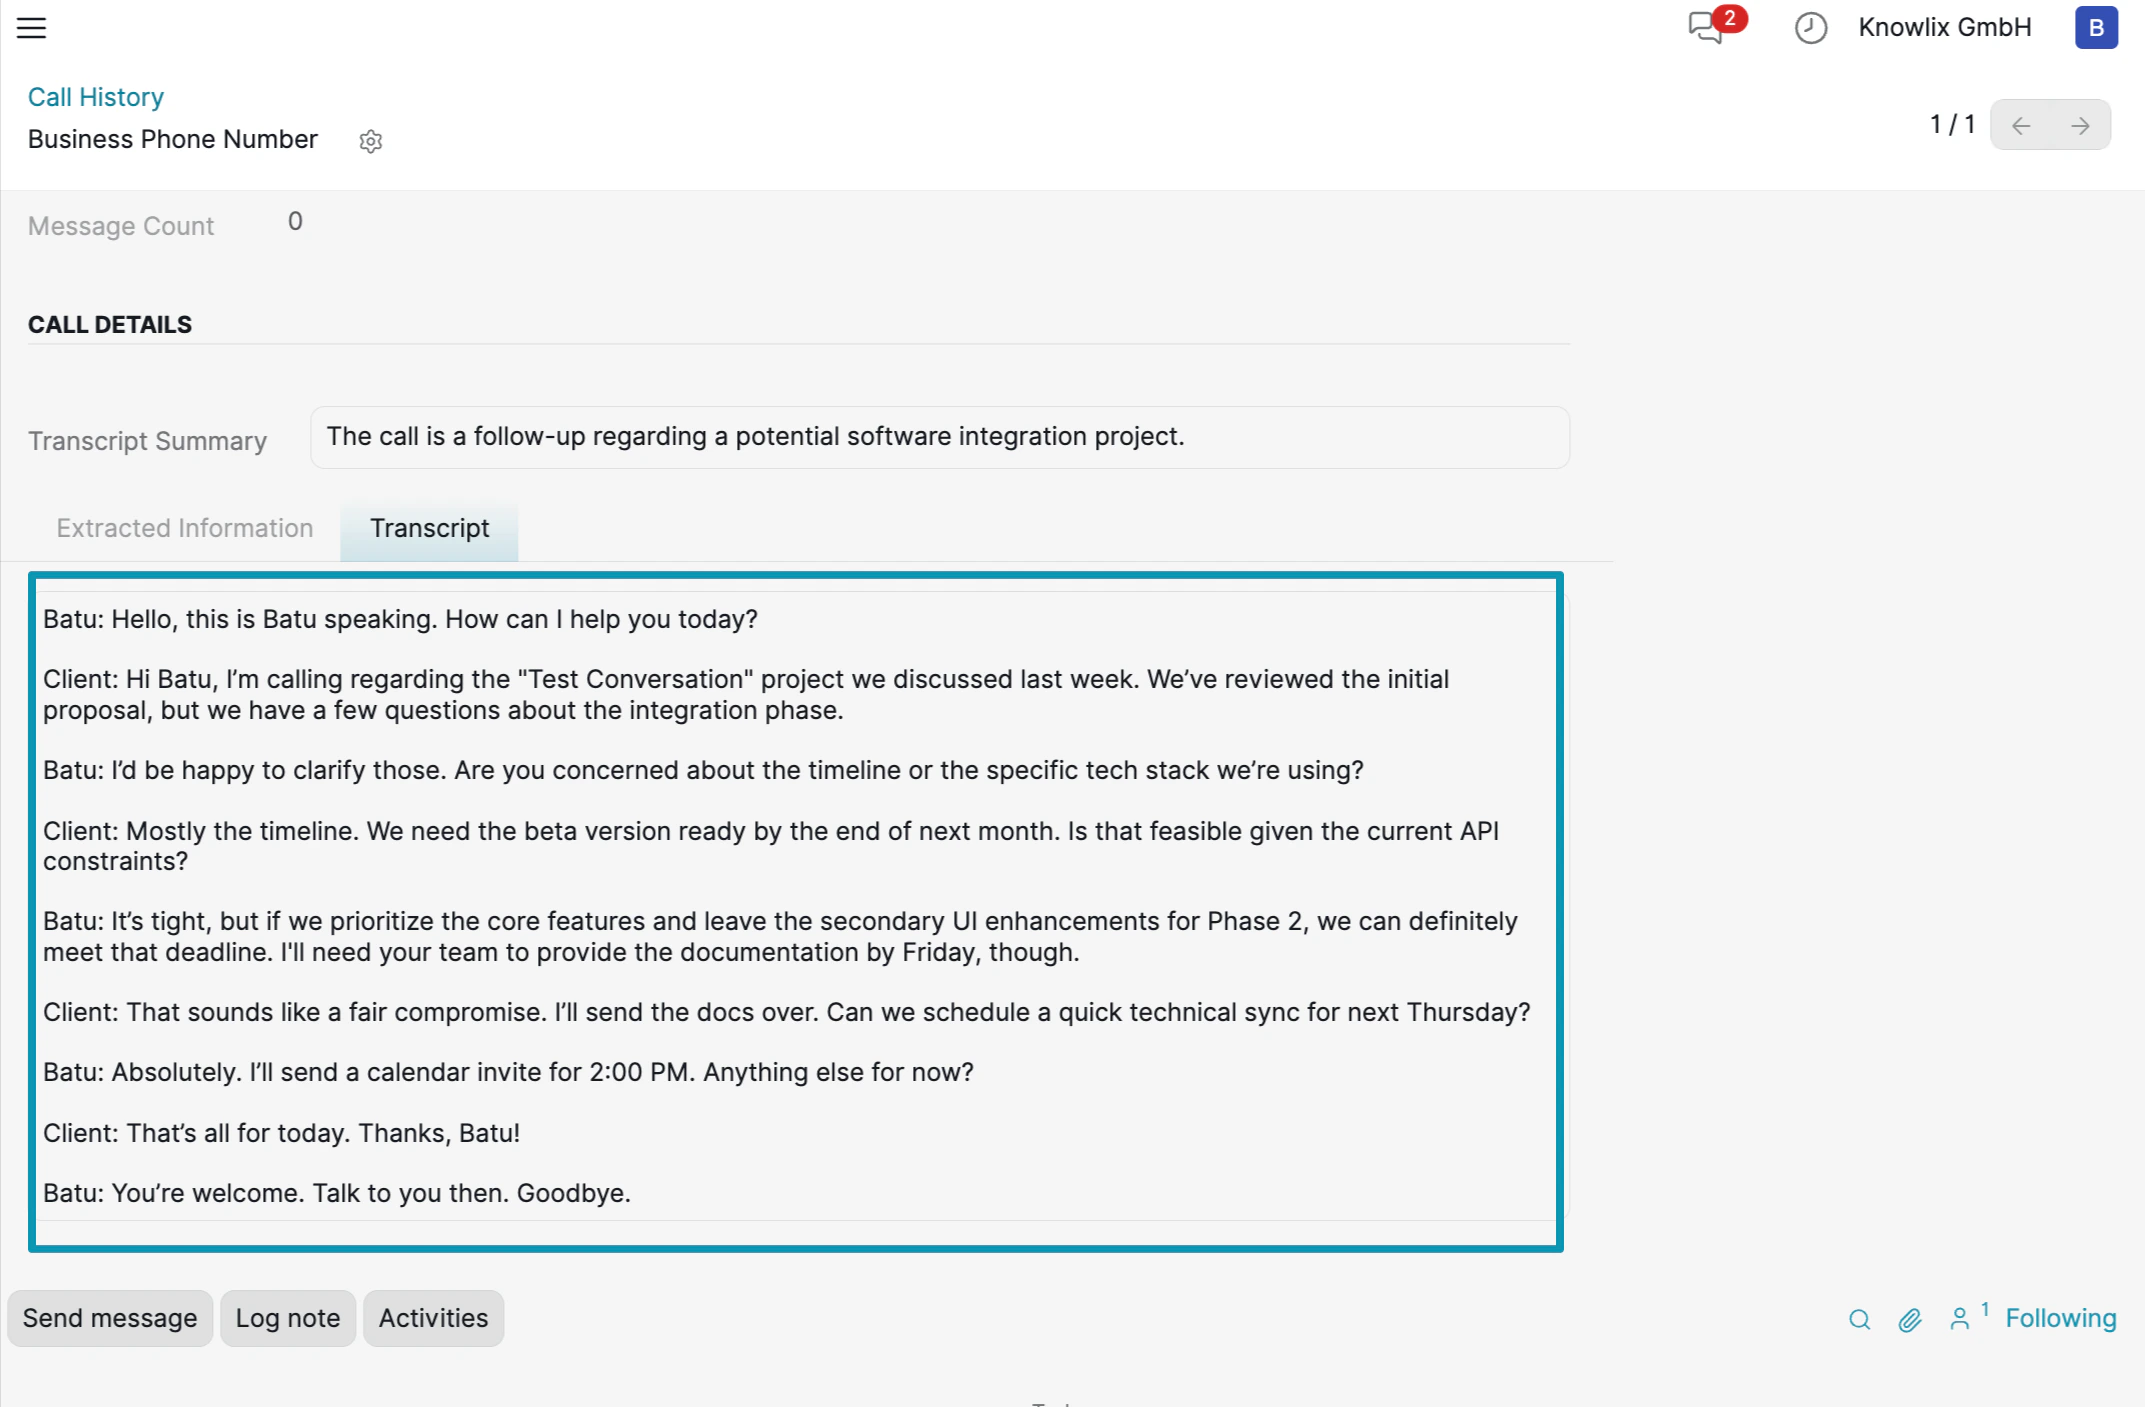 The call detail view includes:
* **Transcript Summary**: A one-line AI-generated summary of the call (e.g., *"The call is a follow-up regarding a potential software integration project."*).
* **Extracted Information**: Key data points the AI collected during the conversation.
* **Transcript**: The full conversation with speaker identification — each line is labeled with the speaker's name (e.g., "Batu:" and "Client:") so you can follow the dialogue.
At the bottom, use **Send message**, **Log note**, or **Activities** to take action based on the call — assign a follow-up task, notify a team member, or log notes for future reference.
***
## More Information
Voice over Internet Protocol calling system
AI assistant tips for the Productivity module
The call detail view includes:
* **Transcript Summary**: A one-line AI-generated summary of the call (e.g., *"The call is a follow-up regarding a potential software integration project."*).
* **Extracted Information**: Key data points the AI collected during the conversation.
* **Transcript**: The full conversation with speaker identification — each line is labeled with the speaker's name (e.g., "Batu:" and "Client:") so you can follow the dialogue.
At the bottom, use **Send message**, **Log note**, or **Activities** to take action based on the call — assign a follow-up task, notify a team member, or log notes for future reference.
***
## More Information
Voice over Internet Protocol calling system
AI assistant tips for the Productivity module