Setting Up a Phone Number
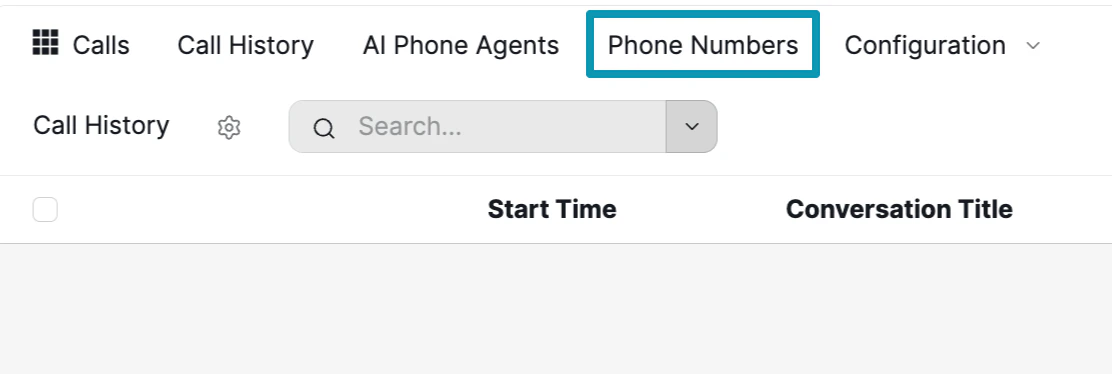
To start using AI Phone, you first need to connect a phone number via Twilio.Step 1: Navigate to Phone Numbers
Step 2: Configure Your Twilio Number
Click New to add a new phone number. Fill in the configuration form: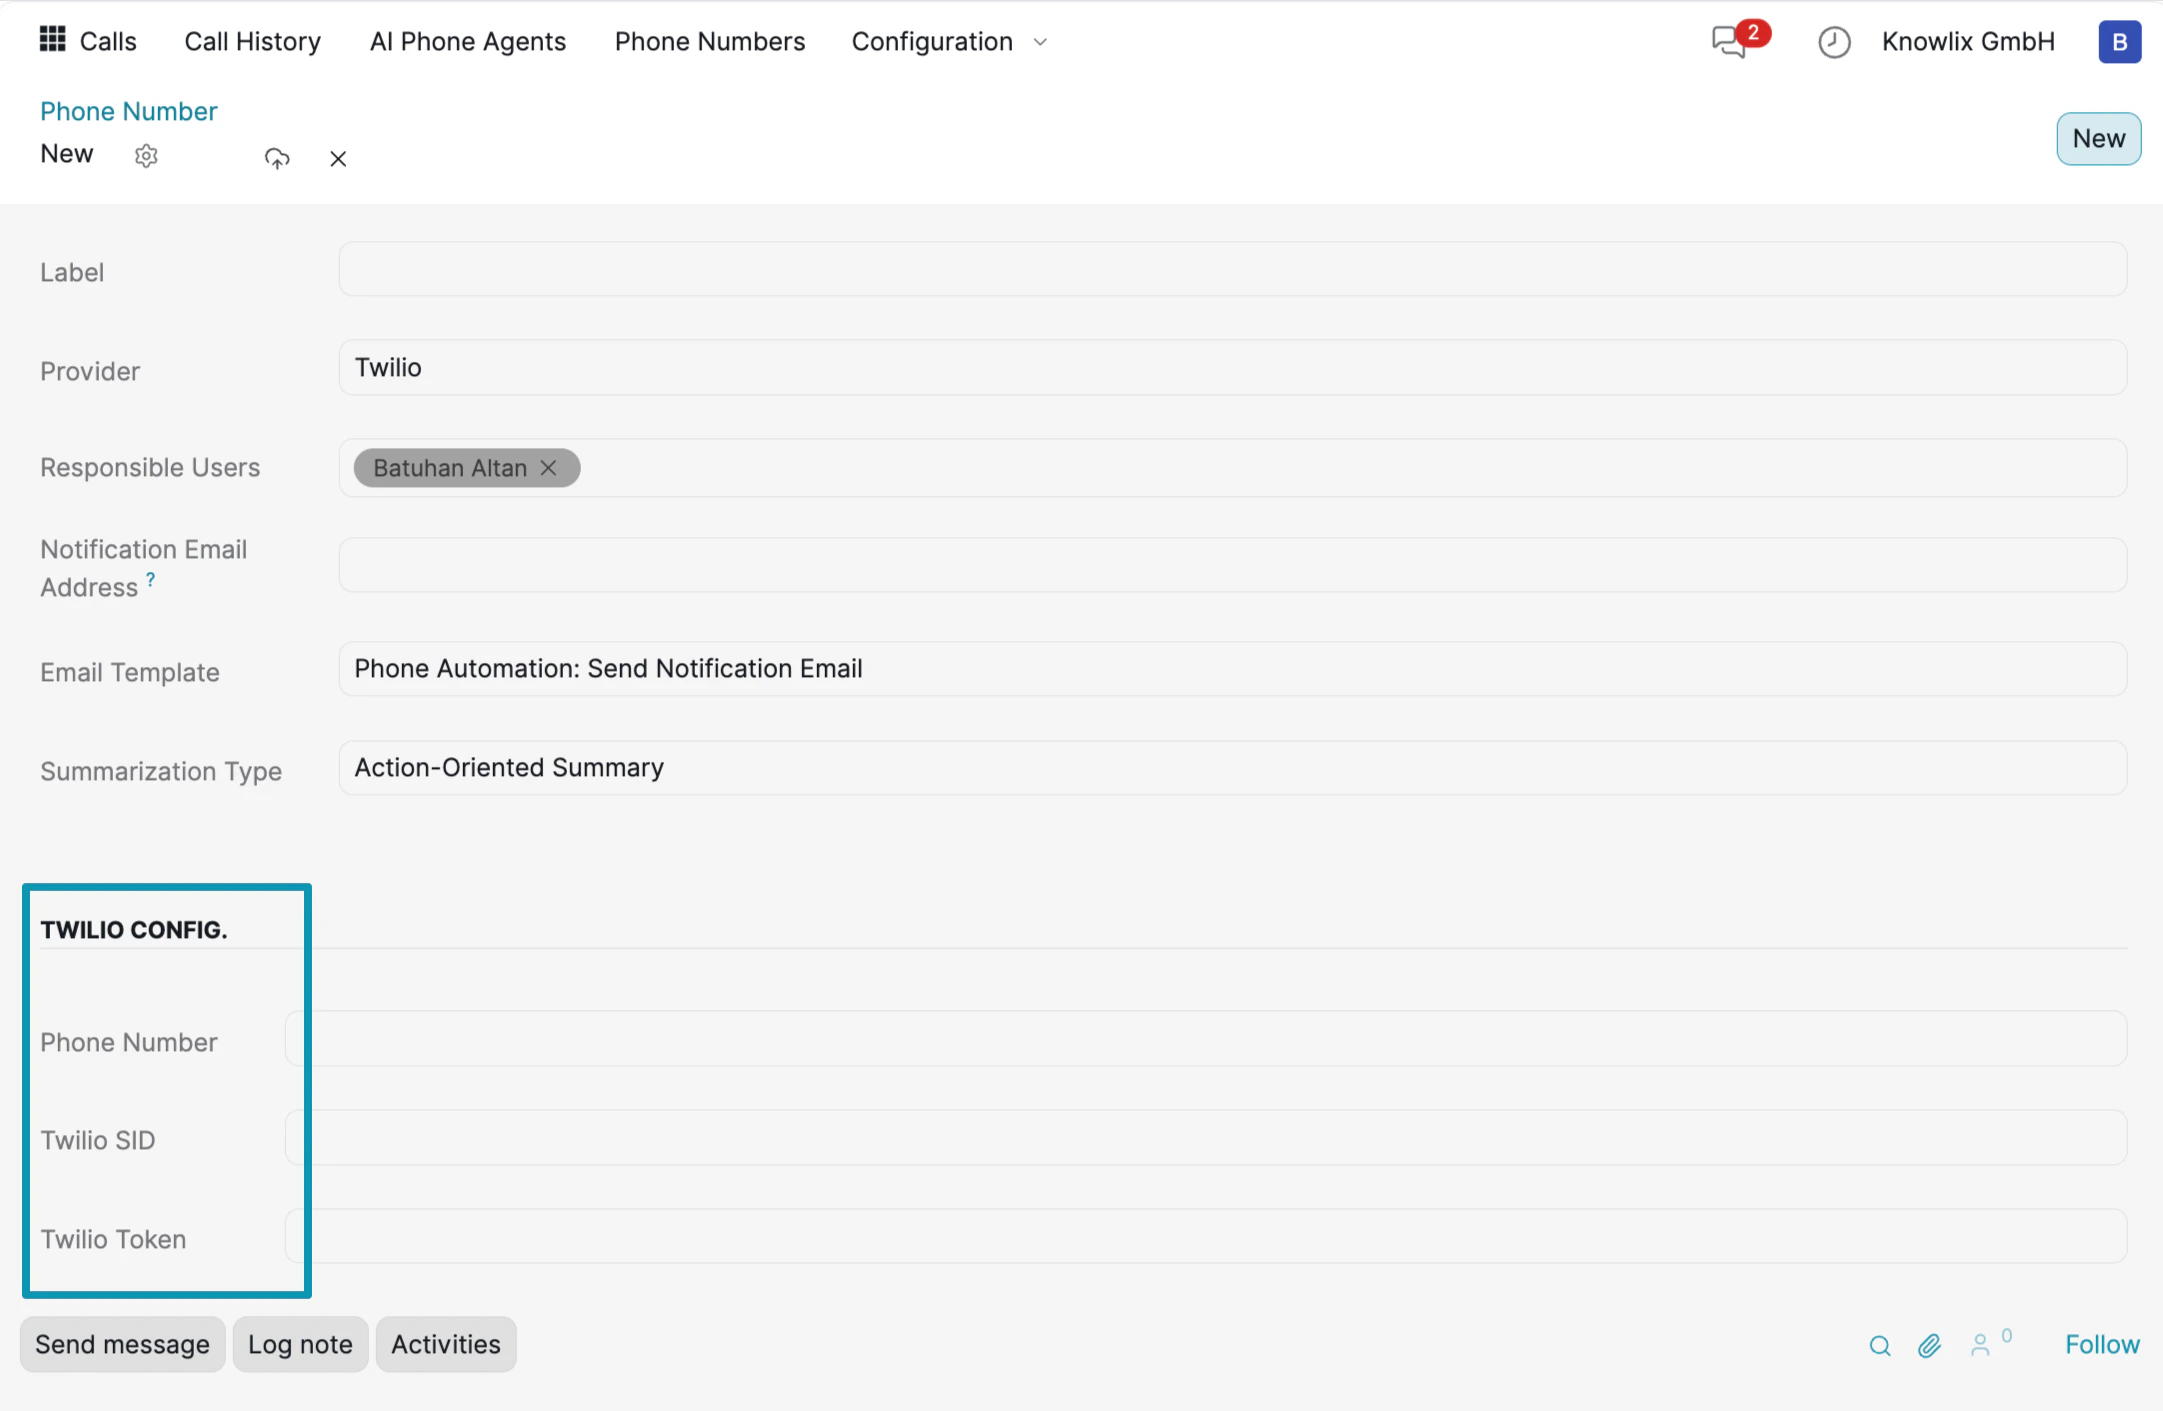
- Label: A friendly name for your phone number (e.g., “Batu”).
- Provider: Select Twilio as the telephony provider.
- Responsible Users: Assign team members who will manage this number.
- Notification Email Address: Set an email to receive call notifications.
- Email Template: Choose a template for automated email notifications (e.g., “Phone Automation: Send Notification Email”).
- Summarization Type: Select how call summaries are generated (e.g., “Action-Oriented Summary”).
- Phone Number: Your Twilio phone number.
- Twilio SID: Your account SID from the Twilio console.
- Twilio Token: Your auth token from the Twilio console.
You can find your Twilio SID and Auth Token in your Twilio console.
Step 3: Verify Your Number

Creating an AI Phone Agent
With your phone number configured, you can now create an AI agent that answers calls automatically. Navigate to AI Phone Agents in the top menu and click New.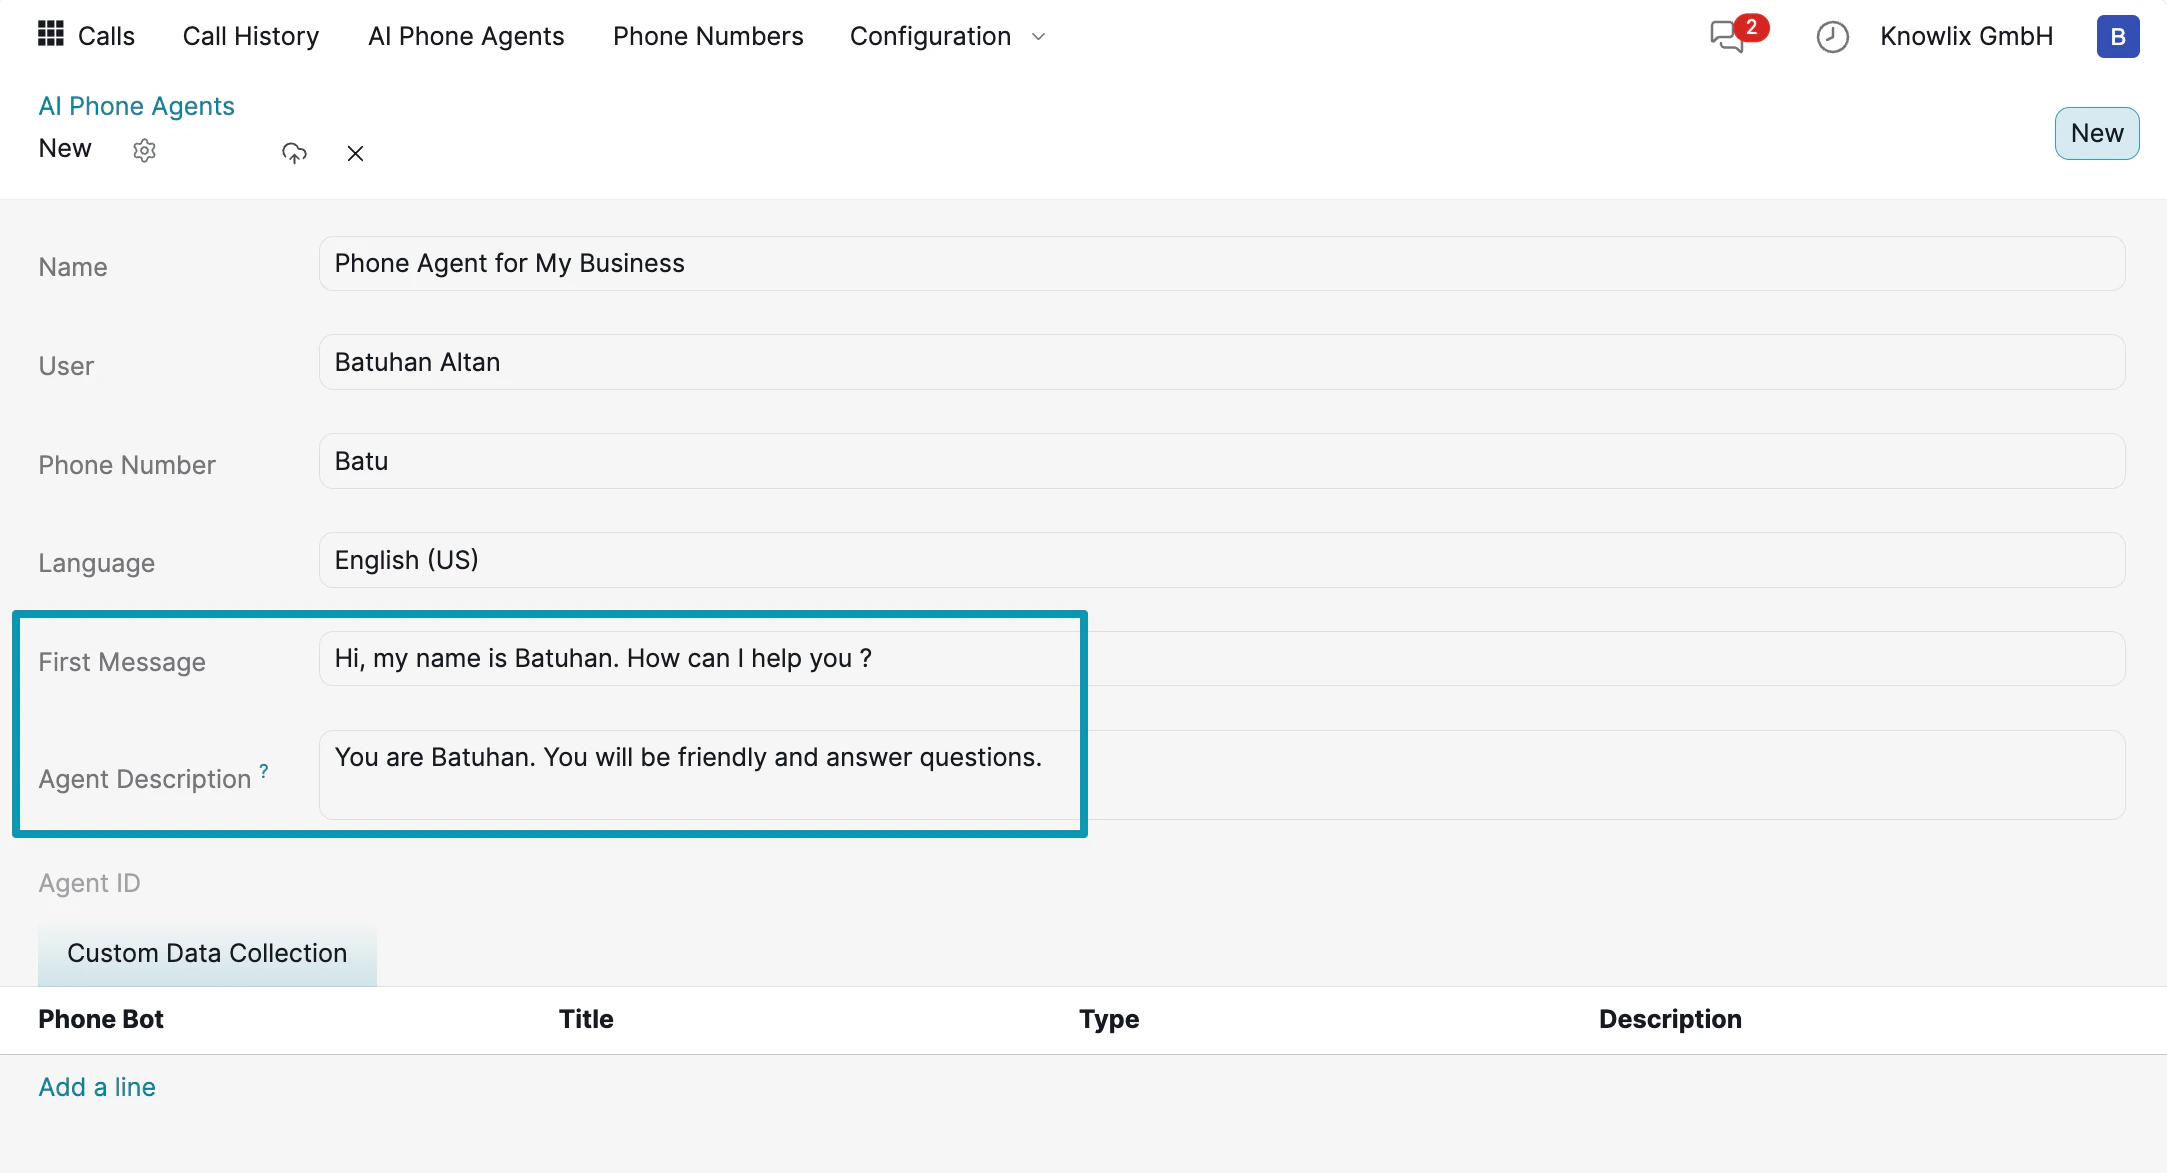
- Name: Give your agent a descriptive name (e.g., “Phone Agent for My Business”).
- User: The user account the agent operates under.
- Phone Number: Select the Twilio number you configured in the previous step.
- Language: Choose the agent’s language (e.g., English US).
- First Message: The greeting your agent says when answering a call (e.g., “Hi, my name is Batuhan. How can I help you?”).
- Agent Description: Instructions that define the agent’s personality and behavior (e.g., “You are Batuhan. You will be friendly and answer questions.”).
Managing Your Agents

Call Transcript & Summary
After each call, Knowlix automatically generates a transcript and summary. Click any call in the Call History to view the full details.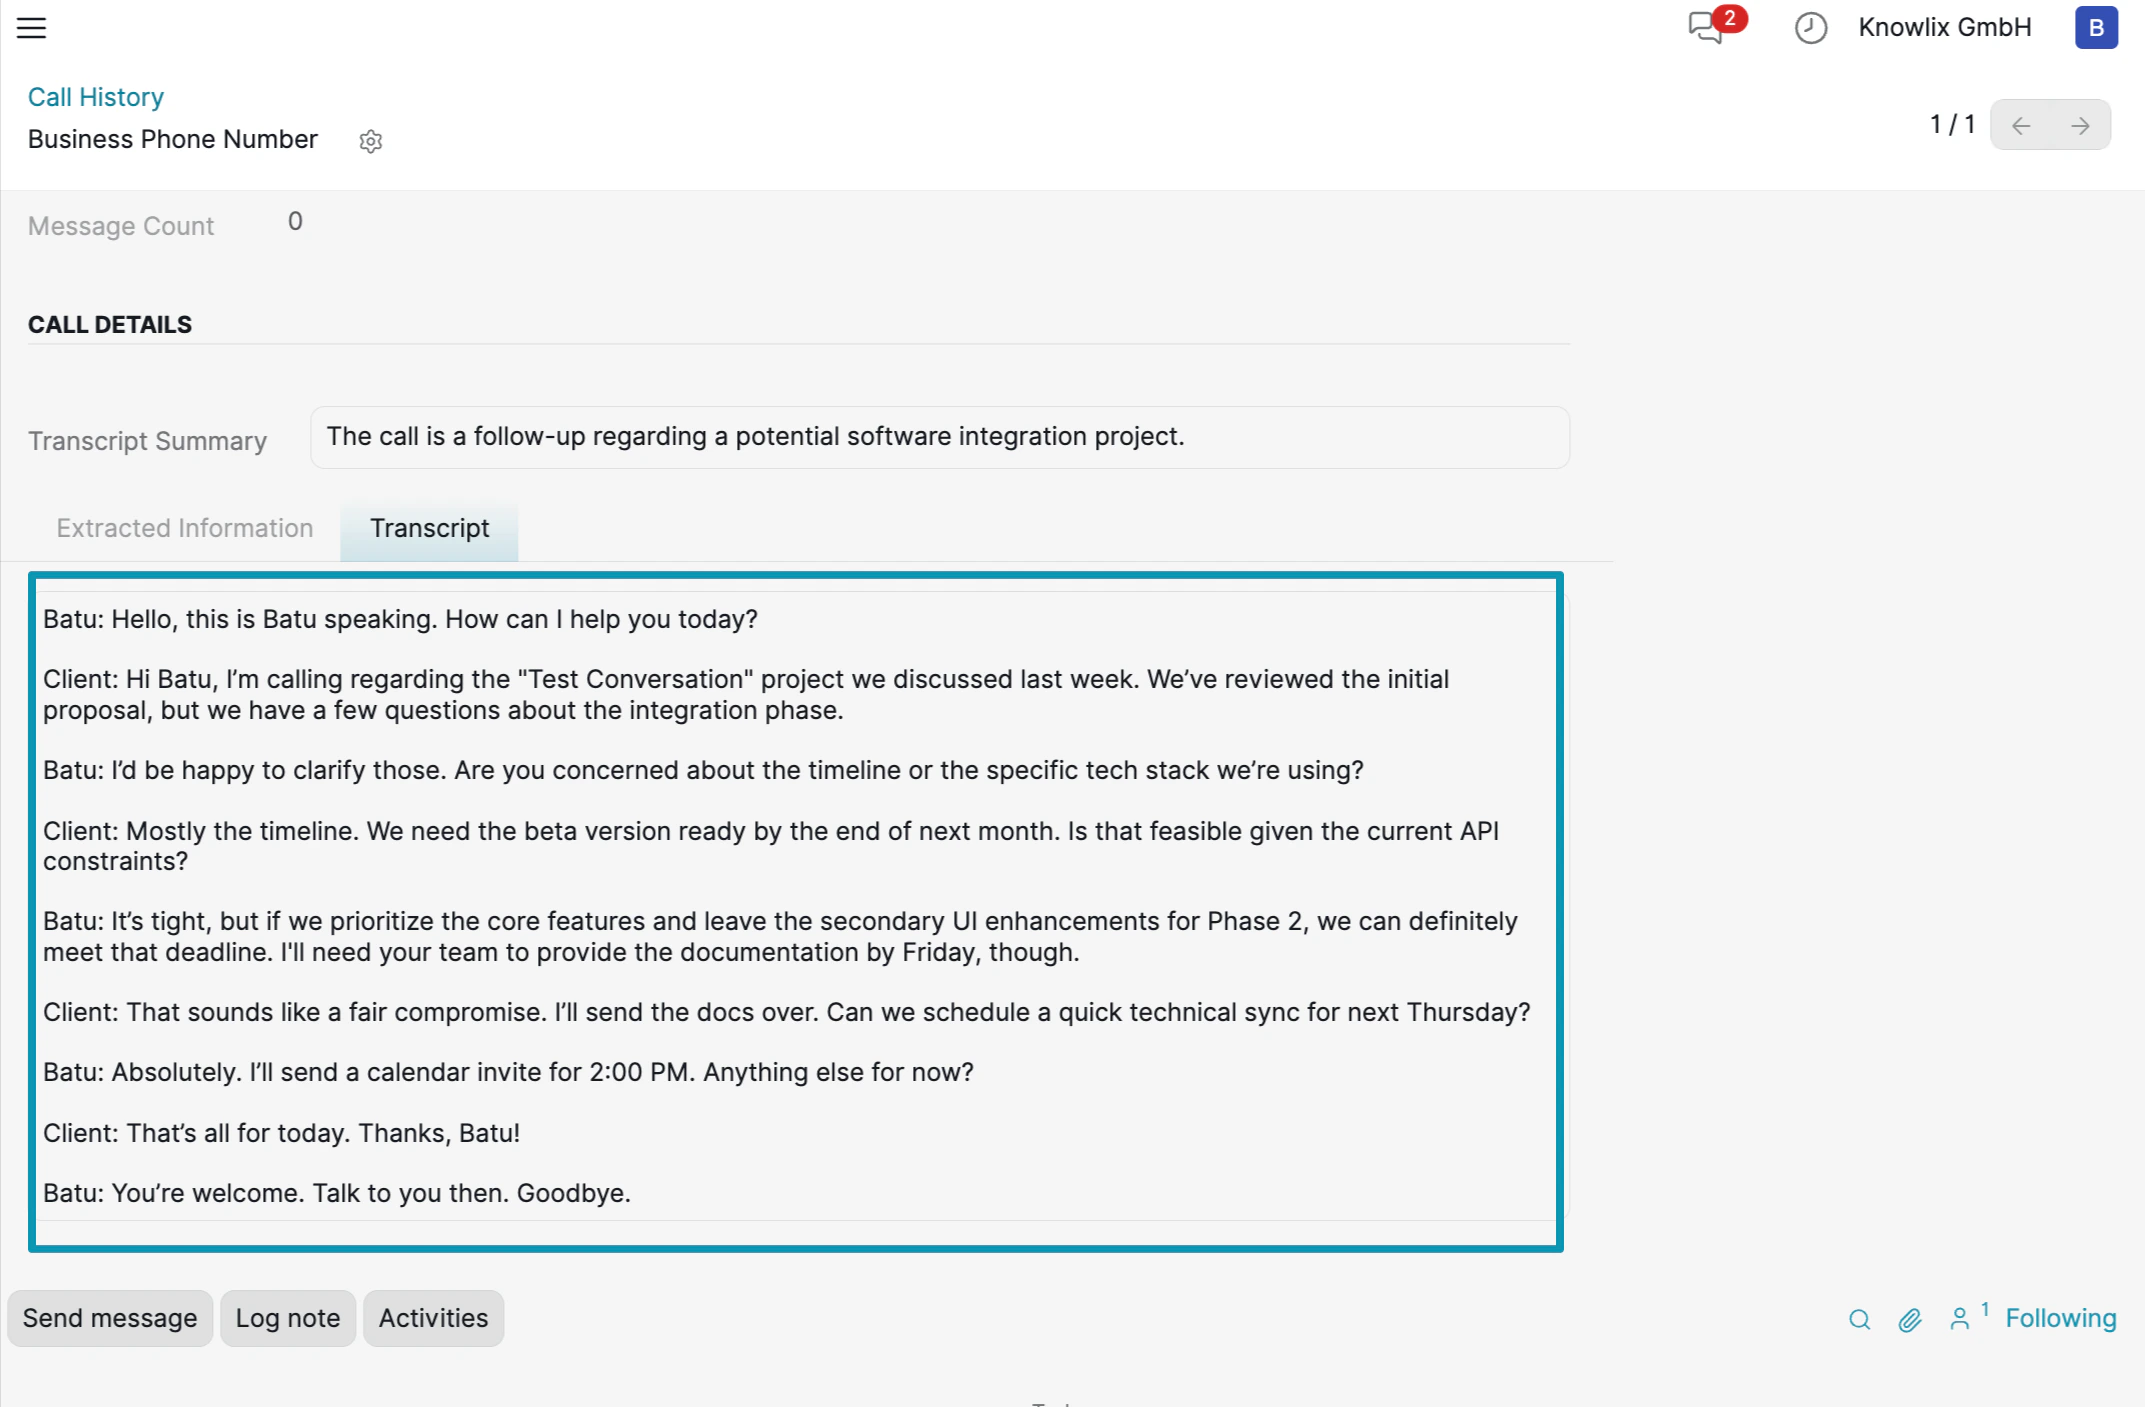
- Transcript Summary: A one-line AI-generated summary of the call (e.g., “The call is a follow-up regarding a potential software integration project.”).
- Extracted Information: Key data points the AI collected during the conversation.
- Transcript: The full conversation with speaker identification — each line is labeled with the speaker’s name (e.g., “Batu:” and “Client:”) so you can follow the dialogue.
More Information
VoIP
Voice over Internet Protocol calling system
Pro Tips: Productivity
AI assistant tips for the Productivity module