- Fast Checkout: Process transactions in seconds
- Offline Mode: Continue selling without internet connection
- Inventory Sync: Real-time stock updates across all locations
- Multiple Payment Methods: Cash, card, mobile wallets, contactless
- Customer Management: Track purchase history and loyalty programs
- Sales Analytics: AI-powered insights into patterns and trends
Setting Up Your POS
Configure hardware and software for optimal performance. Hardware Requirements:- Tablet or Computer: iPad, Android tablet, or Windows PC
- Receipt Printer: Thermal printer (Star Micronics, Epson TM-series)
- Barcode Scanner: Handheld or presentation scanner (optional)
- Card Reader: Stripe Terminal, Square Reader, or Clover
- Navigate to Settings → POS → Download POS Application
- Choose platform and sign in
- Name the terminal (e.g., “Register 1”)
Choosing Your Store Type
When you first set up your POS, you’ll be prompted to choose a store type with sample products or create your own from scratch.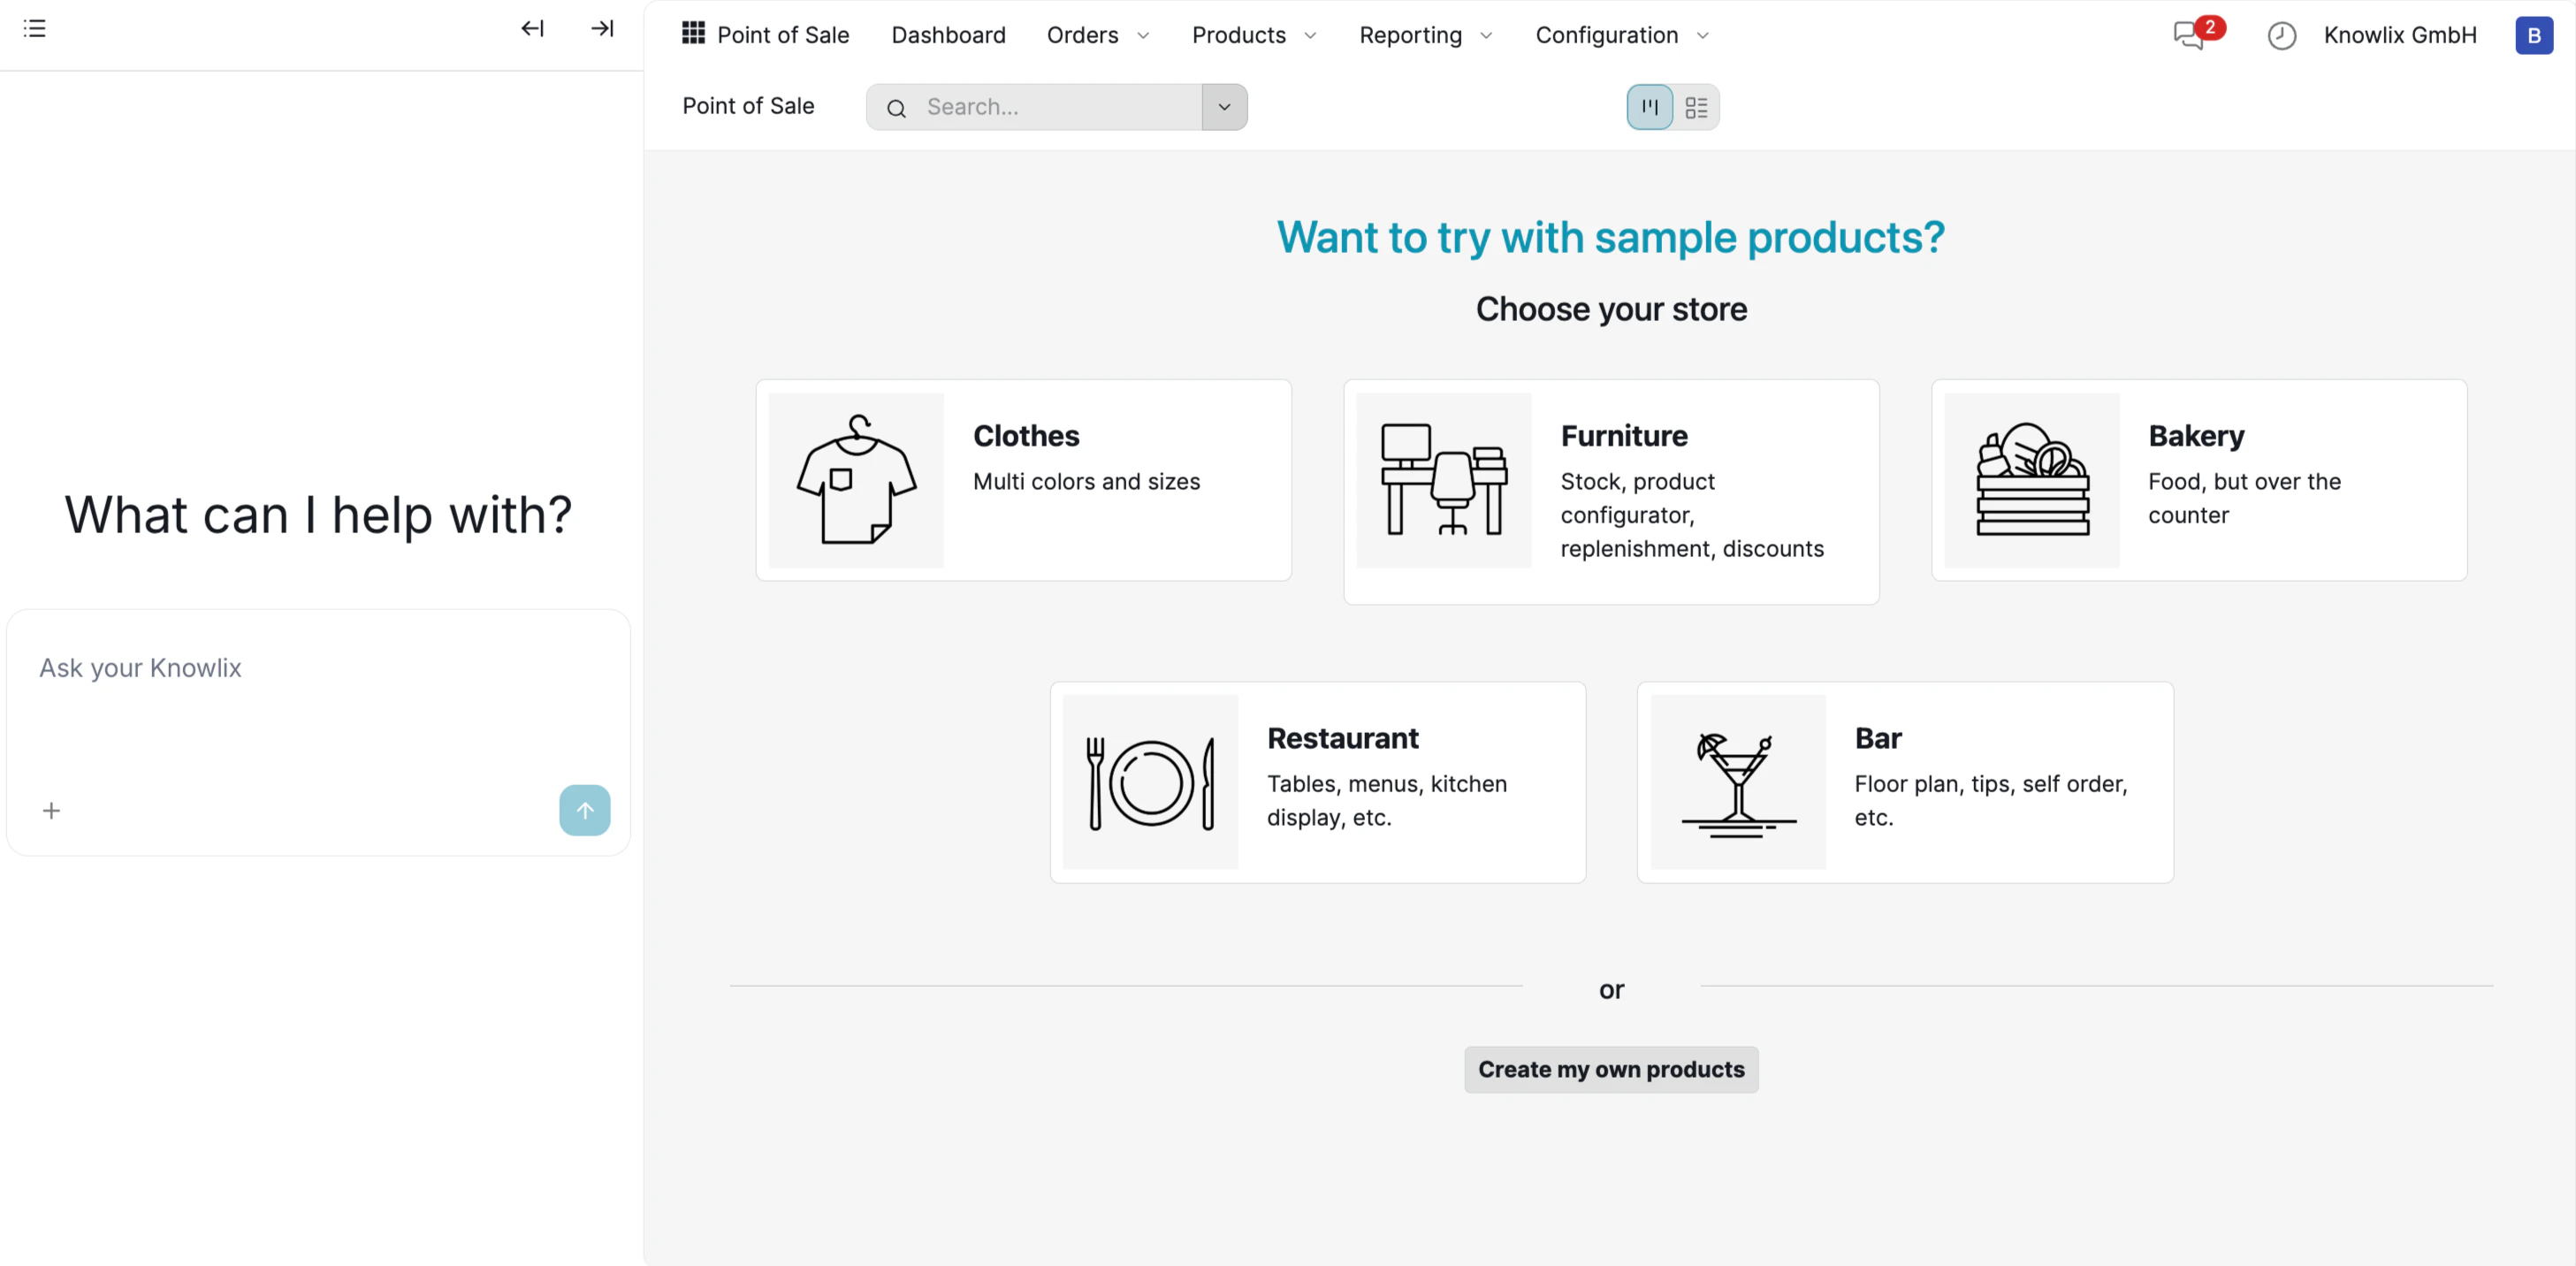
- Clothes: Multi colors and sizes with variants
- Furniture: Stock management, product configurator, replenishment
- Bakery: Food items, over-the-counter service
- Restaurant: Tables, menus, kitchen display integration
- Bar: Floor plan, tips, self-order capabilities
- Connect payment processor: Stripe, Square, PayPal
- Pair card reader via Bluetooth
- Test swipe, chip, and tap payments
Table Management (Restaurant Mode)
For restaurants and bars, AI POS includes a visual floor plan to manage tables and seating.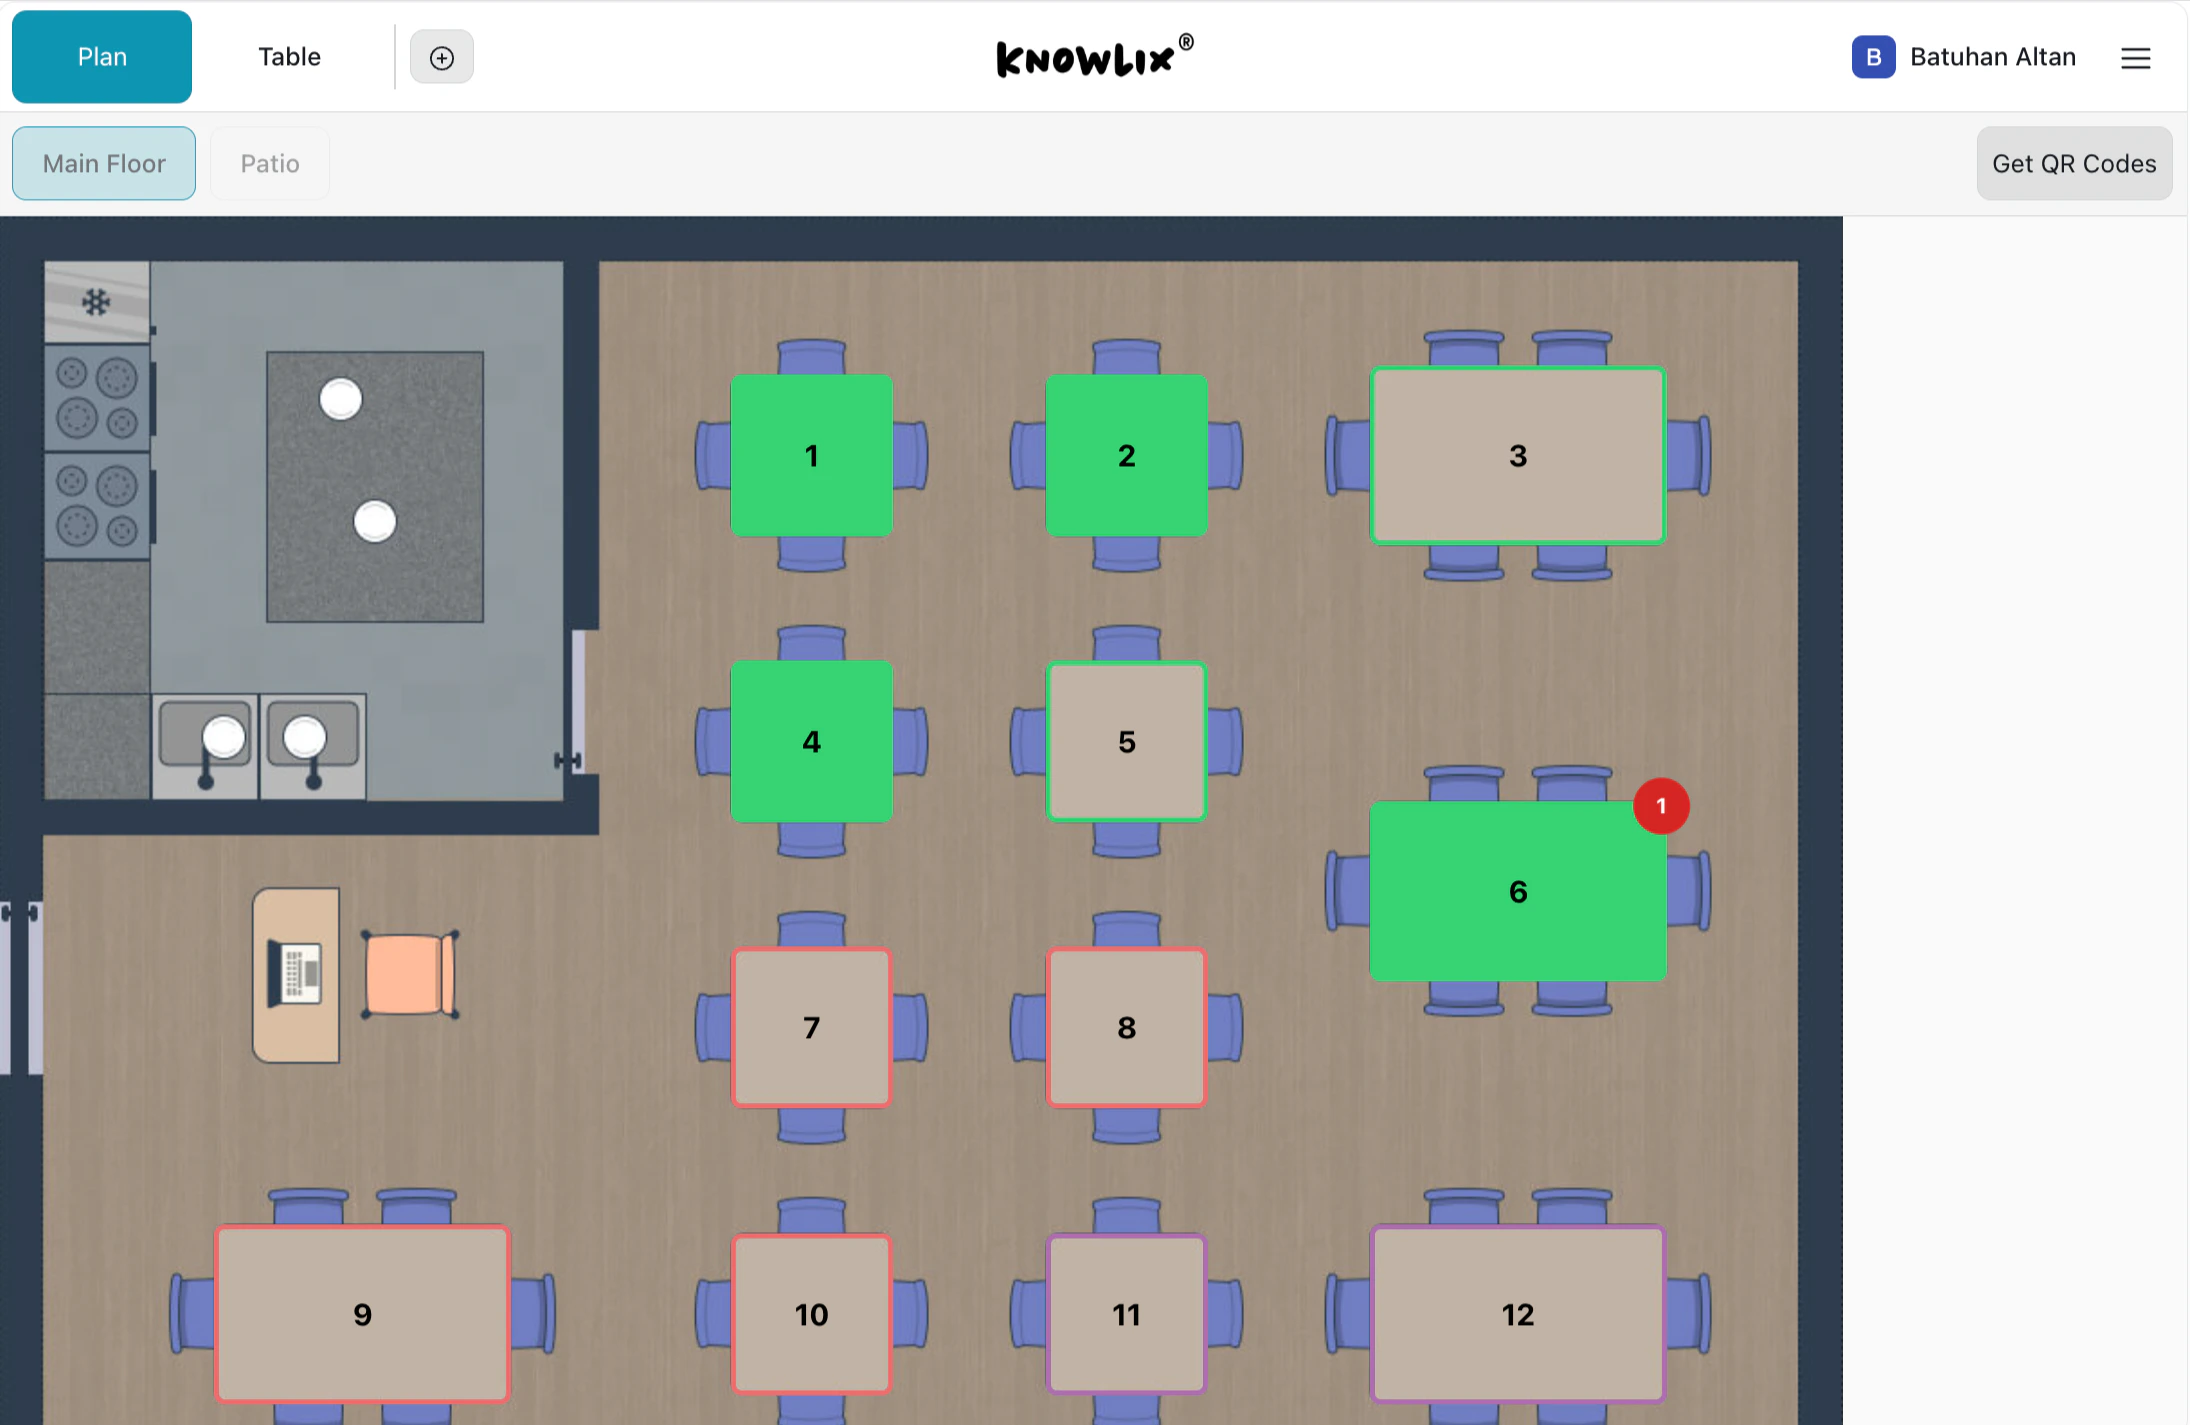
- Green tables: Currently occupied with active orders
- Grey tables: Available for seating
- Red border: Requires attention (e.g., waiting for payment)
- Numbered badges: Table identifiers for easy reference
- Switch between Plan (visual) and Table (list) views
- Manage multiple floors (Main Floor, Patio, etc.)
- Click Get QR Codes to generate table-specific ordering codes
- Drag and drop to rearrange tables in edit mode
Product Management and Checkout
Set up products and process sales efficiently. Adding Products:- Click Products → Add Product
- Enter name, price, SKU, category, tax
- Bulk import via CSV
- Create categories (Apparel, Electronics, Food)
- Categories appear as tiles in POS
- Assign colors for recognition
- Add barcode (UPC, EAN, SKU) to products
- Generate custom barcodes
- Scan to add items to cart
Processing Sales
The main POS interface provides a fast, visual way to build orders.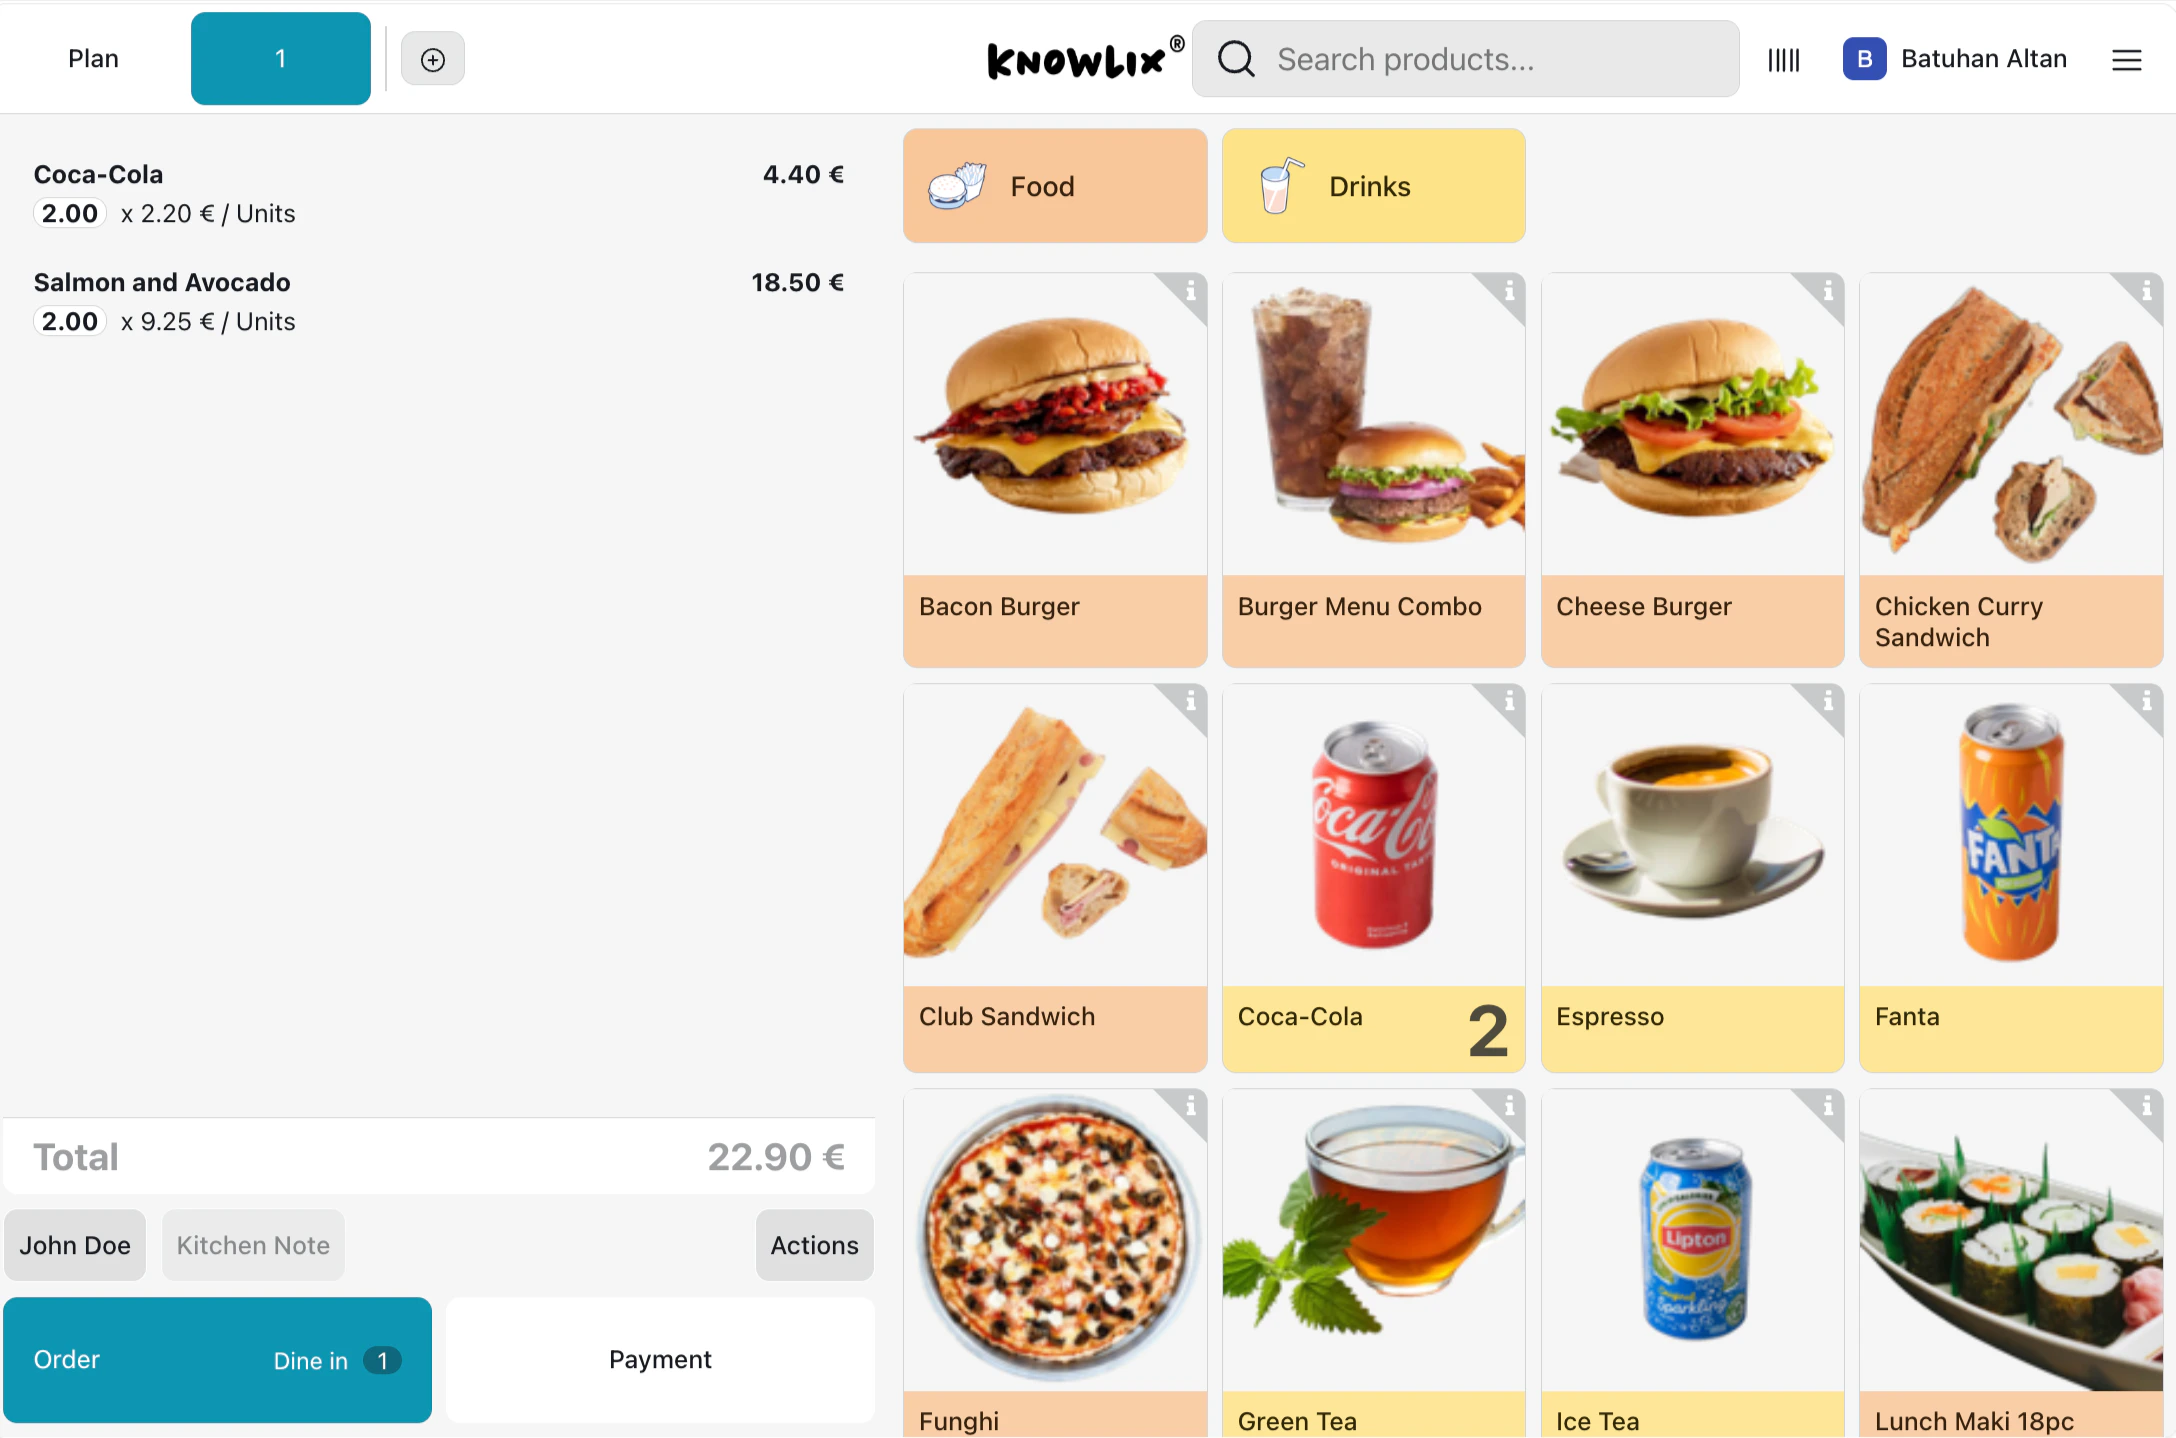
- Left panel: Current order with items, quantities, and running total
- Top tabs: Filter by category (Food, Drinks, etc.)
- Product grid: Visual tiles with images and prices
- Search bar: Find products quickly by name
- Tap product tiles to add items to the cart
- Use +/- buttons to adjust quantities
- Assign a customer name for the order
- Select Order, Dine in, or go directly to Payment
Product Customization
Many products support attribute selection for customization.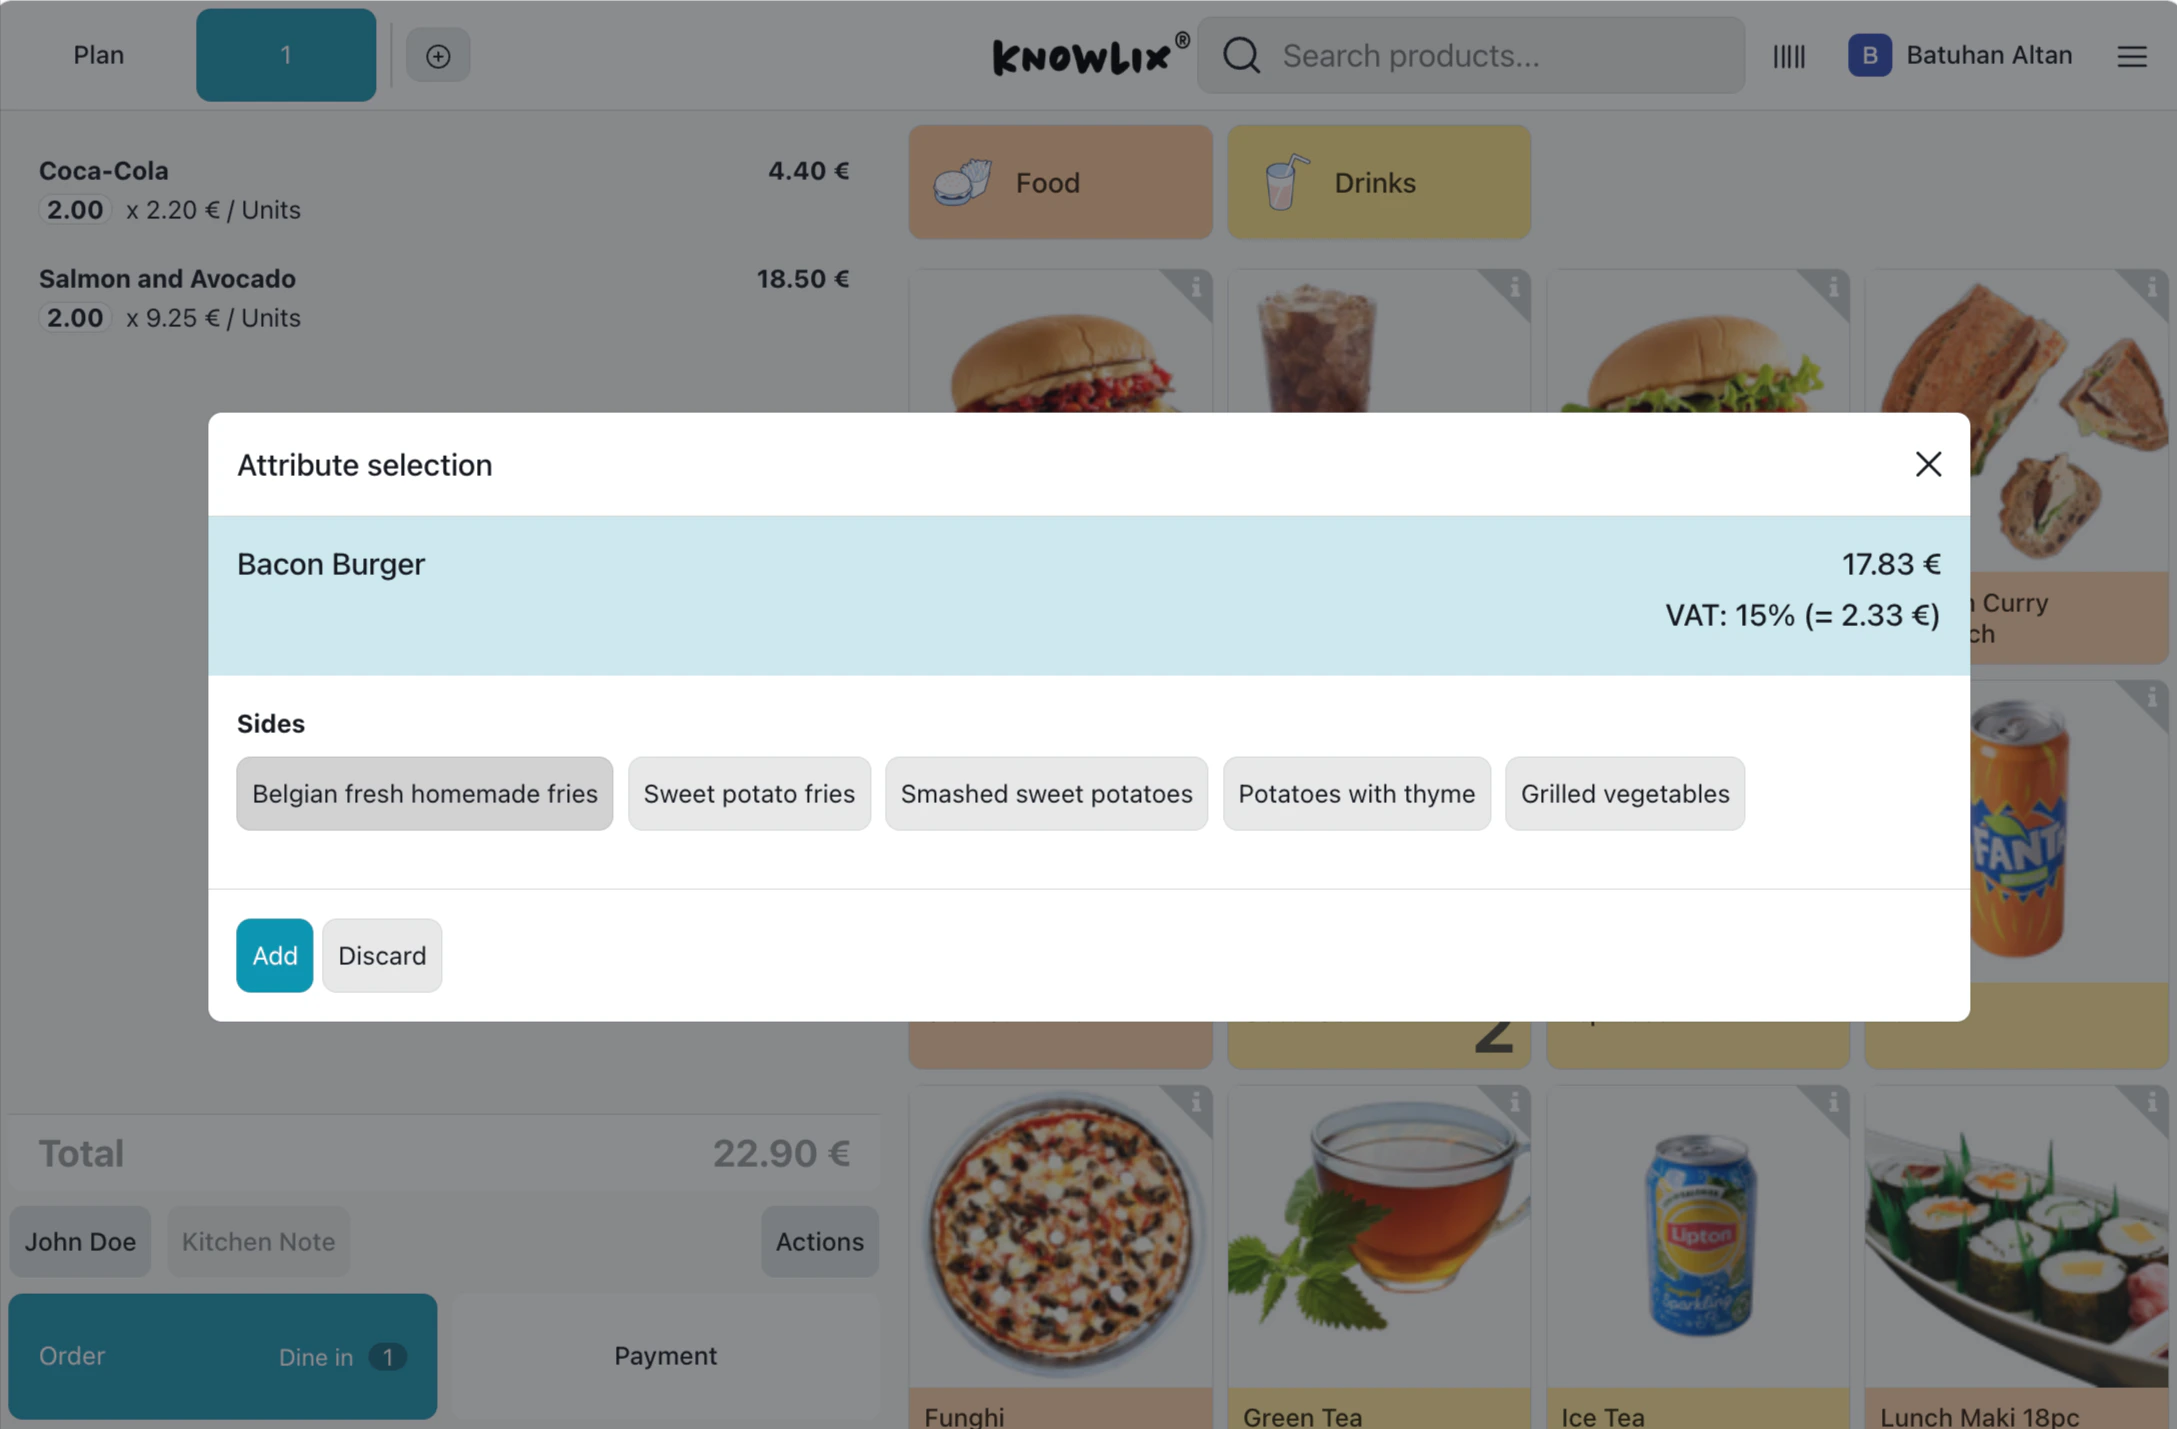
- View the base price and VAT breakdown
- Select from available options (e.g., Belgian fries, Sweet potato fries)
- Click Add to confirm or Discard to cancel
Payment Processing
When ready to checkout, tap Payment to open the payment screen.
- Cash: Use the numeric keypad to enter amount received; system calculates change
- Card: Customer inserts, taps, or swipes on connected reader
- Customer Account: Charge to a customer’s store credit or tab
- Total amount displayed prominently (e.g., 34.40€)
- Remaining shows outstanding balance
- Quick-add buttons (+10, +20, +50) for cash payments
- Split payments across multiple methods
- Click Validate to complete the transaction
- Digital: Email or SMS
- Printed: Automatic with branded template
Managing Your POS
Access backend management options to configure and monitor your point of sale.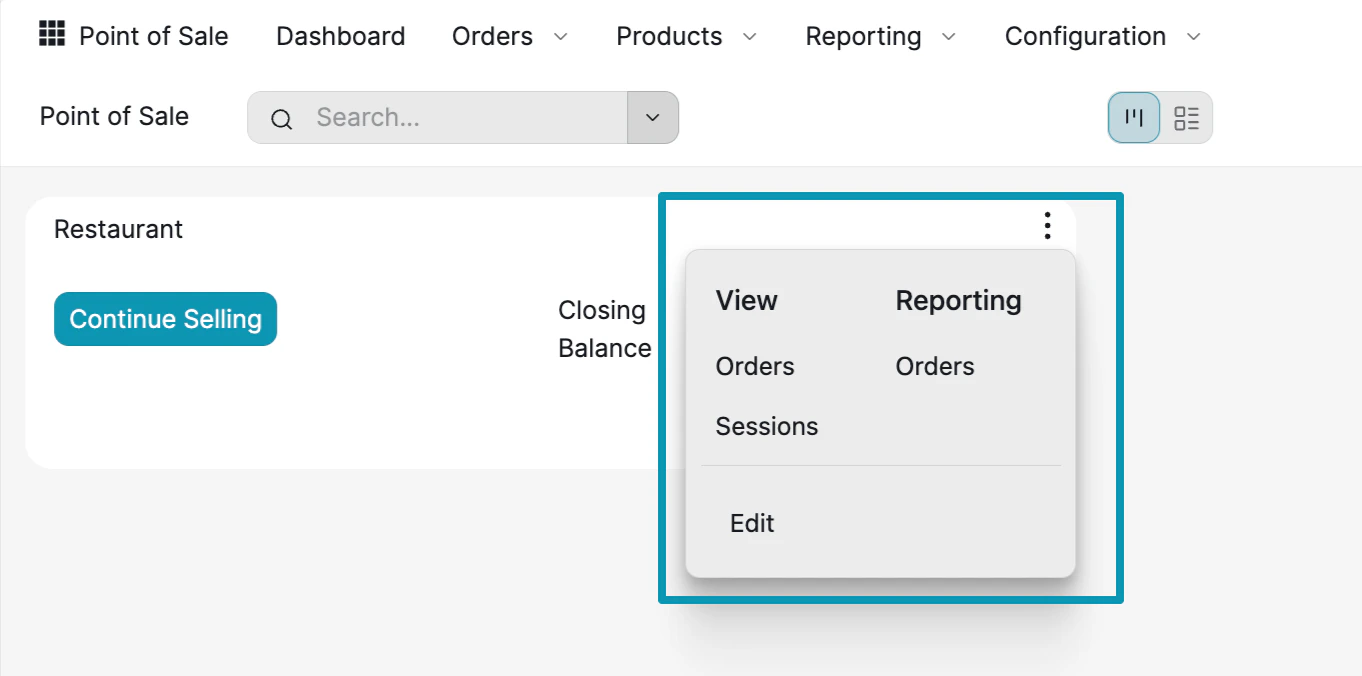
- Orders: See all orders processed through this POS
- Sessions: View cashier sessions with opening/closing balances
- Orders: Detailed order analytics and reports
- Configure POS settings, payment methods, and receipt templates
Customer Management and Analytics
Track customers and gain insights into your business performance. Customer Lookup:- Click Customer in cart
- Search by name, phone, email
- View purchase history and loyalty points
- Click New Customer during checkout
- Customer syncs to CRM automatically
- Customers earn points on purchases
- Redeem points for discounts
- AI suggests personalized offers
- Inventory decreases when sale completes
- Updates across all terminals and e-commerce
- Low stock warnings
- Works in offline mode (syncs when reconnected)
Order History
View and manage all orders from the Orders screen.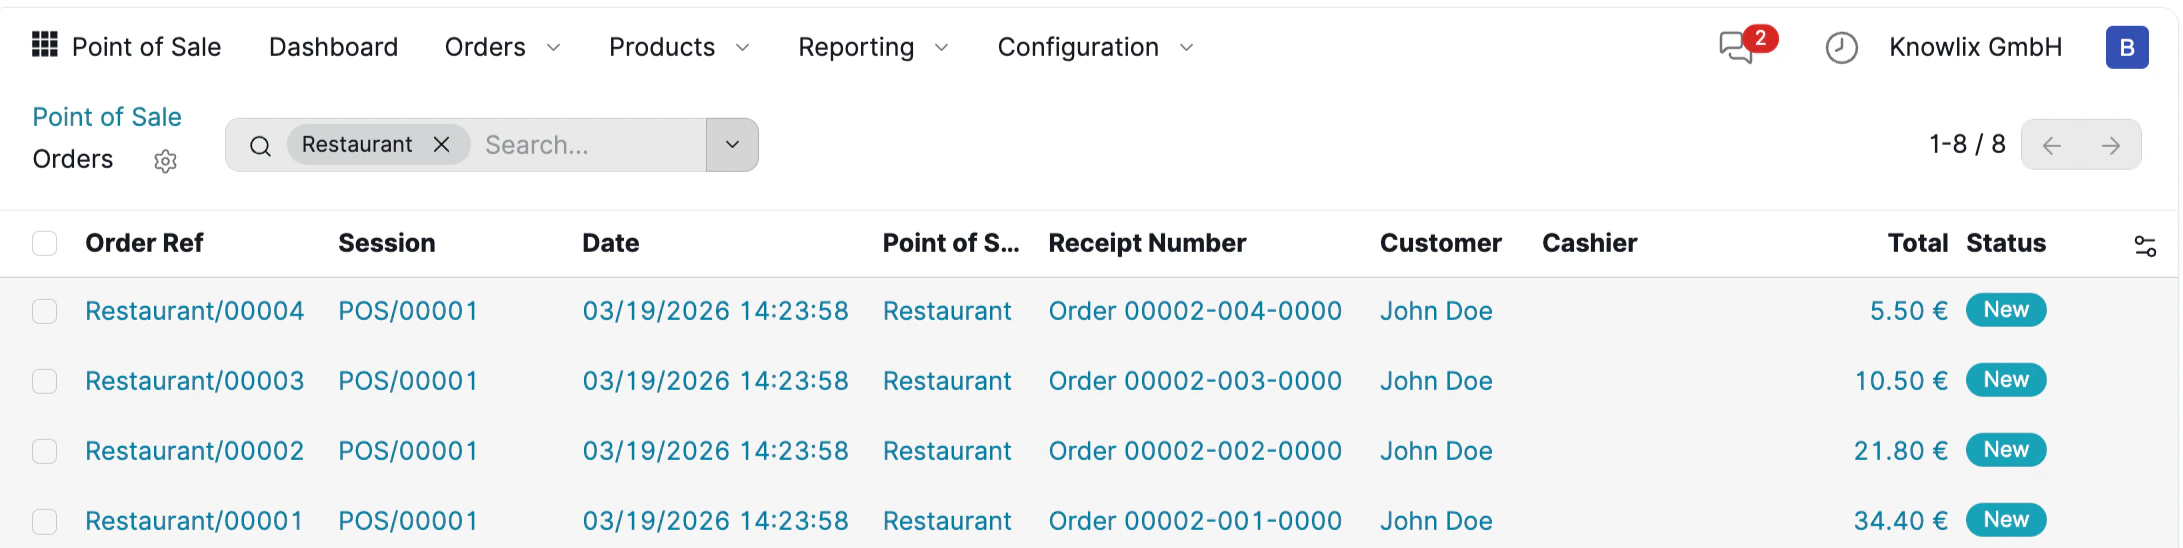
- Order Ref: Unique identifier (e.g., Restaurant/00004)
- Session: POS session ID
- Date: Transaction timestamp
- Point of Sale: Which terminal processed the order
- Receipt Number: For customer reference
- Customer & Cashier: Who was involved
- Total: Order amount
- Status: Current state (New, Paid, etc.)
Sales Analytics
AI-powered analytics help you understand sales patterns and optimize operations.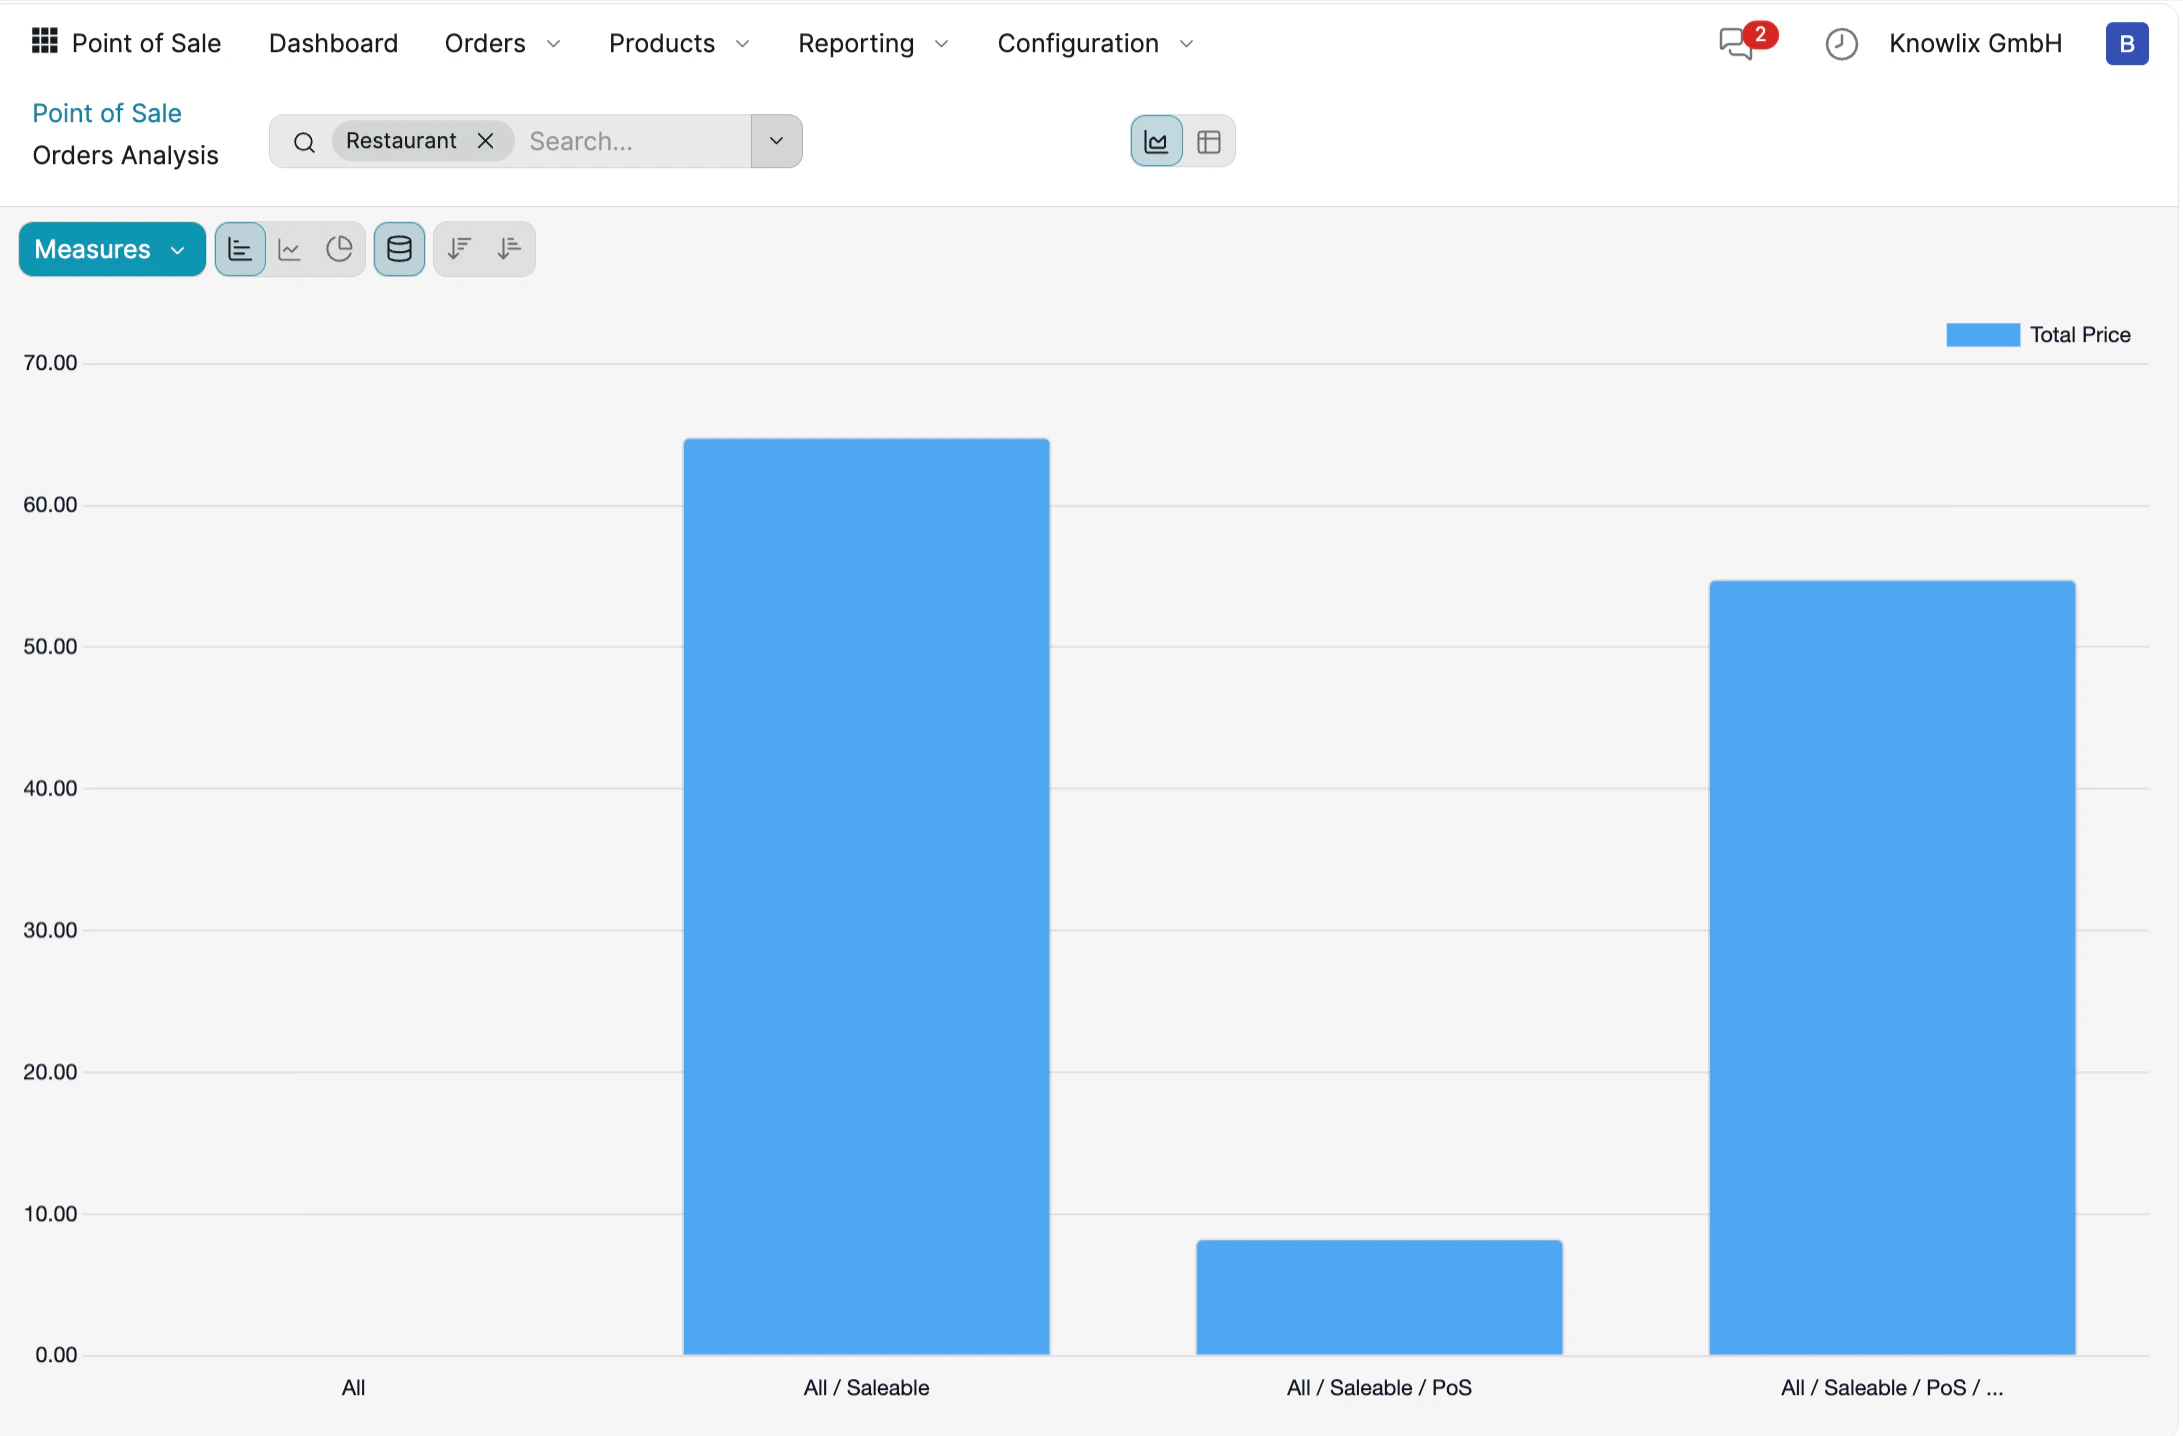
- Visual charts: Bar graphs showing sales by category
- Measures dropdown: Switch between Total Price, Quantity, Count
- Filters: Filter by POS location, date range, product category
- Export options: Download reports for further analysis
- Today’s revenue, transactions, average value
- Top-selling products
- Sales trends and hourly patterns
- AI predicts busy periods and suggests optimal pricing
More Information
Point of Sale
Retail sales and payment processing
Pro Tips: Sales
AI assistant tips for the Sales module