Creating Quotations with AI
Instead of navigating complex menus, simply describe what you need in the AI chat panel. The assistant creates customers, products, and quotations automatically.Try typing: “Please create a sales quotation for Jack Smith. I sold new brand iPhone 16 for 2000€”
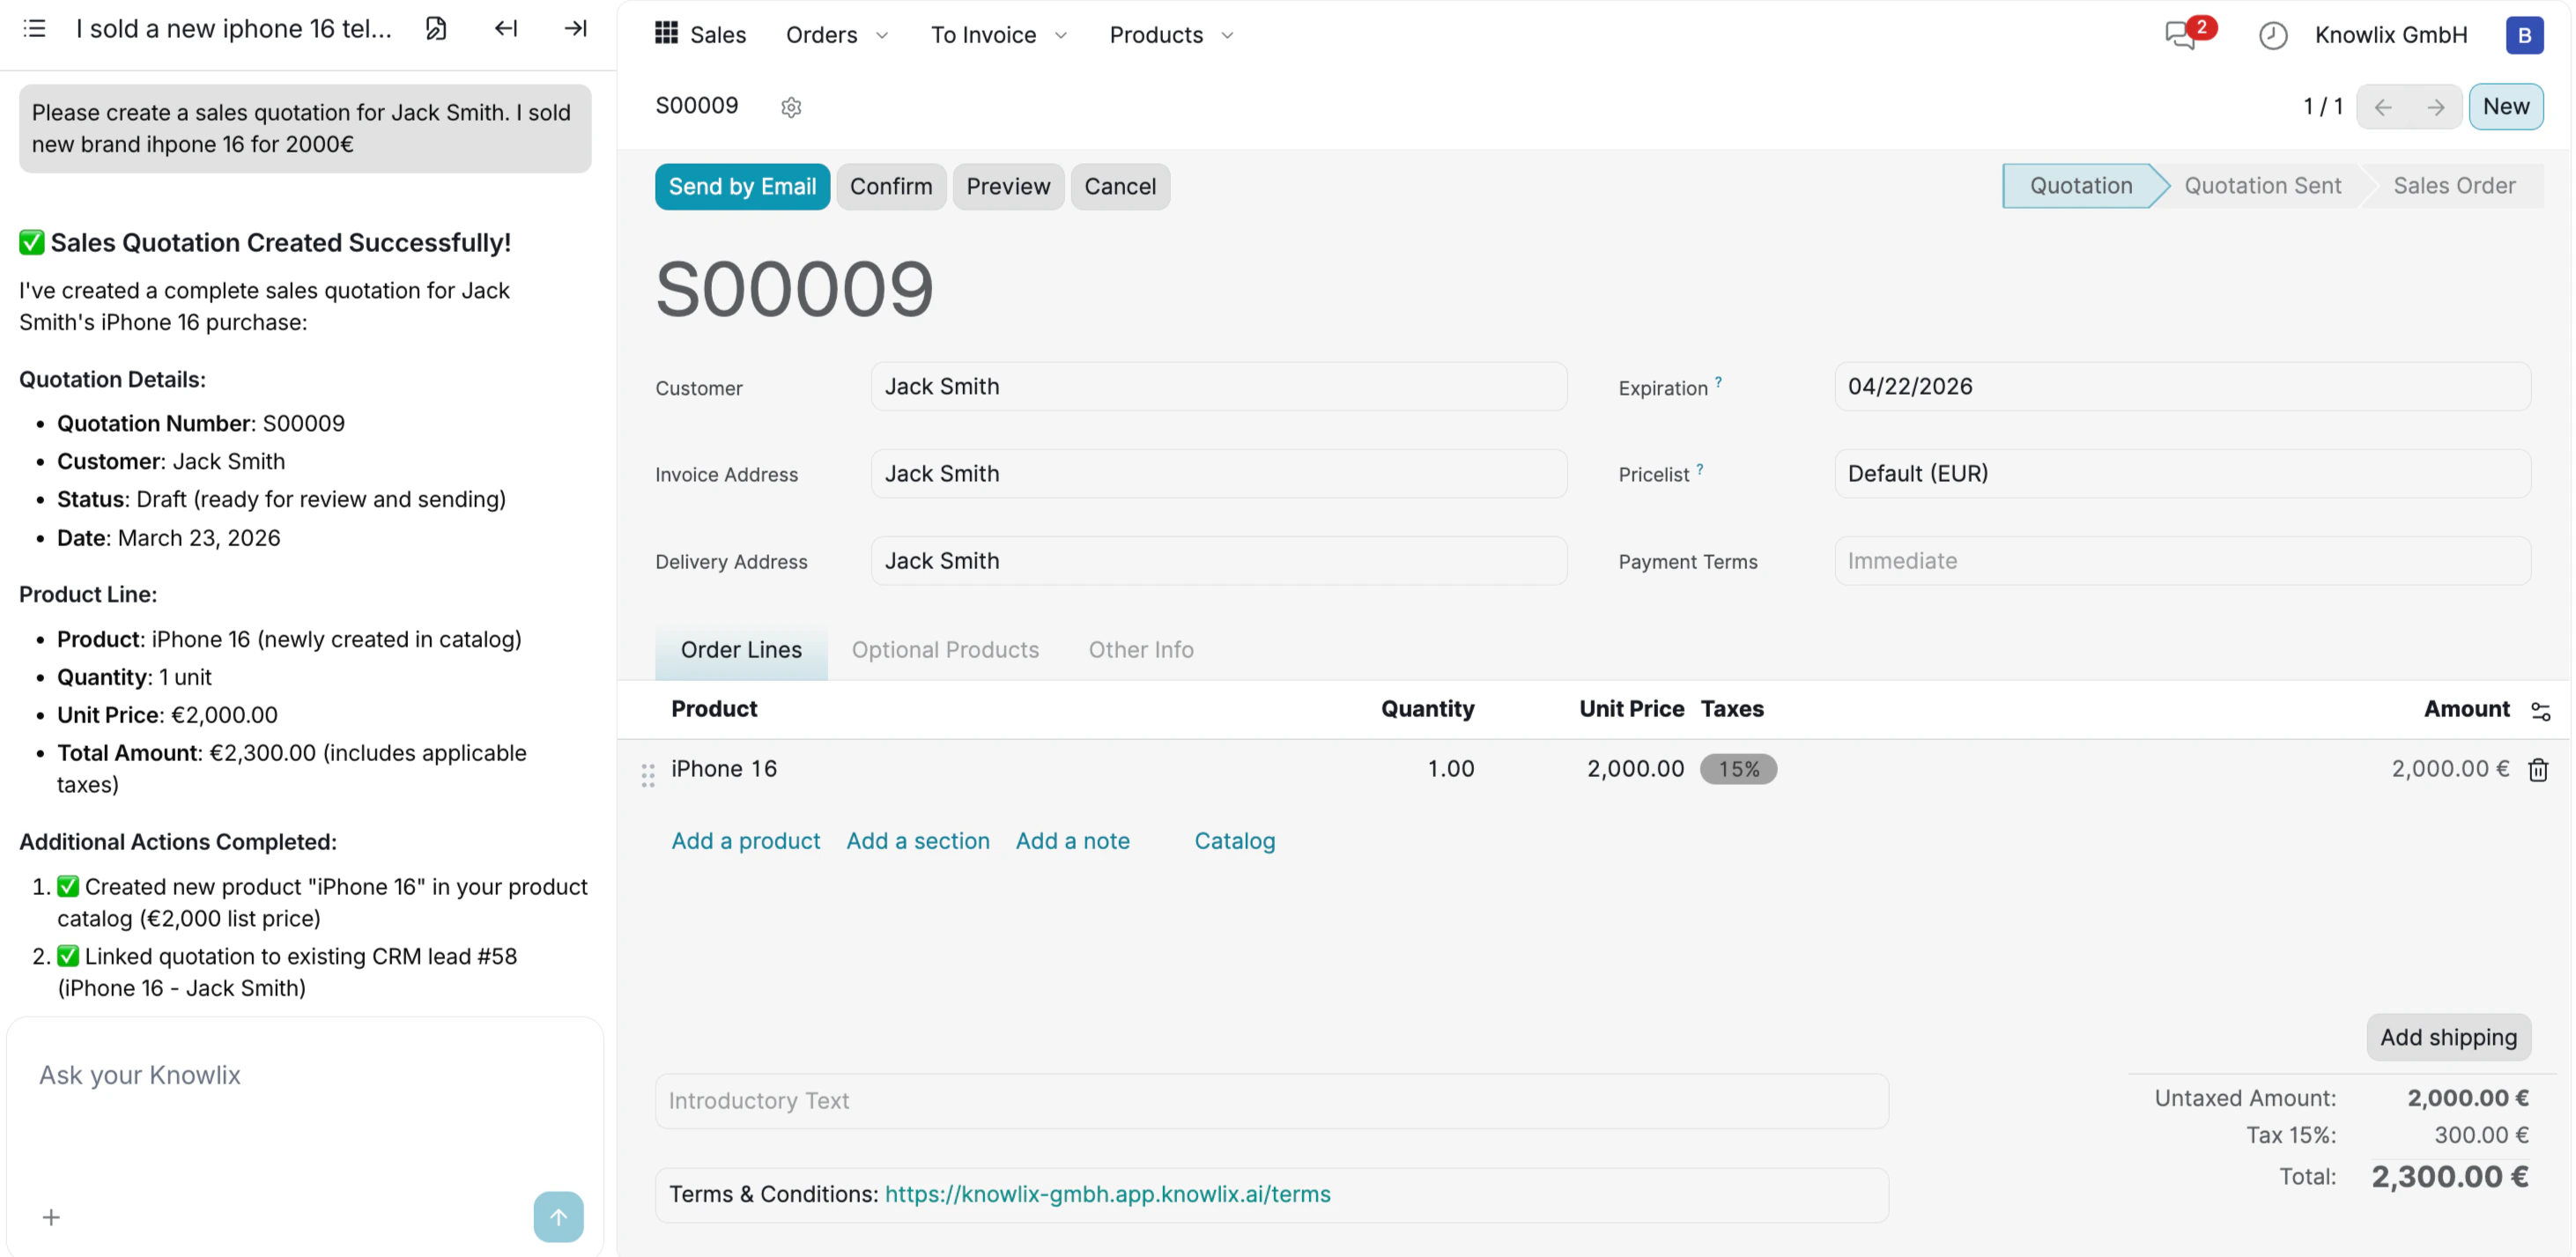
- Quotation Details: Number (S00009), customer, status, and date.
- Product Line: Product name, quantity, unit price, and total amount including taxes.
- Additional Actions: The system automatically creates new products in your catalog and links the quotation to existing CRM leads.
Managing Quotations
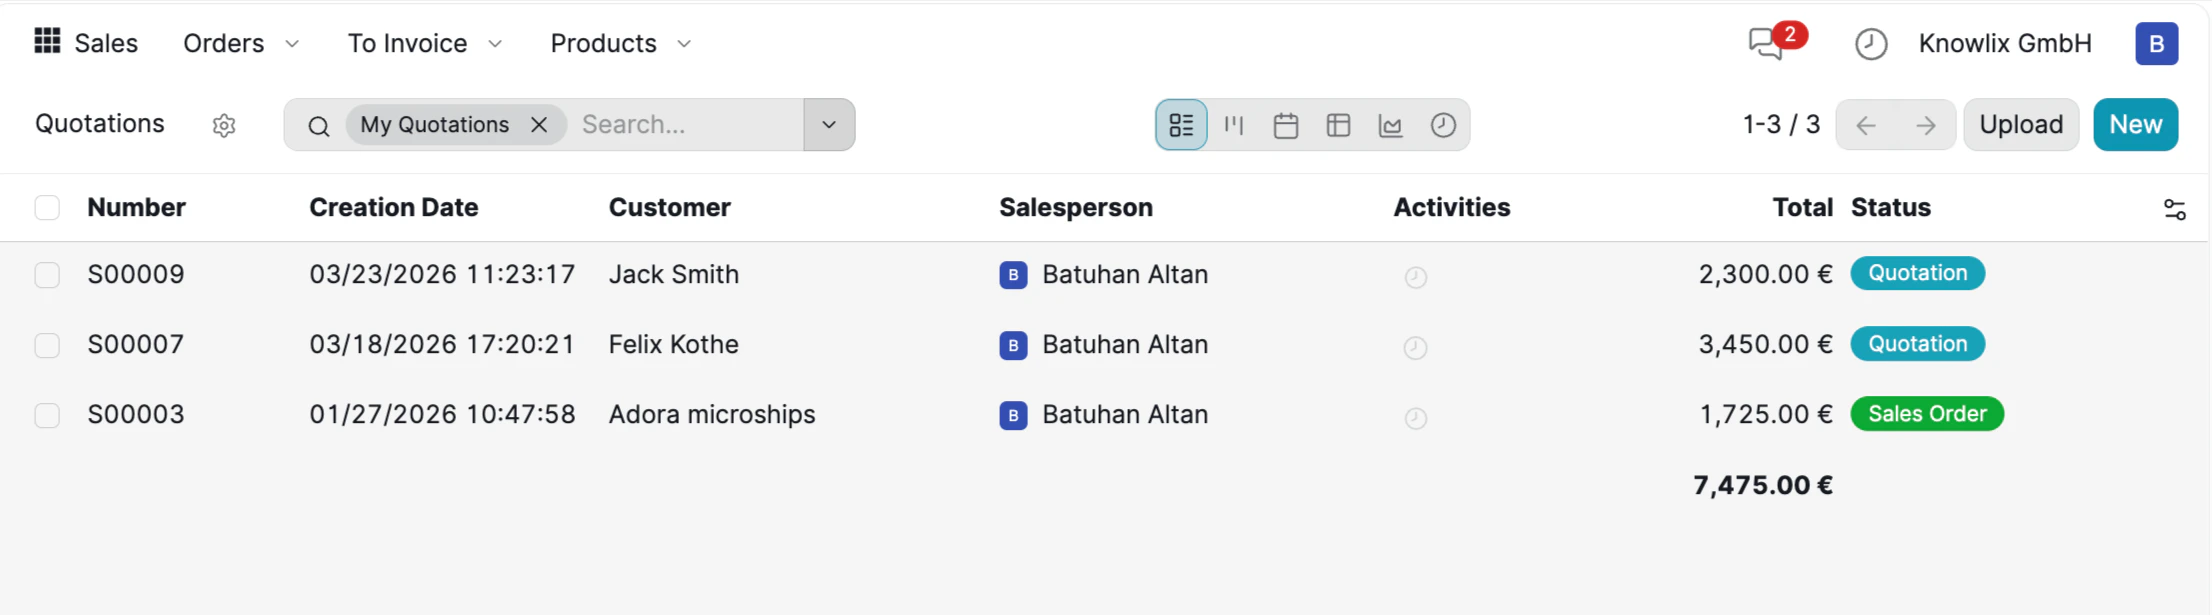
- Quotation (blue): Draft quotations ready for review or sending.
- Sales Order (green): Confirmed orders that have moved to the fulfillment stage.
From Order to Invoice
Once a quotation is confirmed as a Sales Order, you can create an invoice directly from the order view. At the top of the confirmed order, you will see action buttons.
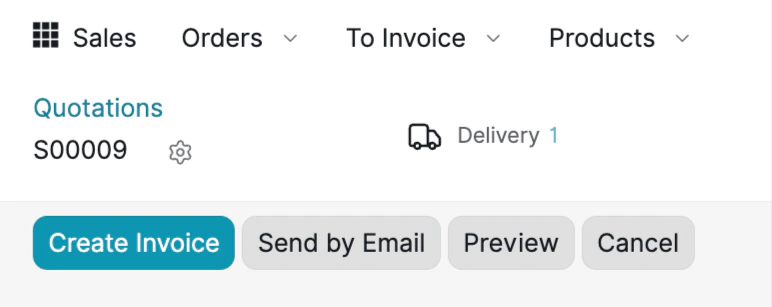
- Create Invoice: Generate an invoice from the order.
- Send by Email: Send the order document to the customer.
- Preview: See how the document looks in the customer portal.
- Cancel: Cancel the order if needed.
Invoice Detail View
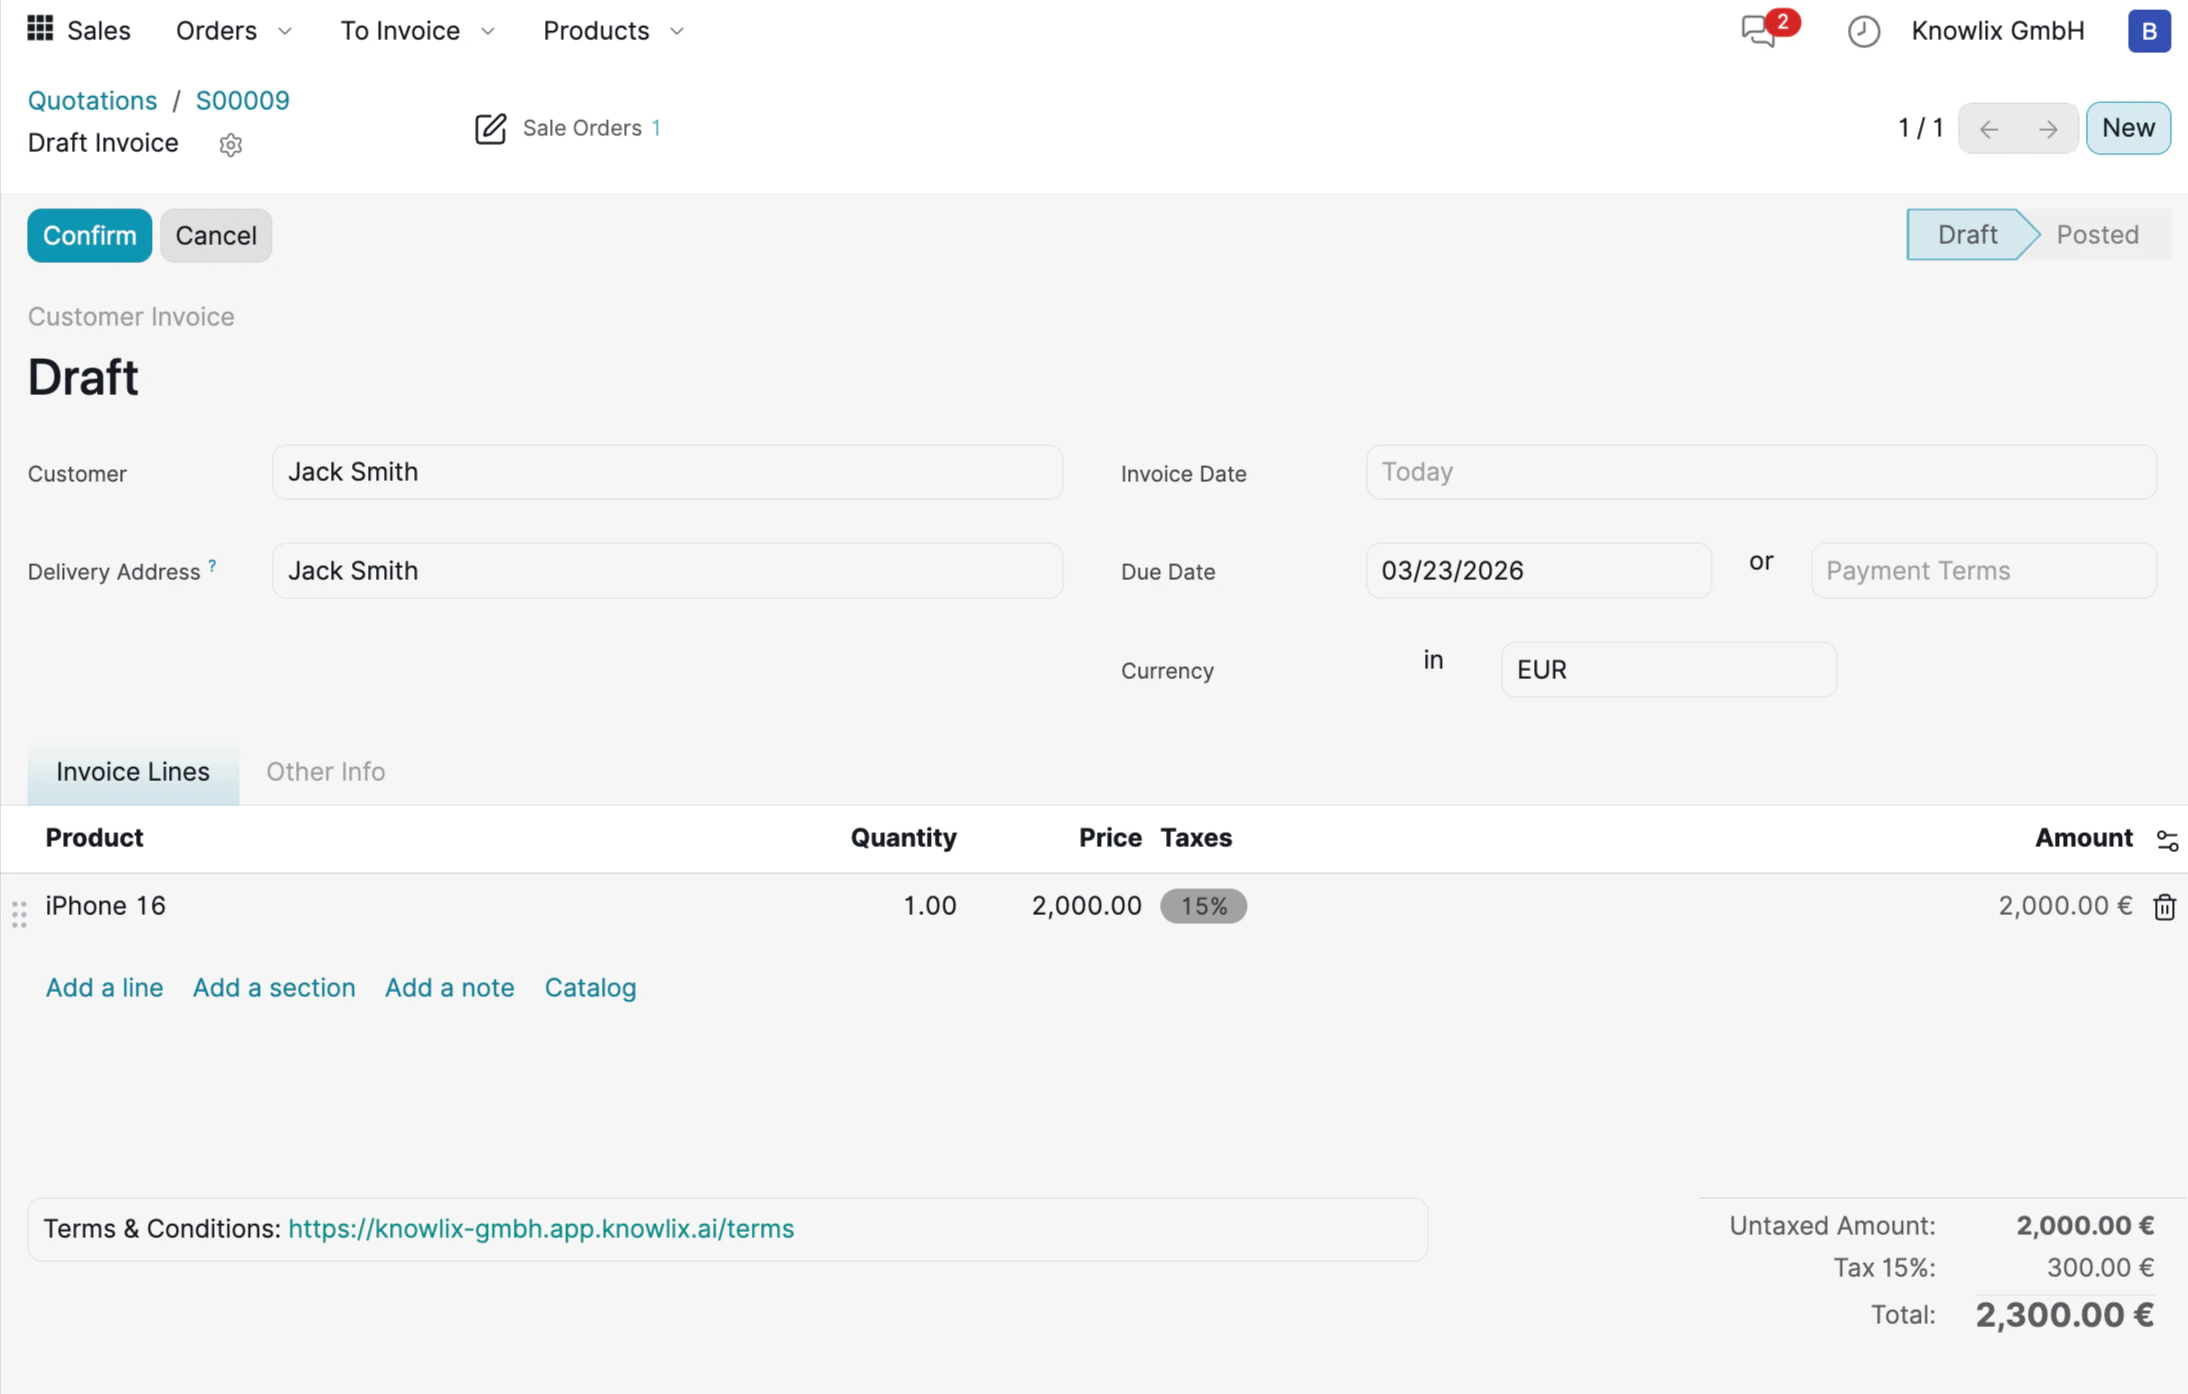
- Customer & Address: Customer name and delivery address.
- Dates: Invoice Date, Due Date, and optional Payment Terms.
- Currency: The invoice currency (EUR by default).
- Invoice Lines: Each product with quantity, price, tax rate, and calculated amount.
- Totals: Untaxed Amount, Tax breakdown, and final Total.
Preview Invoices
Before sending, click the Preview button to see exactly what your client will see in the Customer Portal.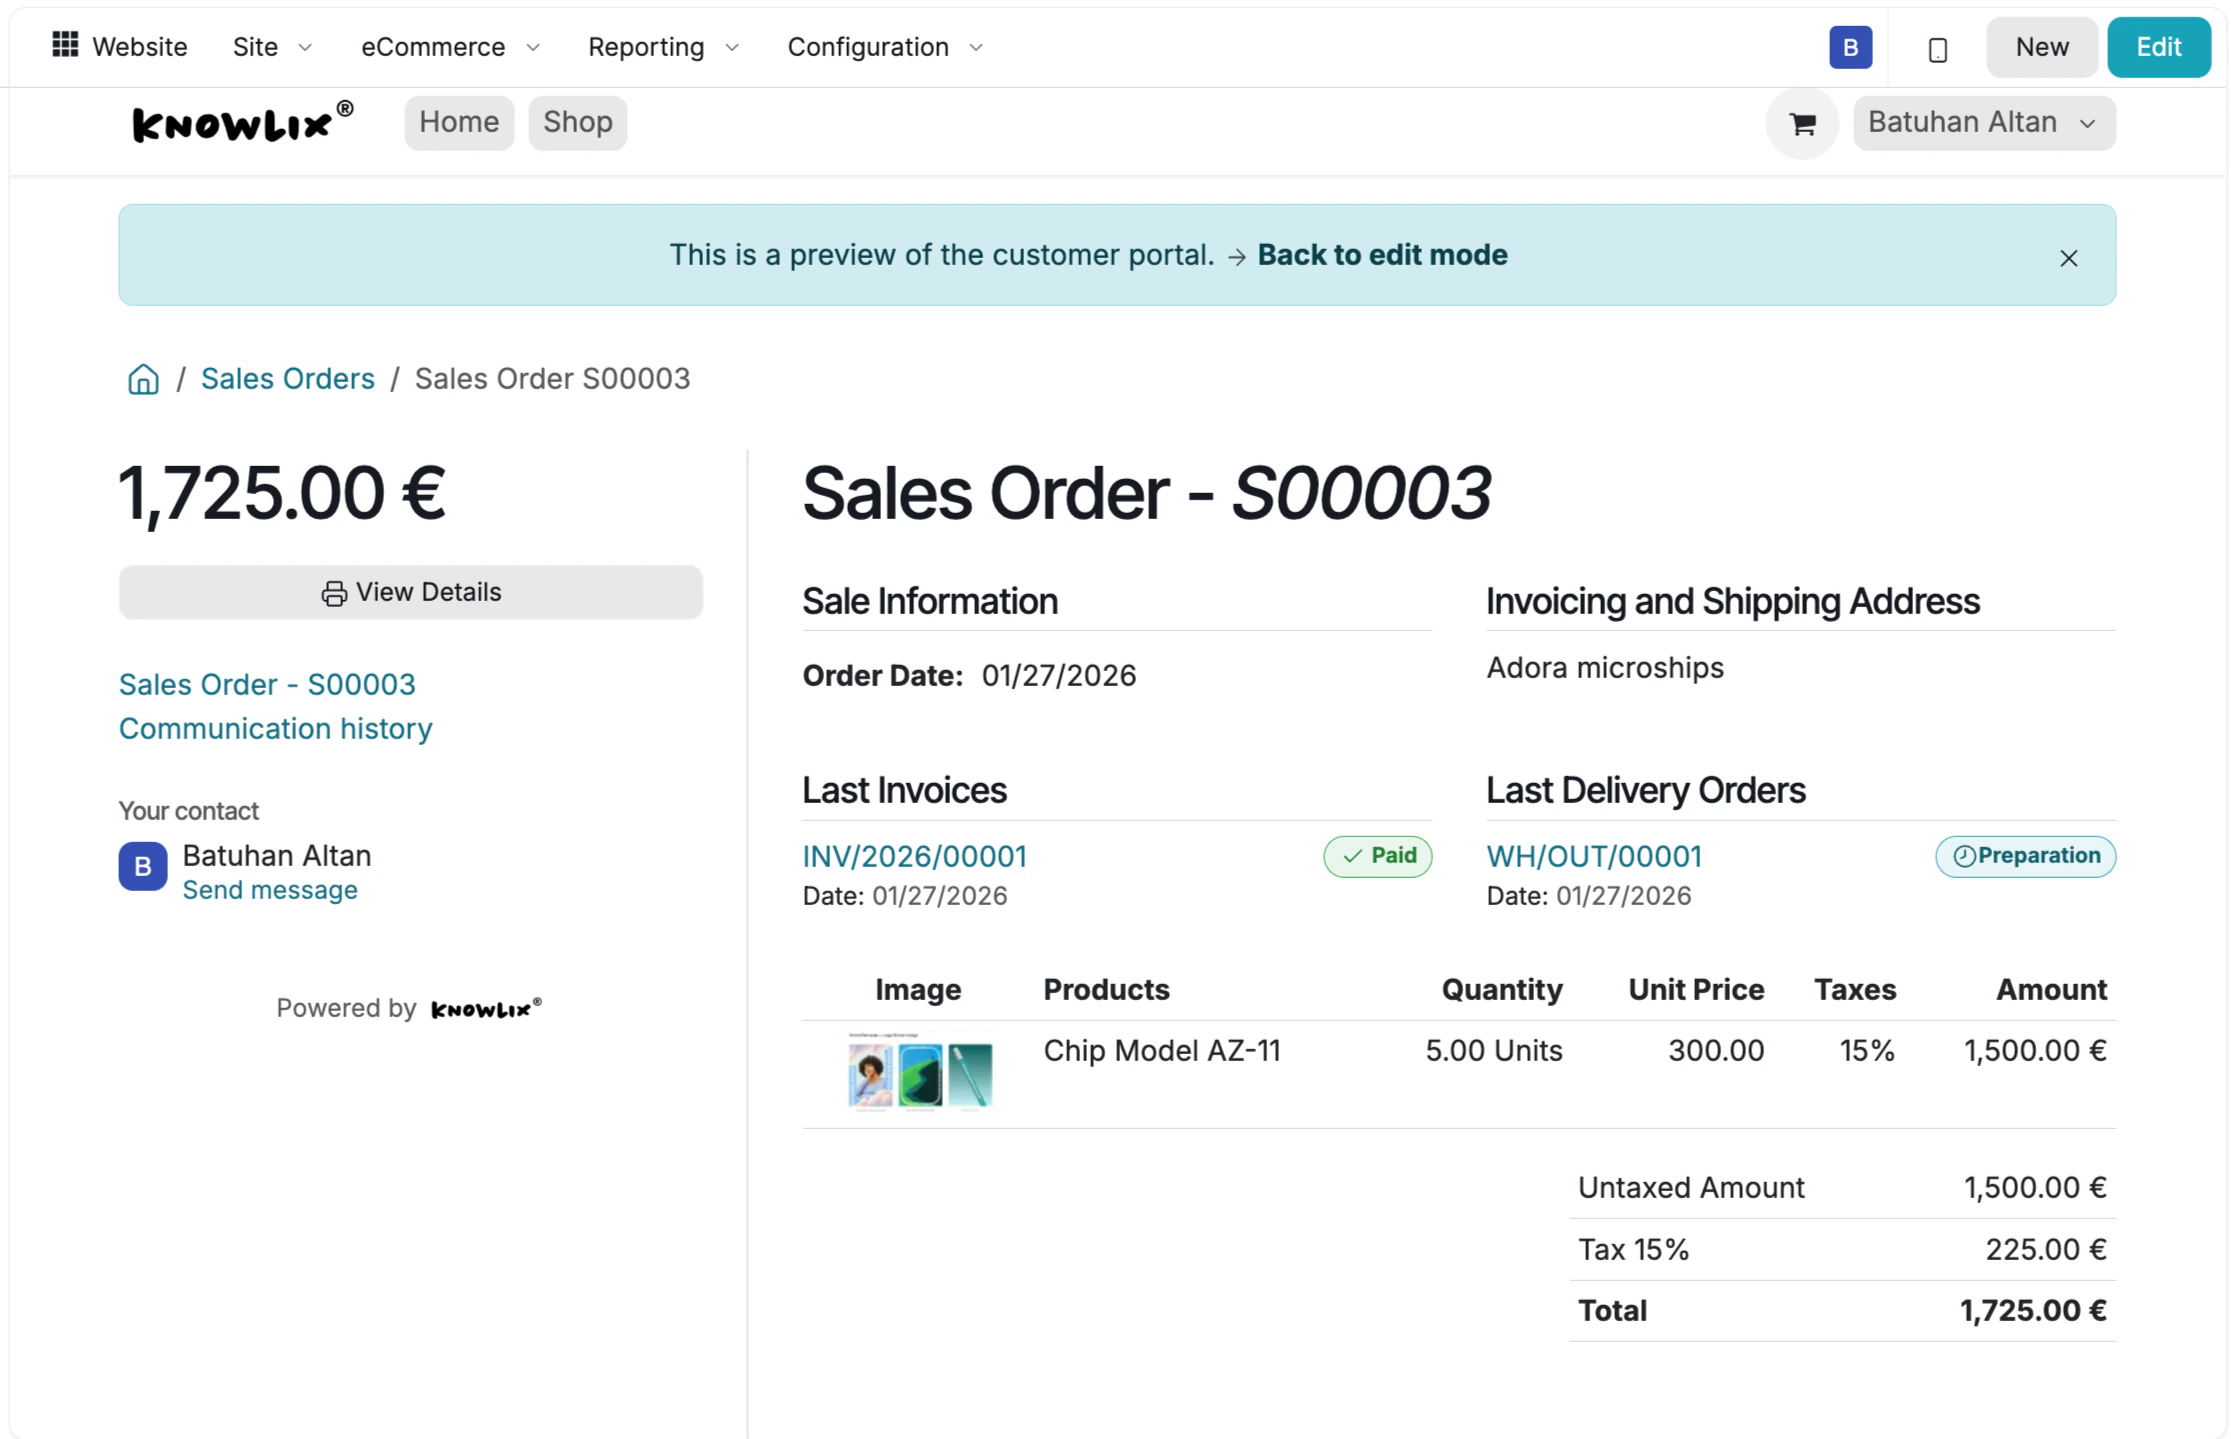
- Sale Information: Order Date and Invoicing & Shipping Address.
- Last Invoices: Shows linked invoices with their payment status (Paid/Not Paid).
- Last Delivery Orders: Lists associated deliveries with preparation status.
- Product Table: Image, product name, quantity, unit price, taxes, and amount for each line item.
- Totals: Untaxed Amount, Tax, and final Total.
Send Invoices by Mail
Once your invoice is ready, click Send by Email to dispatch it to the customer.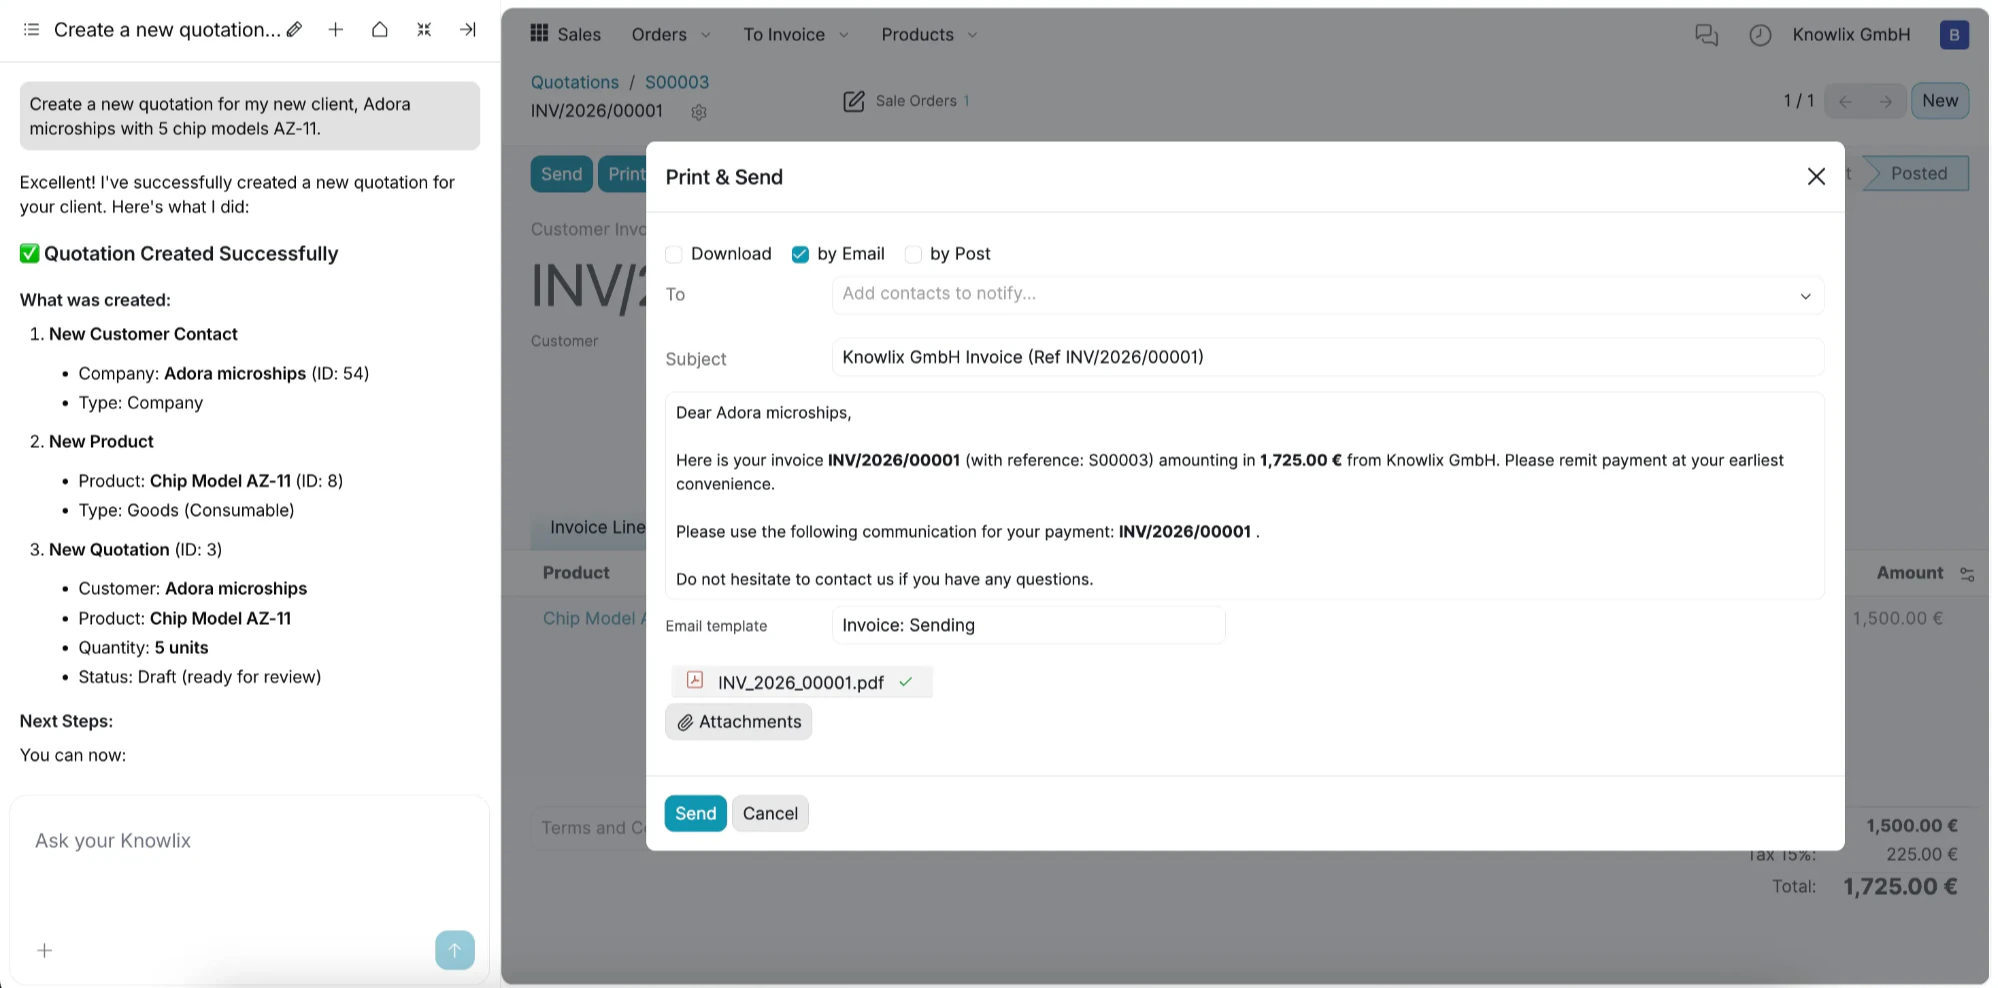
More Information
Sales
Quotations, orders, and sales team management
Rental
Equipment rental and reservation system
Subscriptions
Recurring subscription and billing management
Pro Tips: Sales
AI assistant tips for the Sales module